Page History
| Div | ||||||||
|---|---|---|---|---|---|---|---|---|
| ||||||||
|
In the example below, the logged data is filtered as to display only processes that have ended with a cancel event.
Use the button after the label Filters to create a new filter.
| Note | ||
|---|---|---|
| ||
This button will only be enabled, if you have selected a process, because filters are to be defined on process level. |
Figure: Creating a New Filter
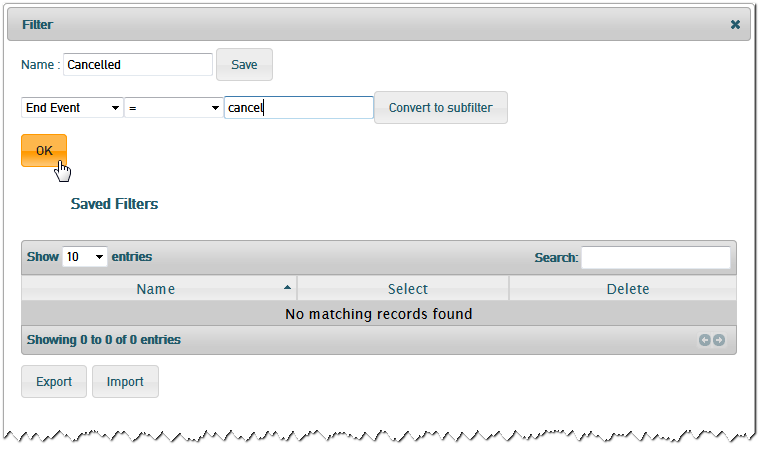
First, assign a name to the filter (Cancelled in the example above).
Next, specify a filter criterion. Select a criterion from the drop-down list (e.g. EndEvent), select a comparison method from the drop-down list (e.g. =) and specify a value to compare the selected criterion with (e.g. cancel).
You can filter for all fields from the List view. As per default, these are
| Multiexcerpt include | ||||||
|---|---|---|---|---|---|---|
|
You can extend the filter criteria and define own ones as described in Logging Custom Values to the Dashboard Database.
Click Save to save the filter under the assigned name. The saved filter will appear in the list of filters in the table at the bottom of the window.
 | As per default, the list shows 10 entries. Having a larger list of filters you can either
|
Click OK to apply the filter to the current data selection and close the window. If you want to save changes to the filter, click Save first. Only clicking OK will not save changes you mad to the filter - the filter will then be displayed with an asterisk after its name (e.g. Cancelled*).
Figure: Filter Applied to the Selected Data
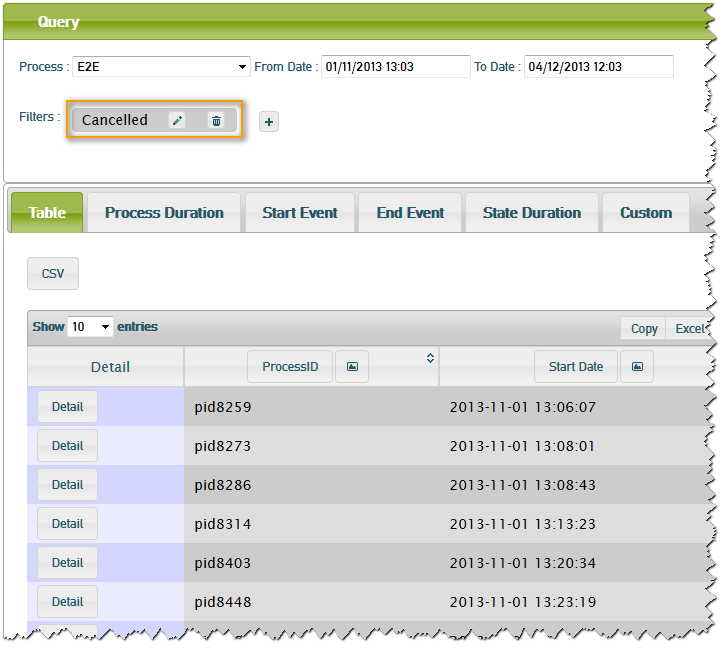
The label Cancelled indicates, that this filter has been applied to the data. You can remove the filter by clicking the dustbin icon or modify it by clicking the pencil.
Click to apply more filters to the data.
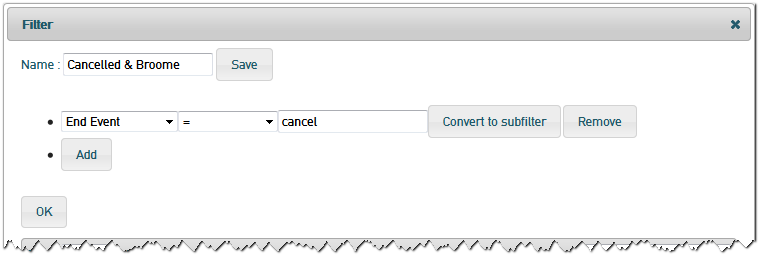
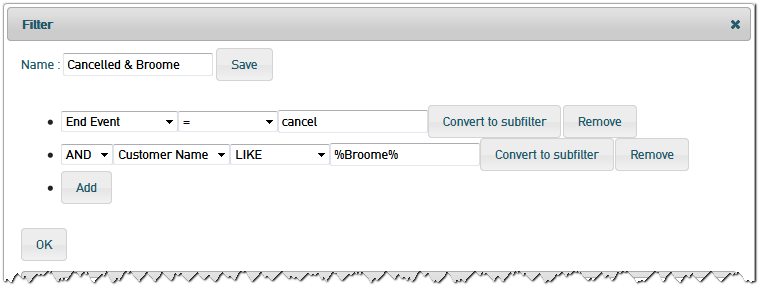
Defining More Complex Filters
The filtering feature is a very powerful feature. You can apply multiple filter criteria to a filter by using subfilters.
| Specify a filter criterion and click Convert to Subfilter |
| Now, you can add additional filter criteria. You can combine subfilters using AND or OR. |
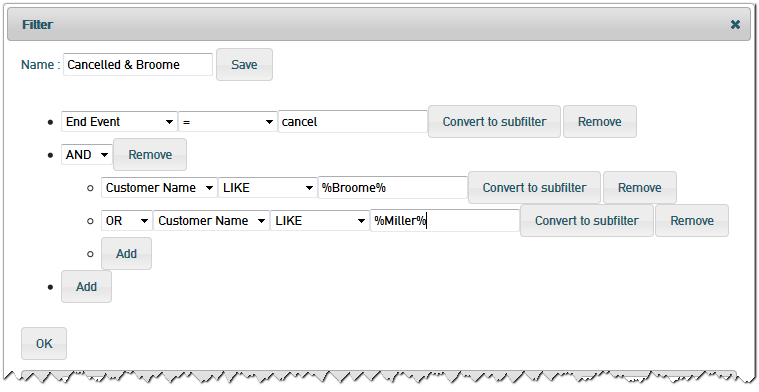 | You can define a complex hierarchy of filters by converting a subfilter to a sub-subfilter and so on. |
Some Remarks on Operands
The Operand LIKE
In fact, the defined filters correspond to SQL queries.If you use the operand LIKE, make sure to use wildcards as are accepted with SQL, e.g.:
_ | as a substitute for a single character |
% | as a substitute for zero or more characters |
The Operand IN
The operand IN can only be applied to events or states and it does not correspond to the SQL enumeration operand IN. This operand can be used to identify processes that have undergone (or not, using NOT IN) a specific state or event at all.
Figure: Defining a Filter Using IN
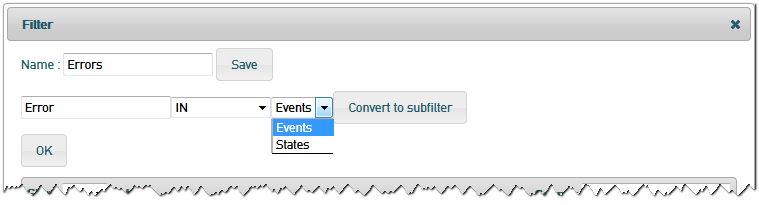
First, select the operand IN, next enter the name of an event or state from your BPMN diagram. Events can be BPMN intermediate or boundary events (see Intermediate Events).
The filter shown above e.g. filters all processes in which the error event has occurred. To dig deeper in those erroneous processes, you could inspect the process details and have a look at the process history.
Figure: Inspecting the History of a Filtered Process
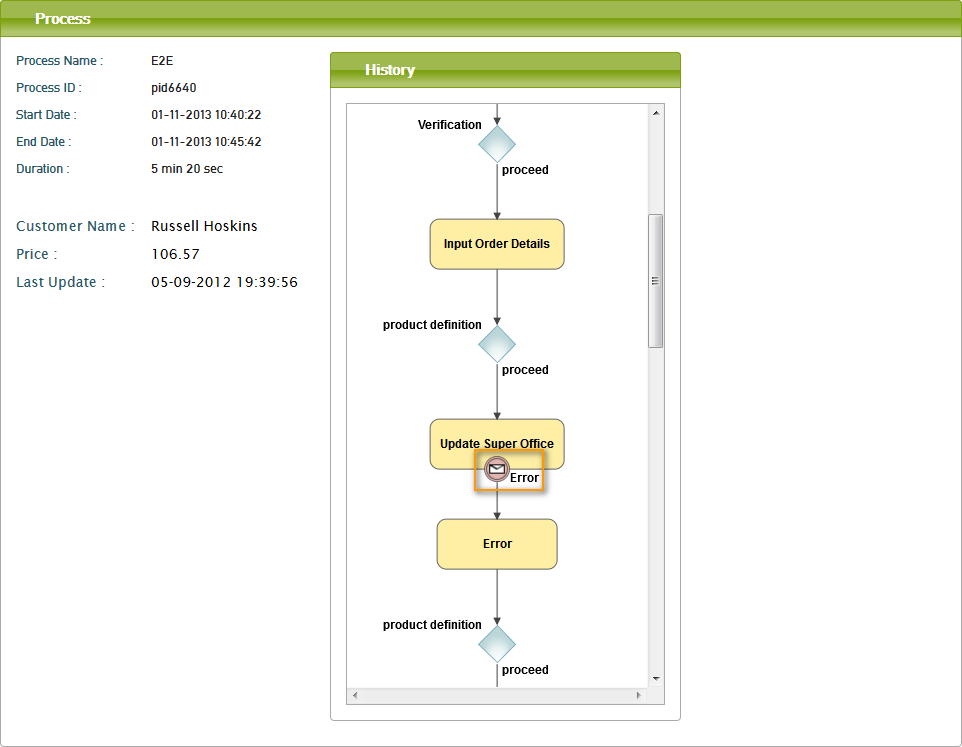
The same way, you could filter all processes that have undergone e.g. the state Update Super Office and so on.
| Note | ||
|---|---|---|
| ||
To filter for e.g. a list of customers, you'll have to define a list of filters and subfilters reflecting this list (as described in Defining More Complex Filters). |
Importing and Exporting Filters
Click Export to export the complete list of filters to an XML file filters.xml and download it.
Figure: Export Filters
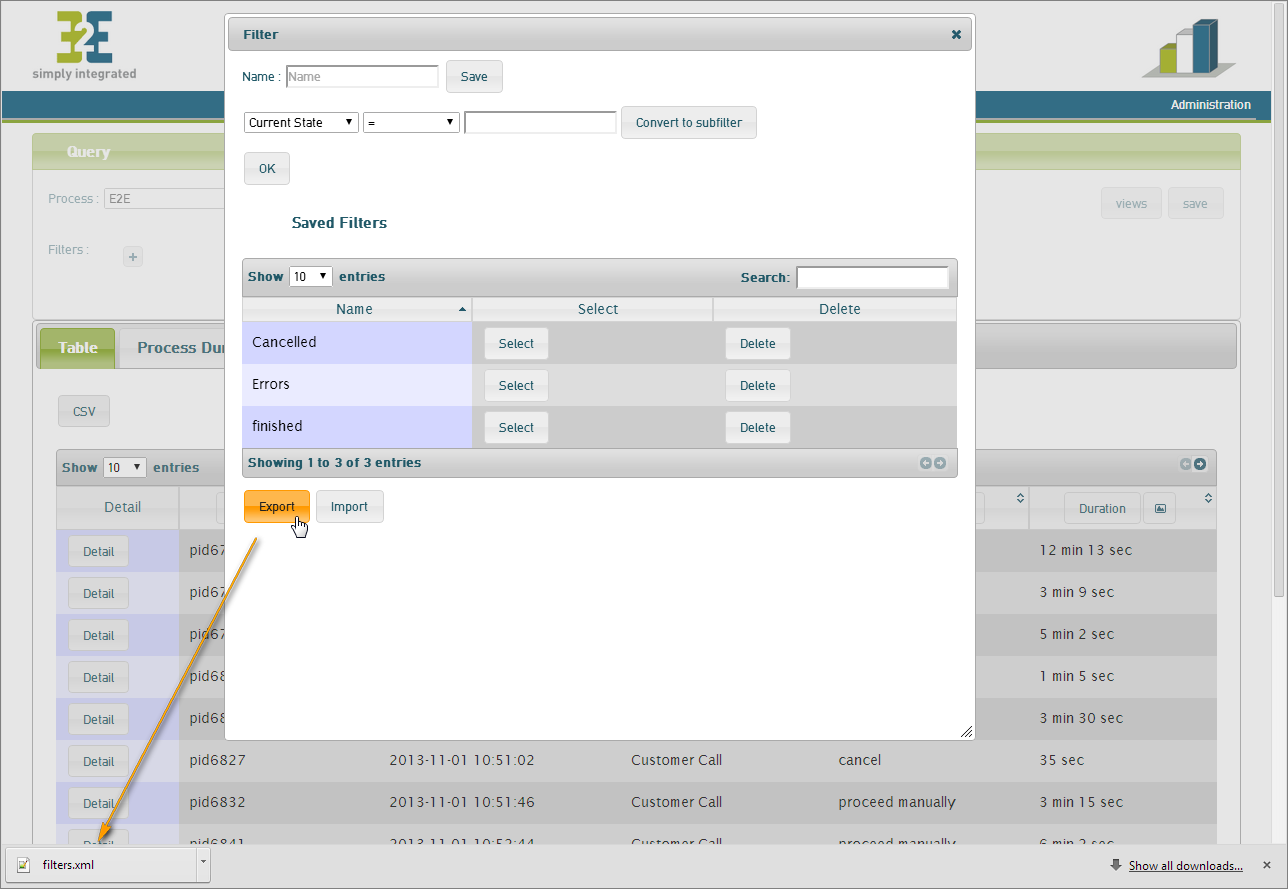
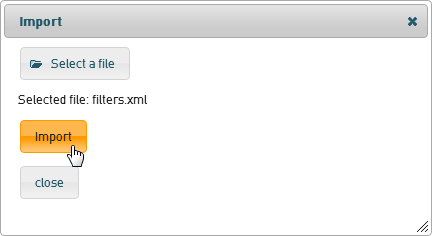
Clicking the Import button allows you to select a previously exported set of filters and import it to the list of filters.
If the list of filters to import contains filters that are already existing in the list of saved filters, these filters will not be overwritten, but ignored. In this case, you will get the following error message: some filters have not been imported because they already existed: ....
| Panel | ||
|---|---|---|
| ||
|
| Panel | ||
|---|---|---|
| ||
Overview
Content Tools