Page History
You can edit a user data sheet at any time, for example to save additional data, to assign more profiles or roles, to allocate a new password or to correct a typing error. Display the user list by choosing the Users menu in the sidebar. The user list shows all users and its content is loading dynamically if you scroll down. You can filter the list by using the filter bar.
Editing User Data
| If you want to edit a user data sheet, open it first. Select Users in the sidebar menu to display the list of all users |
. |
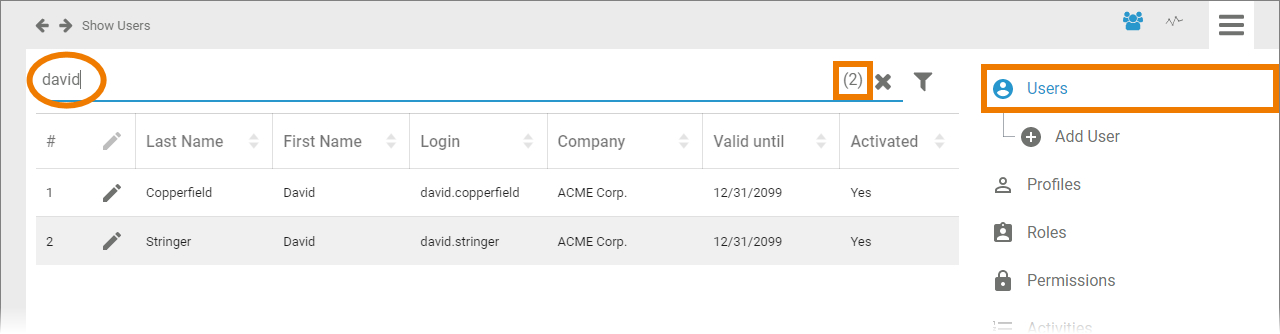
On the right side of the filter bar, the total number of users is displayed. If a filter is set, the number of filter results is shown here |
. |
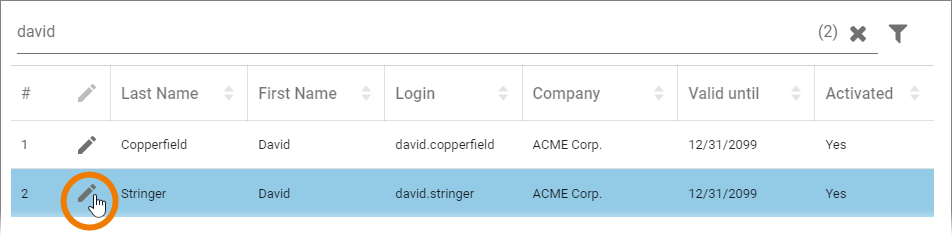
| Open the user data sheet by |
clicking the |
icon. |
| Now you can rework the settings saved in the user data sheet |
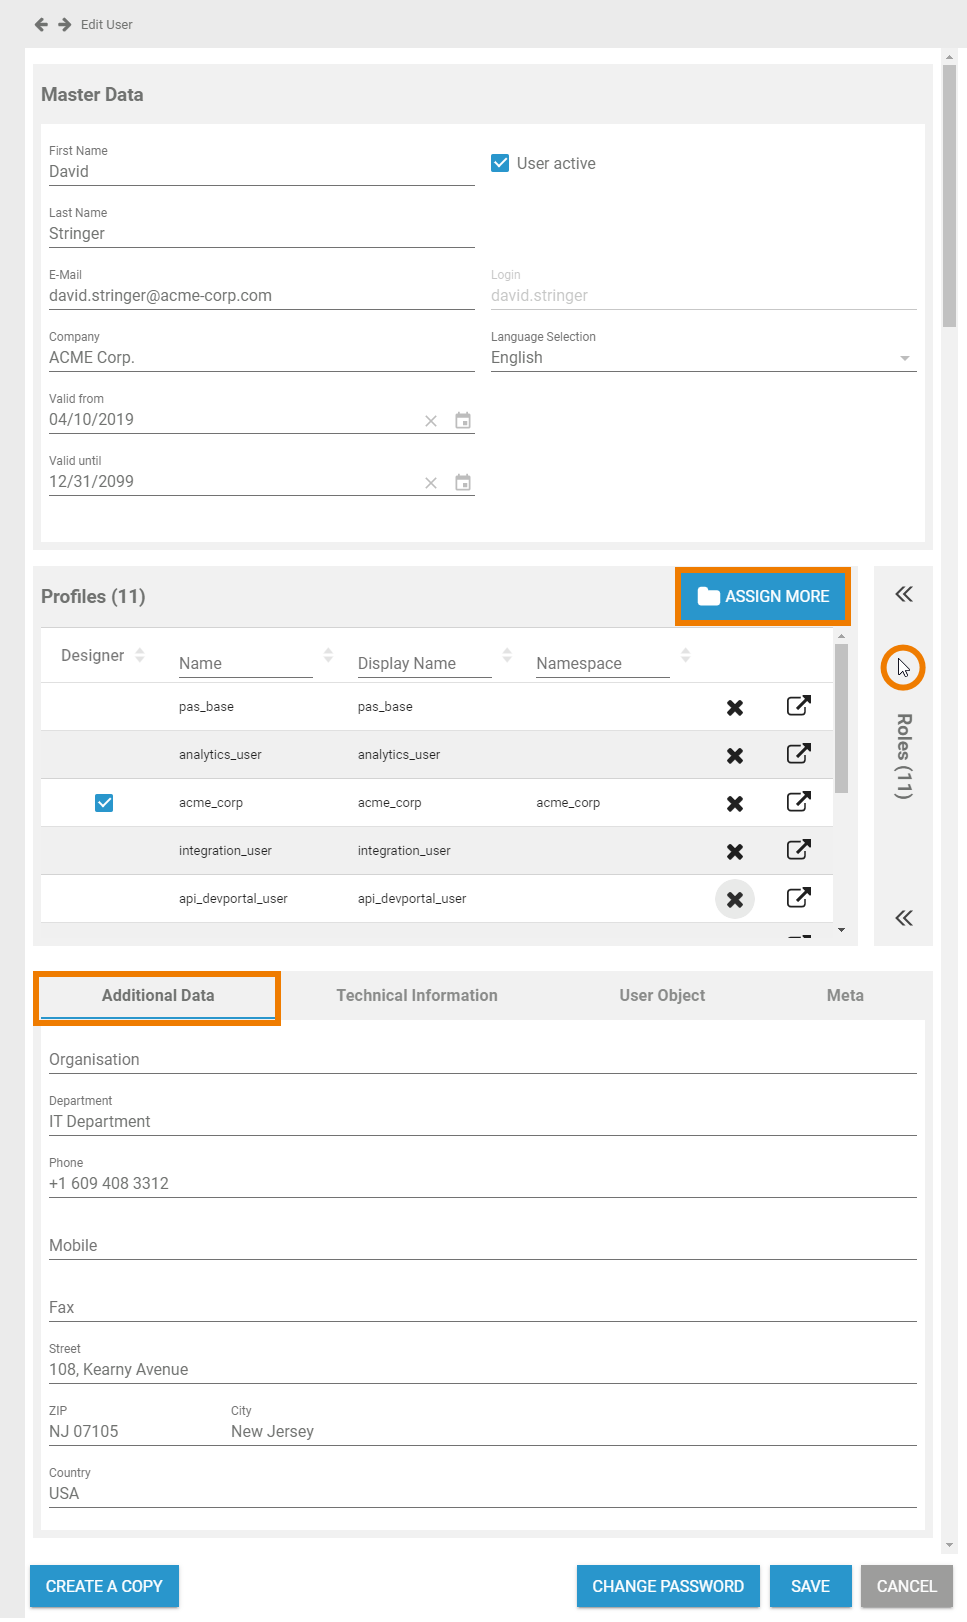
|
Click Save to store your modifications or use Cancel to discard them. | ||
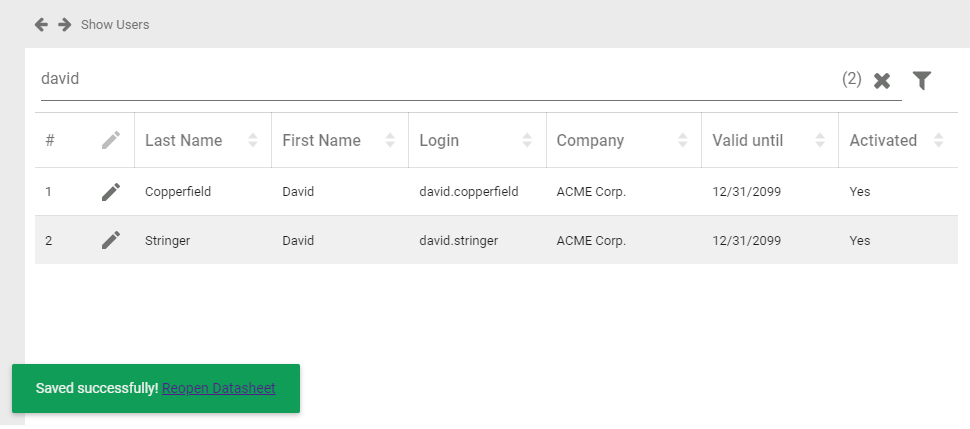
| If you save the data, the |
data sheet closes and a message Saved successfully! appears in the user list. You can use the displayed link to reopen the user data sheet |
. |
Managing Profiles
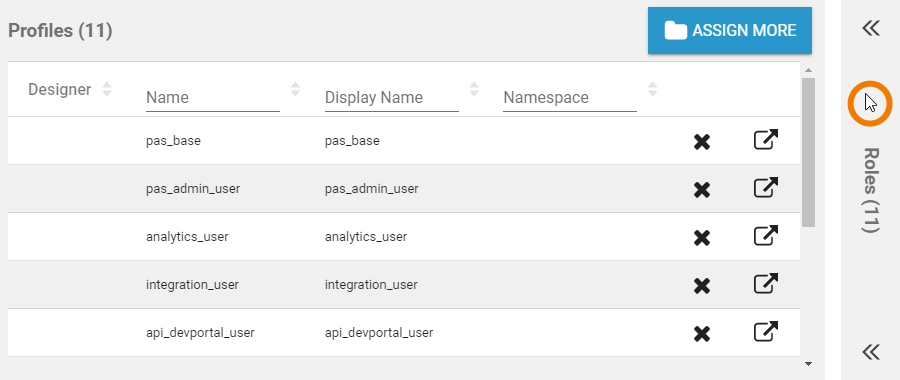
| You can manage profiles and roles in the second section of the user data sheet. Use the section's sidebar to switch between the profiles and the roles view |
. |
Deleting Profiles
Deleting Profile
| You can delete already assigned profiles by using the As a consequene, the user will not be authorized to use this profile anymore |
.
|

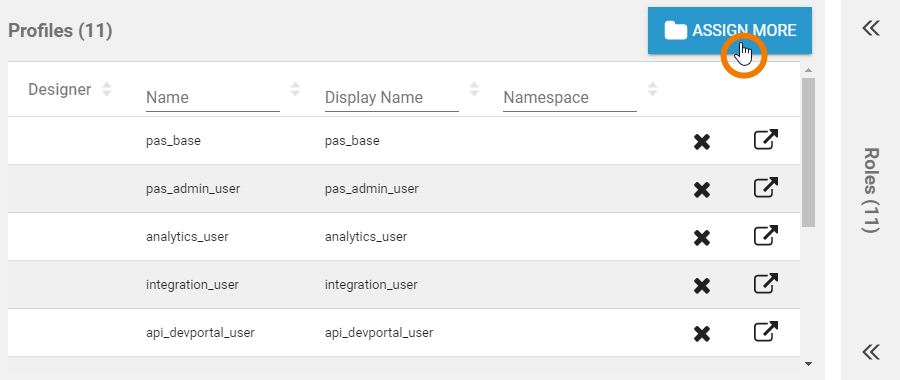
Adding Profiles
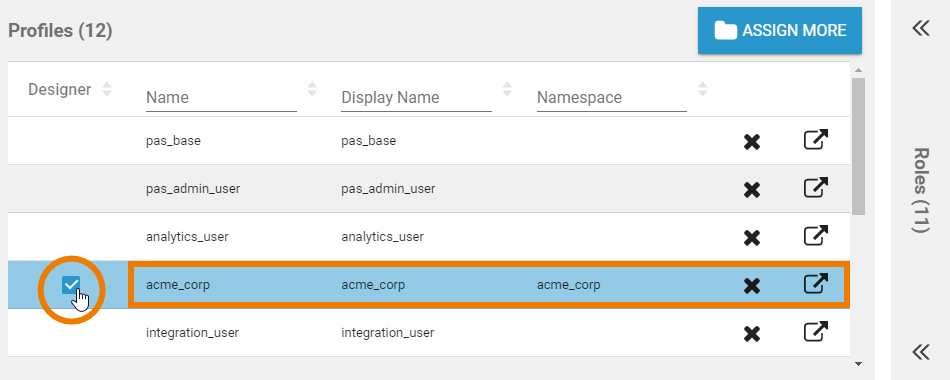
| Use button Assign More if you want to grant this user access to other profiles |
| . |
| The list of available profiles will open. Use the filter to search for the profile you wish to assign. In the footer you will find the profiles that have already been assigned to this user |
. |
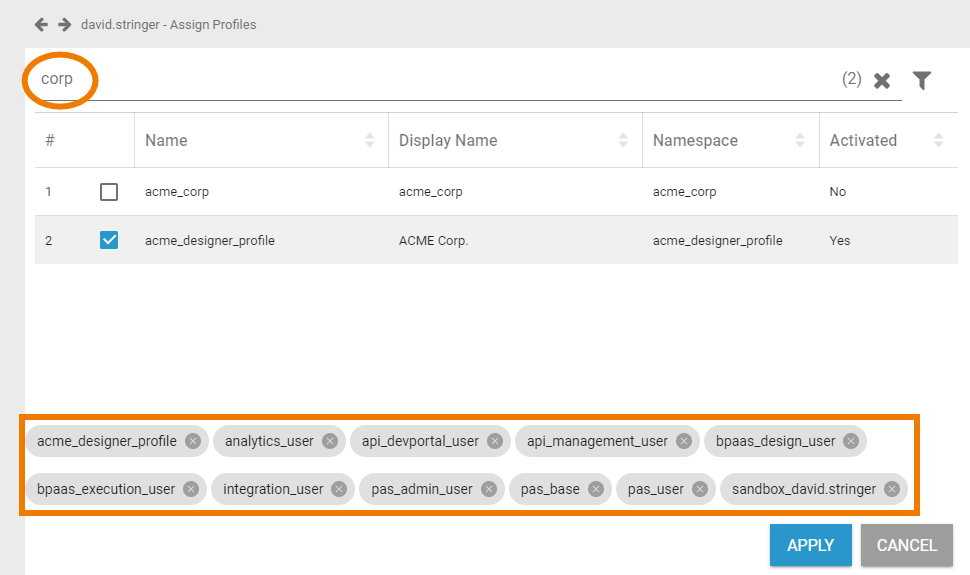
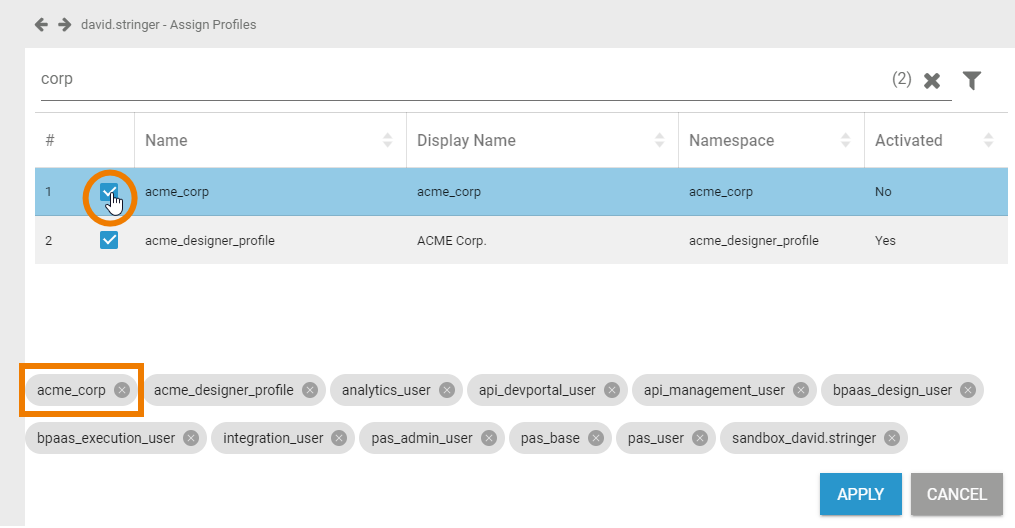
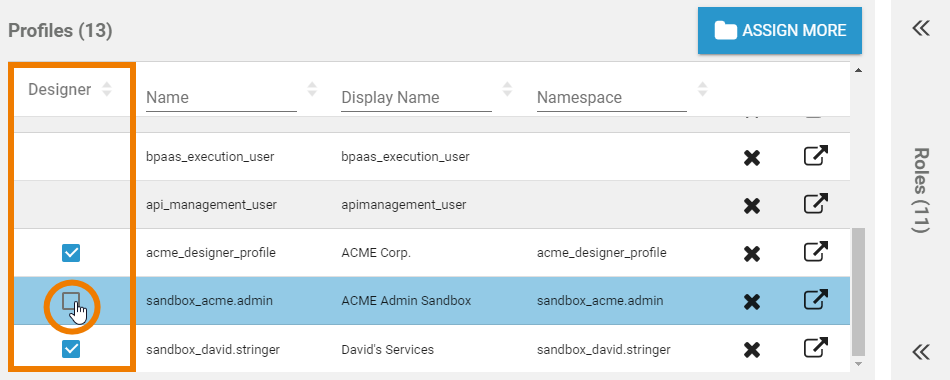
| Use the checkboxes to assign further profiles. The chosen profiles are added |
in the profiles list in the footer. Click Apply to assign the chosen profiles to the user. Click Cancel to discard your choice |
. |
| Your chosen profiles are added to the profiles section of |
the user data sheet. |
If you have added a profile with namespace, check if the user needs write permission on the profile |
(see |
Granting Write Permission on Profiles).
|
Granting Write Permission on Profiles
For design users, individual
| Individual write permissions can be granted or denied for profiles with namespace. By default, the write permission is granted.
|
Users can only edit content in a profile, if the profile bpaas_design_user has been assigned to them and the write permission for the profile in question has been granted.
|
|
|
|
|
|
|
|
|
The default settings for write permissions are as follows:
|
Editing Profiles
| Administrators can also use the profile section to switch directly to the corresponding data sheet to edit a profile . To do so, click |
the |
Editing Profiles

| The corresponding profile data sheet will open and you can edit the profile data, for example to change the display name |
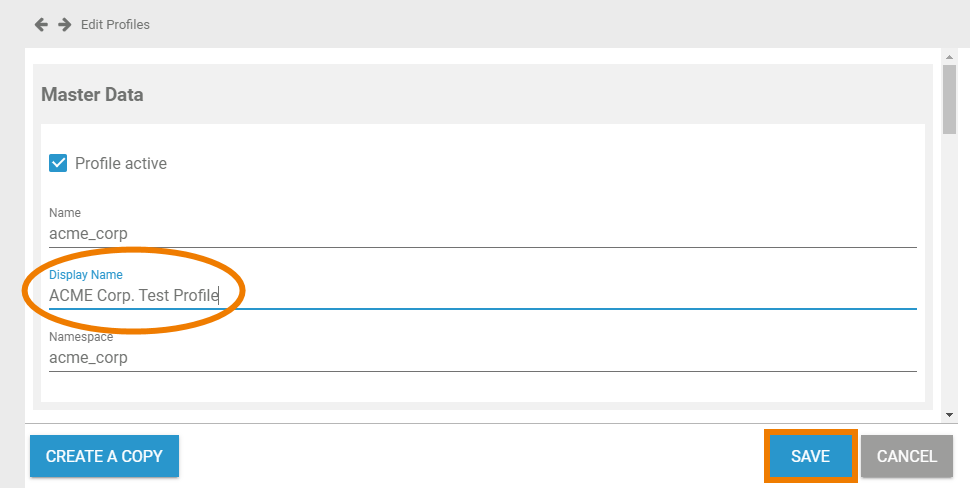
. Save the modifications or discard them by using the Cancel button. | |
| If you have saved the modifications, they will be displayed in the user data sheet. |

| Note |
|---|
Do not forget to save the user data sheet before closing it. |
|
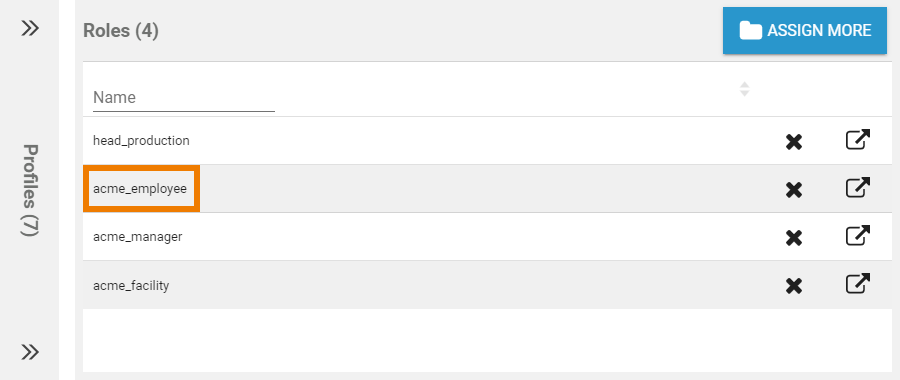
Managing Roles
| You can manage roles and profiles in the second section of the user data sheet. Use the section's sidebar to switch between the roles and the profiles view |
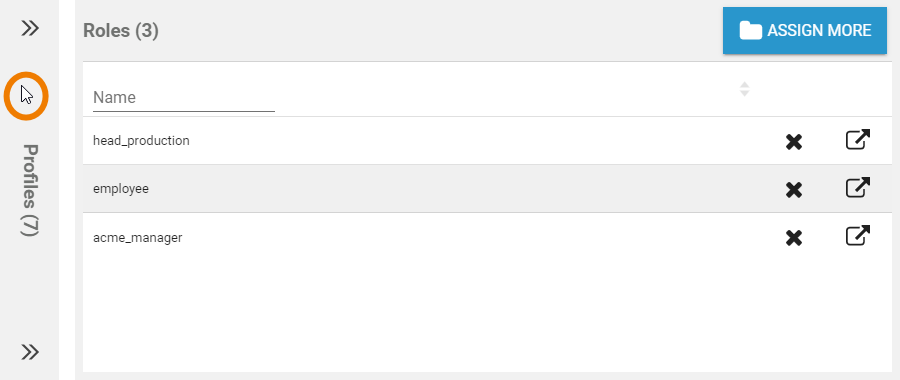
. |
Deleting Roles
| You can delete already assigned roles by using the The user will then not be able to view the customized user interface anymore |
.
|
Adding Roles
|

| Note |
|---|
Do not forget to save the user data sheet before closing it. |
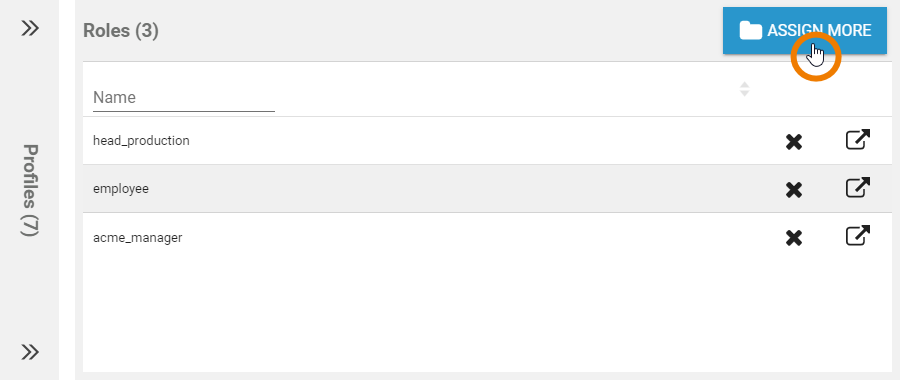
| Use button Assign More if you want to assign additional roles |
| . |
| A list of available roles will open. Use the filter to search for the role you wish to assign. In the footer you will find the roles that have already been assigned to this user |
. |
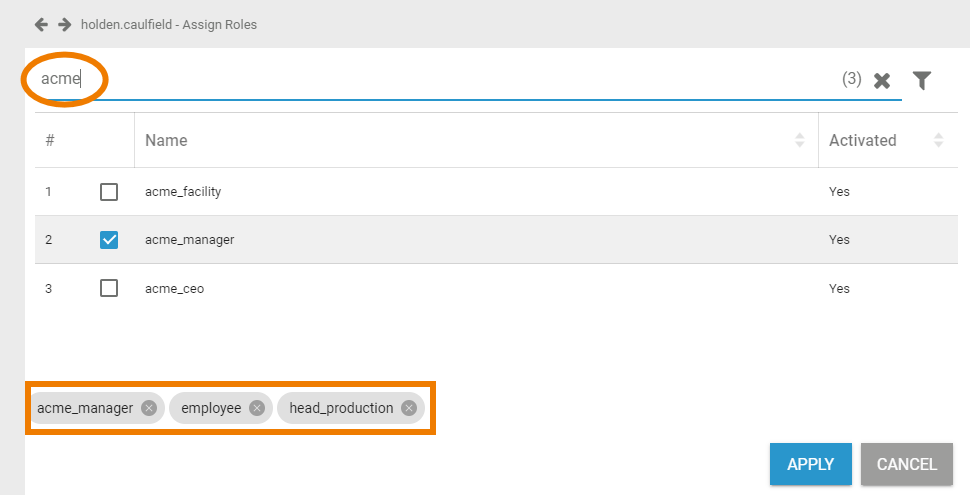
| Use the checkboxes to assign additional roles. The chosen roles are added to the footer. Click Apply to assign the roles to the user. Click Cancel to discard your choice |
. |

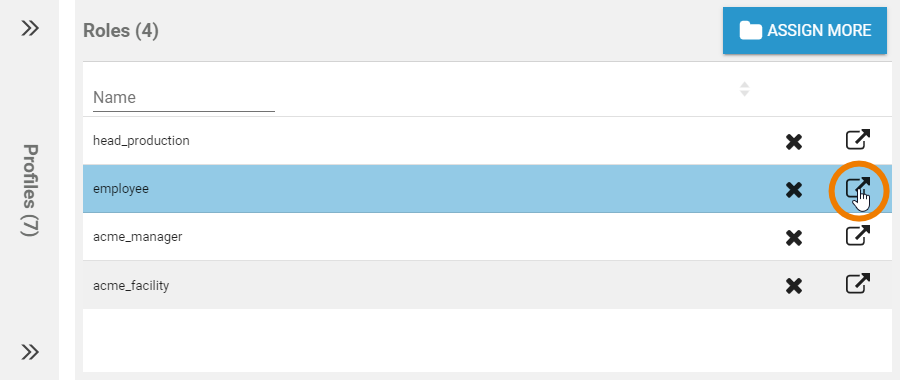
| Your chosen roles are added to the profiles section of the user data sheet. |
|
Editing Roles
|

Administrators can also use the roles section to switch directly to the corresponding data sheet to edit a role. To do so, click the |
. |
| The corresponding role data sheet will open and you can edit the settings, for example to change the role name |
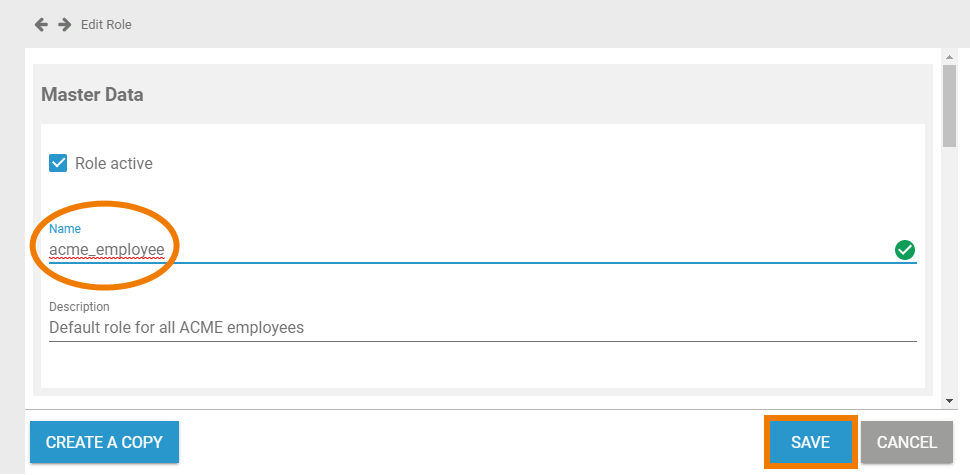
. Save your modifications or discard them by using the Cancel button. | |
| If you have saved the modifications, they will be displayed in the user data sheet |
.
|
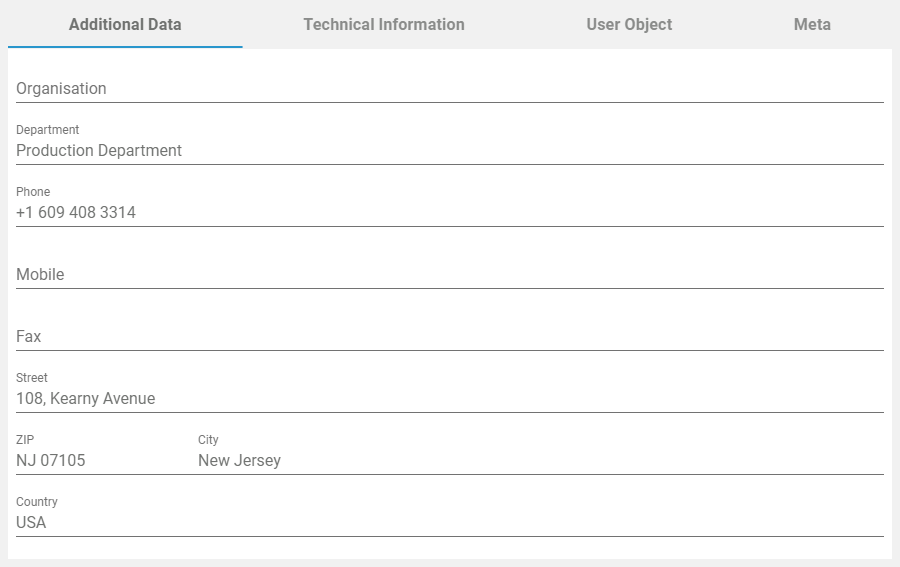
Adding Additional Data
| In the Additional Data section, you can insert complementary data of the user in question, for example postal address or contact numbers. The following fields can be found:
|
|
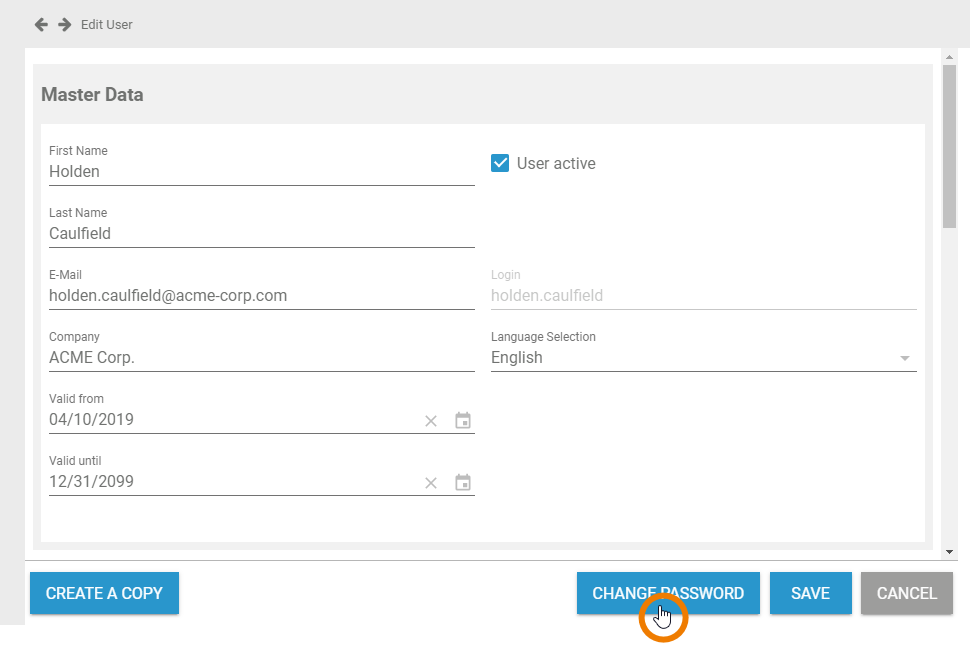
Changing the Password
| If a user forgot his password, the administrator can assign a new one. Open the user data sheet and click Change Password |
. |
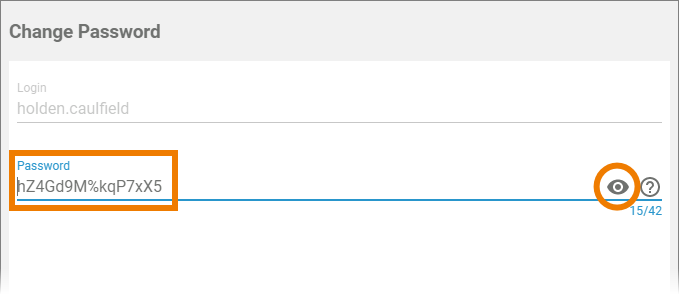
| A password dialog box opens. Enter the new password in the corresponding field |
. |
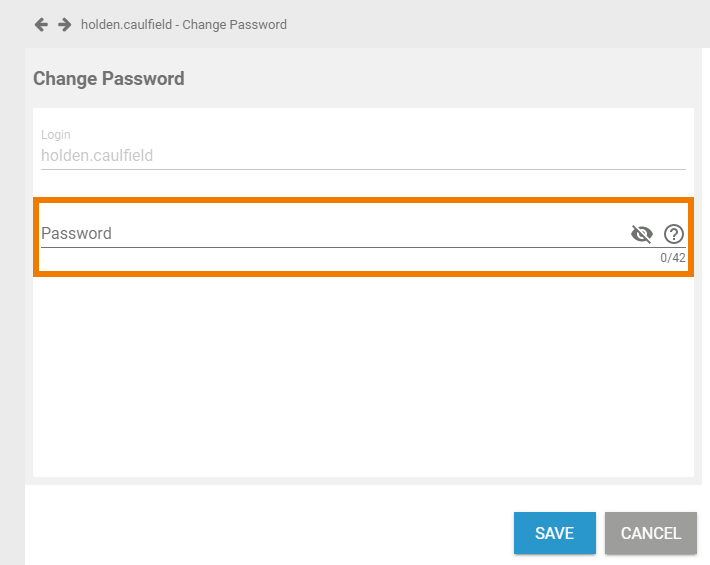
| By default the new password is invisible, which is signaled by icon Click the icon to turn the password visible – the icon will change to |
. |
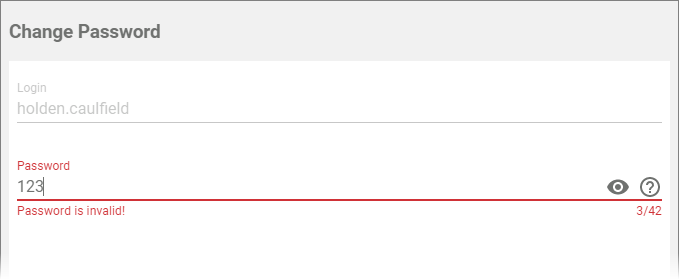
| As long as your entry does not match the password criteria, you will see |
| the note Password is invalid! |
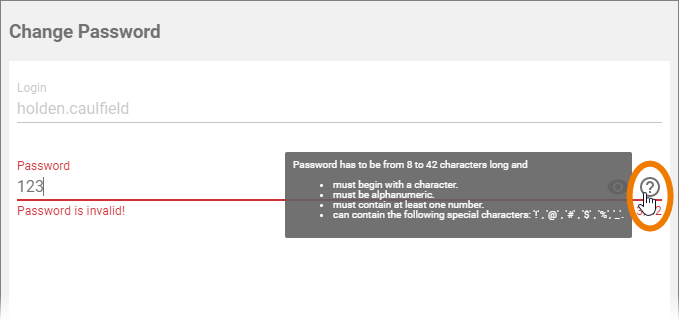
| Hover over the |
icon |
. |
| Change the new password until it matches the criteria, only then you will be able to save it |
| . |
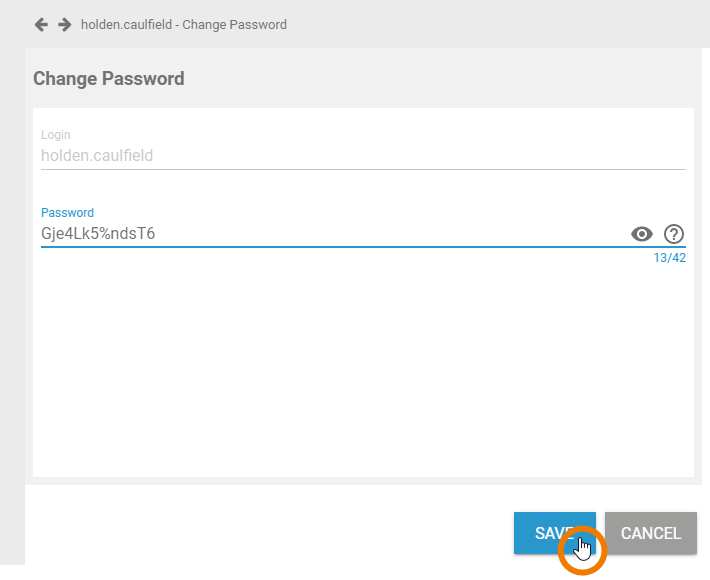
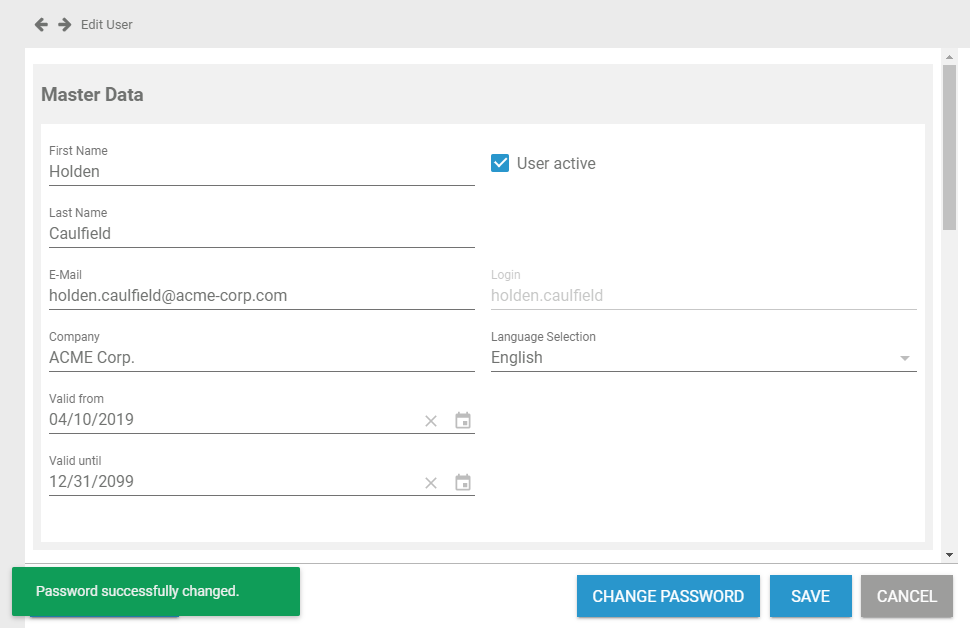
| The user data sheet is displayed again, |
the message Password successfully changed appears |
. |
|
Deactivating a User
If a user is not allowed to access the system any more, his account must be deactivated. Users cannot log in to the business system, if their user account is inactive or if the date in field valid until lies in the past, meaning that the validity of the user account has ended.
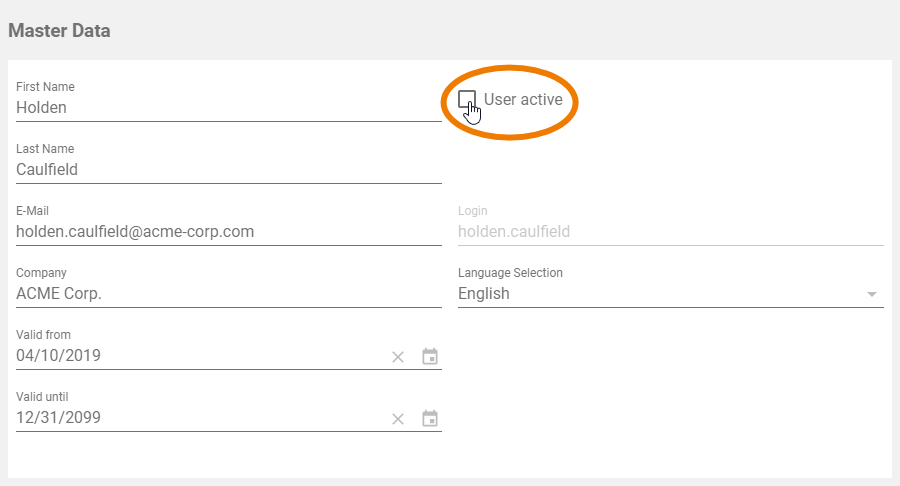
| If you need to deactivate a user account, open the user data sheet. |
Disable the checkbox User active |
.
| ||||||||
|
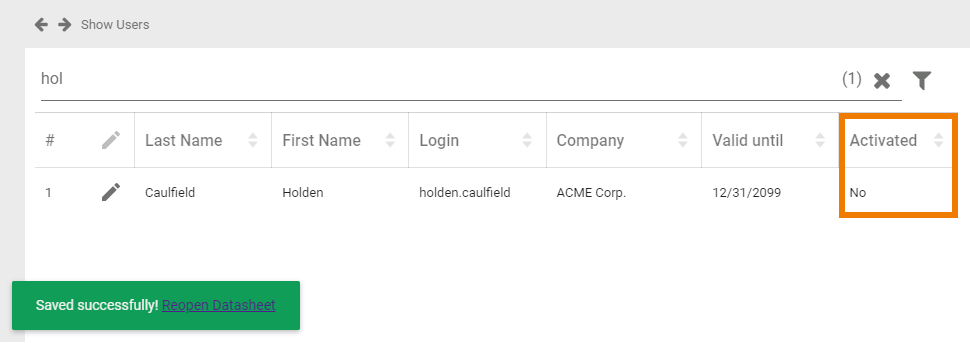
Confirm your modification by clicking the Save button:
The message Saved successfully! confirms that the data has been saved. You can use the displayed link to reopen the data sheet. In the content area, the user list is displayed and the modified user shows the information No in column Activated |
. |
Overview
Content Tools