Page History
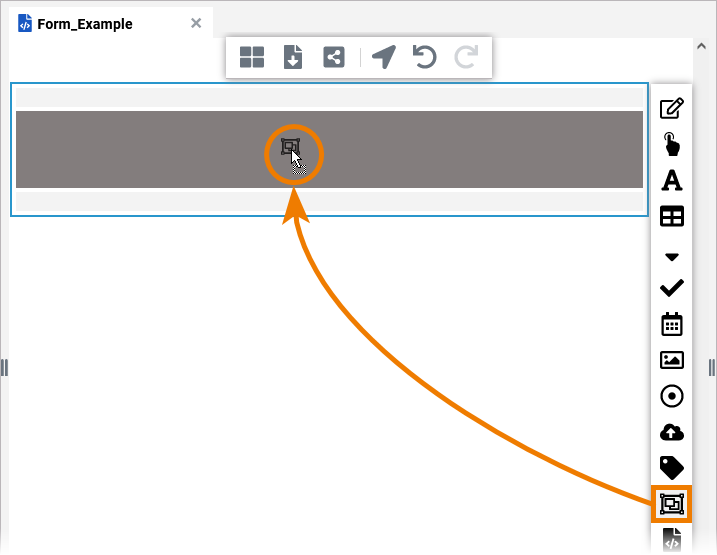
You can design forms more clearly using the Grouping Element. You can find the element in the form element toolbar. Use it to group multiple form elements into blocks. This allows you to reuse combined groups of form elements in other forms and to move related elements to other positions in the form.
| Multiexcerpt include | ||||||
|---|---|---|---|---|---|---|
|
Grouping Elements
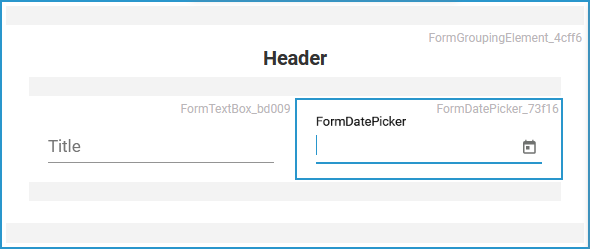
In order to group form elements, create a new Grouping Element in the Form Editorform editor.
| Use icon | ||||
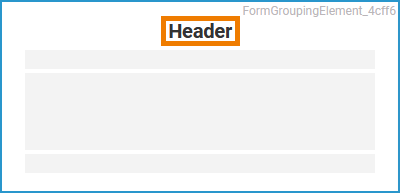
| By default, the header of the grouping element is shown as a label for the whole block. | ||||
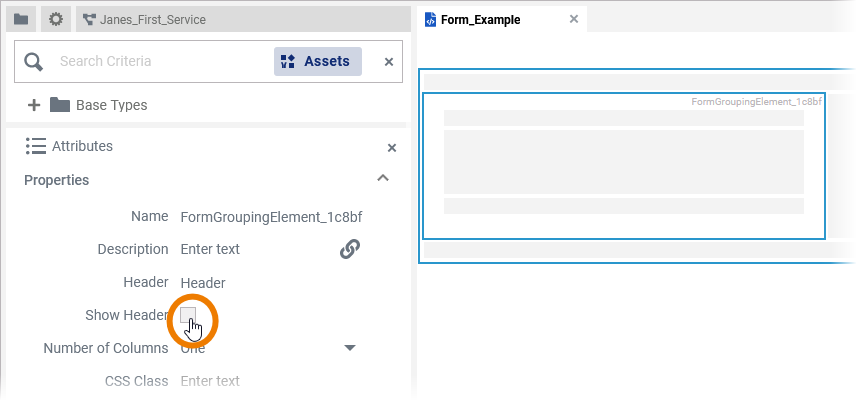
| If you do not want to display a title for your grouping element, disable the attribute Show Header. | ||||
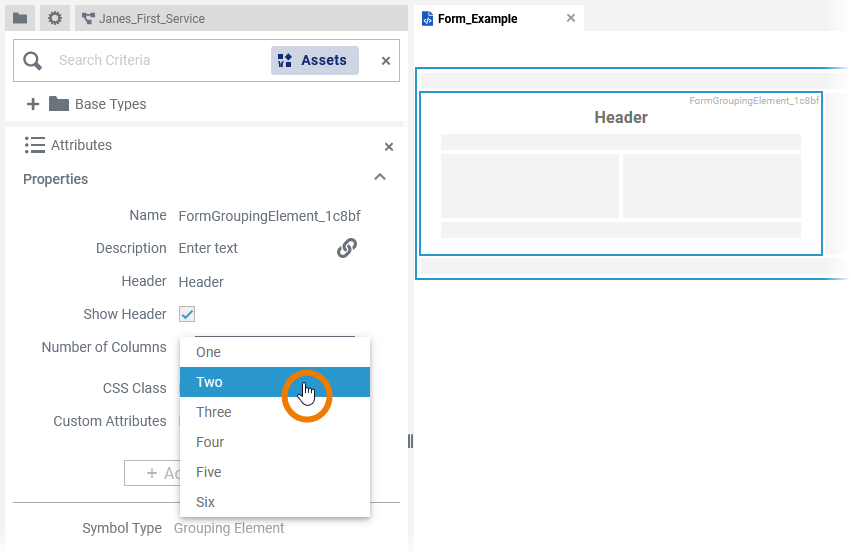
| Grouping elements can be multi-column. Use the attribute Number of Columns to set the desired column number. Up to six columns are possible. | ||||
| You can add form elements by dragging them directly into the grouping element. You can edit elements that are positioned in a grouping element as usual via the attributes panel. |
| Grouping elements can be multi-column. Use the attribute Number of Columns to set the desired column number. Up to six columns are possible.
| ||
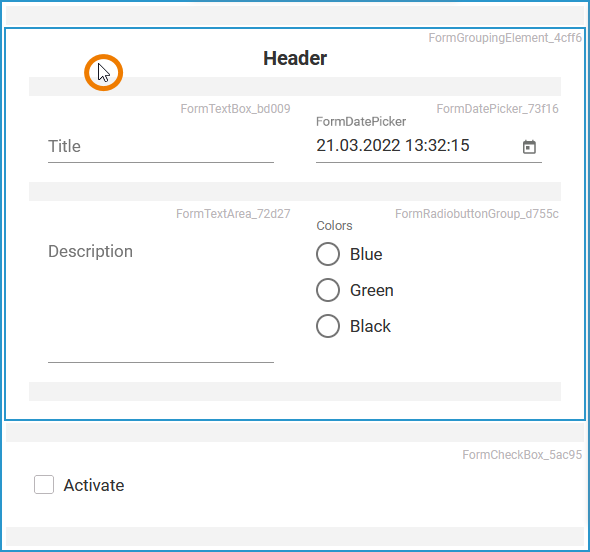
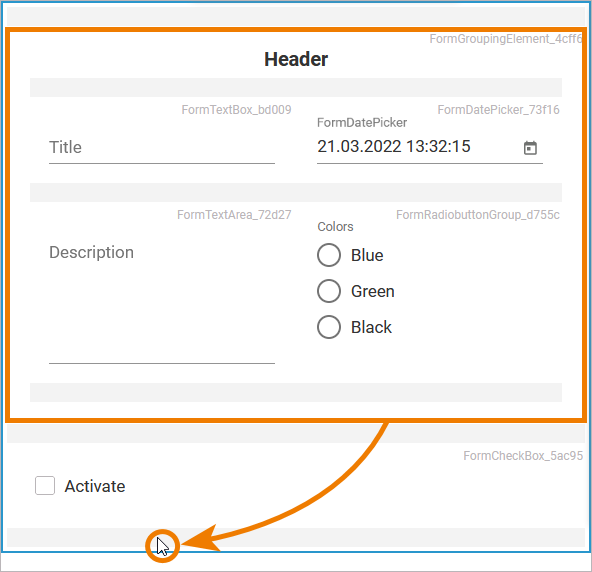
| To move the entire block within a form, you need to activate the grouping element by clicking on it. An activated grouping element is highlighted with a blue frame. | ||||
| Now drag the element within the form and click on its new position. In our example we drag the whole Header block. | ||||
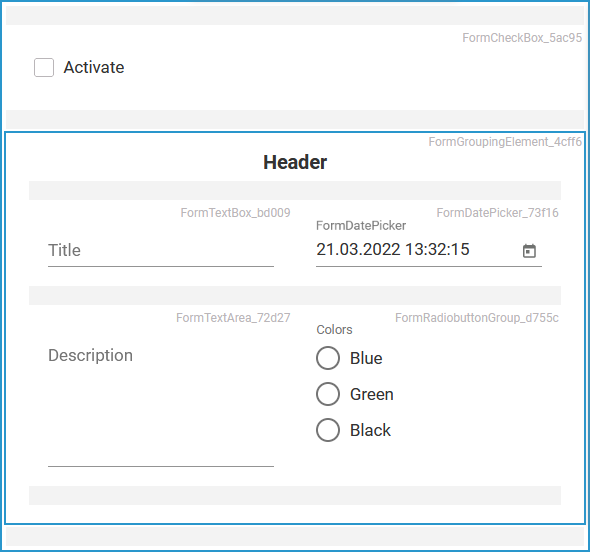
| The grouping element is displayed at the new position including all its content. |

Reusing Grouped Elements
You can copy blocks of form elements combined in a grouping element to reuse it elsewhere.
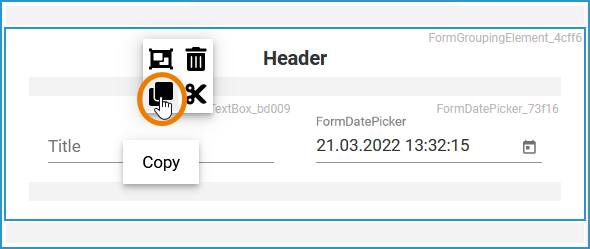
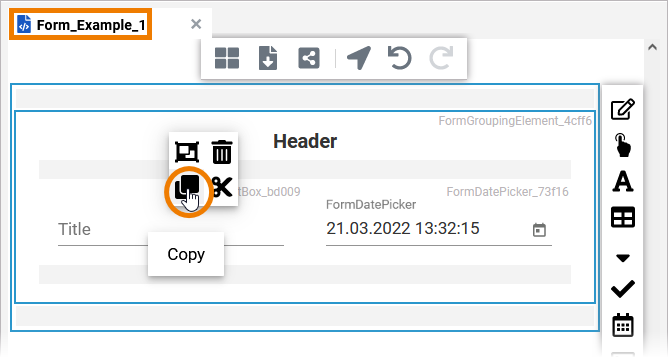
| If you want to copy a grouping element including all its content, activate the element and open the context menu with a right-click. Select option Copy The grouping element and all its content is copied to the clipboard. | ||||||||
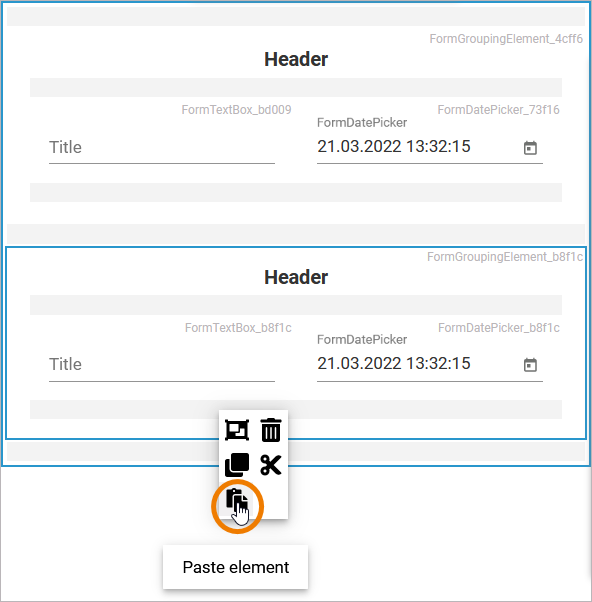
| To paste the element, click on the place where you want to insert the element, open the context menu again and select option Paste | ||||||||
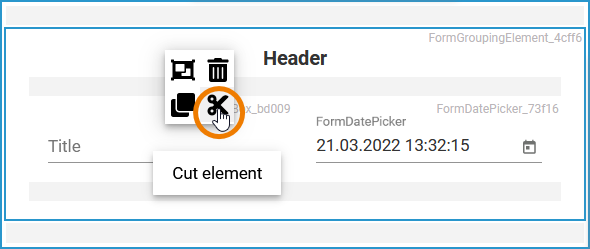
| You can also cut
| ||||||||
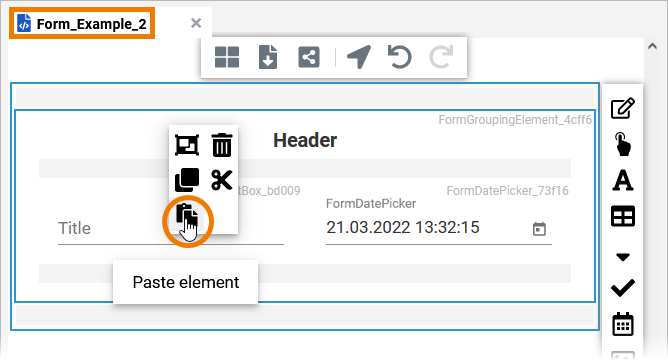
| You can also insert copied elements to another form. | ||||||||
| Switch to the form where you want to include the copied element. Open the context menu and select Paste The grouping element is inserted including all its content. |


| Otp | ||
|---|---|---|
|
| Rp |
|---|
Overview
Content Tools