In this section it will be shown how to:
- Implement BasicAuthentication and authorization with the Bridge
- Setup a role-hierarchy
- Assigning roles through reading a backend system
- Handle multiple operations in pre/postprocessing
- Saving information in the preprocessor for further use in the postprocessor.
Example File (Builder project Advanced Modeling/Security):
<your example path>\Advanced Modeling\Security\uml\interceptorHelloWorldAdvanced.xml This example uses the file "roles.txt". Within this file there is a list of users and their role. The file can be found at: |
Basic Authentication with the Bridge
To implement basic authentication with the bridge one has to define the two tagged values authenticationMode and user in the component diagram. By setting these two tagged values this service can only be called when this user and its password are set in the SOAP or HTTP header.
Figure: Basic Authentication with the Bridge
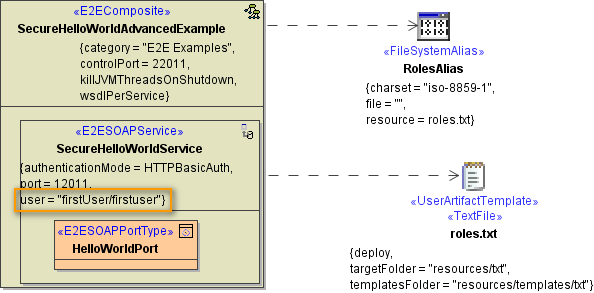
The above example shows how to implement basic authentication executed directly at the Bridge. This implementation supports only one user. So one can define only one user at the "user" tagged value. This is suited for simple implementations or for testing. When having the need of supporting more than one user or have the user definitions stored in a external system like LDAP then one must define a proxy in front of the SOAP/HTTP service.
This example shows how to call such a service which requires basic authentication.
Example File (Builder project Add-ons/SOAP):
| <your example path>\Add-ons\SOAP\uml\soapUseSecureHelloWorldAdvancedExample.xml |
Defining a Role Hierarchy
In chapter Adding Role Based Access Control it is described how to implement a role based access control (authorization). Only users having a dedicated role have access to the defined operations. But sometimes there is the requirement that not only one group should have access but several ones or one would like to define group hierarchies like they are existing in the real world.
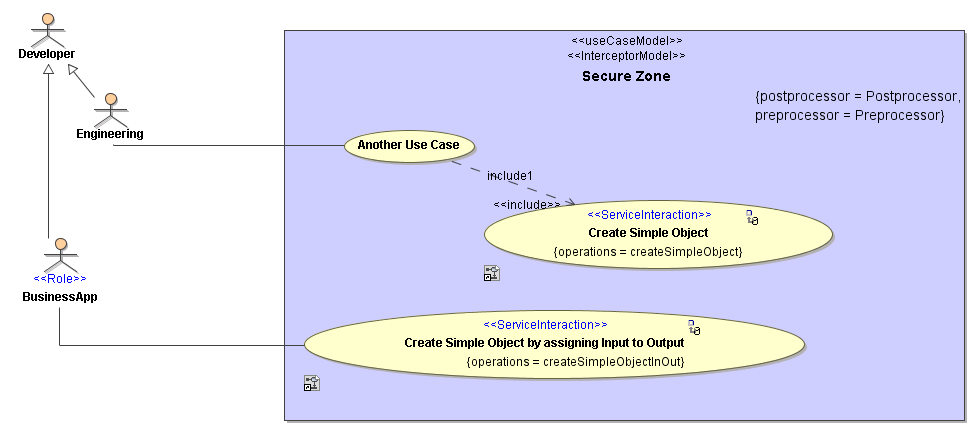
The image below shows how to implement such a hierarchy. The role actors "Engineering" and "BusinessApp" inherit the role "Developer". So the operations "CreateSimpleObject" and "CreateSimpleObjectInOut" can be executed by users having the role "Developer". Users having the role "Engineering" can access only "CreateSimpleObject". Users having the role "BusinessApp" can access only "CreateSimpleObject".
Documentary uses cases - like "Another Use Case" can be placed in the security model also - the compiler will ignore use cases having no stereotype assigned.
Figure: Role Hierarchy
Reading Roles from Backend Systems
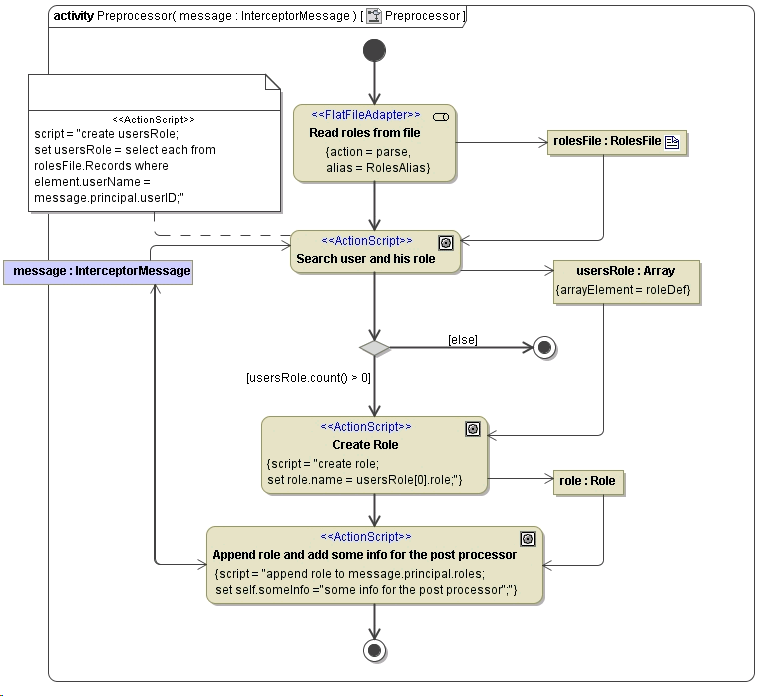
In chapter Adding Role Using Preprocessor the role have been assigned statically which in real world project would not be the case. The roles will be stored in a databases, LDAP, ActiveDirectory, a file or any other system. So the user will be given from outside through the SOAP or HTTP header by applying basic or secure authentication. The user is mapped by the Bridge to the user attribute of The Principal Object .
In the example below the user is read from this principal object and then mapped to a role stored in a flat file. This role is then checked against the role names in the before defined use case diagram. If these role names (actor names) does not match the process will be stopped after the preprocessing and the Bridge will throw an access error message.
Figure: Reading roles from a file
Handle Multiple Operations in Pre/Postprocessing
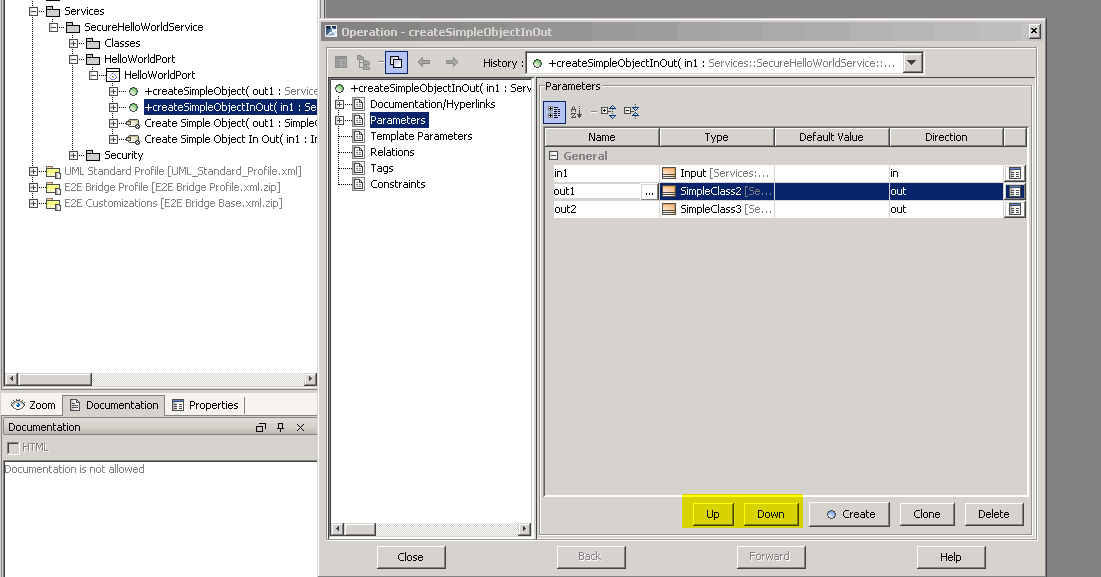
When having multiple operations with different input and output parameters which should be accessed within the pre- or postprocess model one has to implement switches using the operation attribute. The attribute operation holds the name of the operation which will be / was invoked by the request. Using it in a condition of a decision point allows you to implement specific models to extract and/or manipulate parameters. After dispatching for the operation, we get the parameter to be manipulated from the parameters attribute of the interceptor message. The value of the parameter is then being cast to its static type. Finally, this value is being manipulated: we add a string.
Figure: Handling multiple operations having different parameters
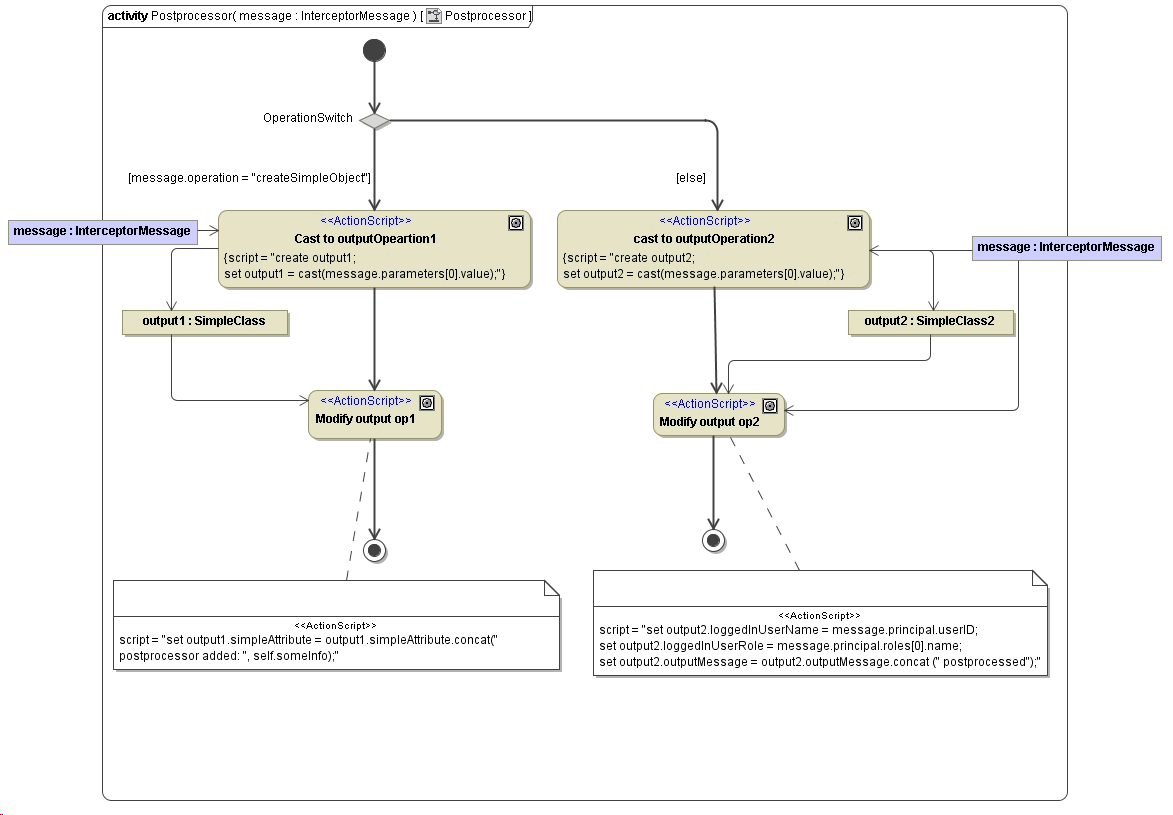
Figure: Order of PortType parameter
On this Page:
Overview
Content Tools