Adding the Keycloak OAuth Policy
Since every Scheer PAS installation contains a Keycloak instance, this Keycloak-specific OAuth2 policy should be your first choice to secure an API in the PAS environment.
Use Keycloak in combination the Keycloak OAuth policy to...
- ... synchronize users from LDAP and other Active Directory servers.
- ... enable login with different social networks.
- ... authenticate with external OpenID Connect or SAML Identity Providers.
- ... to automatically authenticate users that are logged-in to a Kerberos server.
In general, this is one of the best approaches for achieving security without greatly impacting performance.
Go to page Keycloak OAuth for a detailed overview on all settings of this policy.
In contrast to the policy defaults, change the following
| Policy | Configuration | |
|---|---|---|
| Keyloak-OAuth-Policy | Require Transport Security | false |
| Realm |
| |
Adding the JWT Policy
If you want to secure your API via an identity provider different from Keycloak, choose the JWT policy. It helps you to validate JSON Web Tokens (JWT) by providing a signing key or a JSON Web Key Set (JWK(S)). You can also require claims and strip them to forward them as header to the backend API.
In contrast to the policy defaults, change the following
| Policy | Configuration | Information | |
|---|---|---|---|
| JWT-Policy | Require Transport Security | false | Keycloak can provide a JWK(S) URL |
| Signing Key or URL to a JWK(S) |
| ||
Go to page JWT for a detailed overview on all settings of this policy.
Adding the Authorization Policy
In addition to the Keycloak OAuth policy, you can use the Authorization policy to add a list of fine-grained authorization rules which allows you to control precisely who is allowed to access the API.
Make sure that you configure the Authorization policy after the standard authentication, because an authentication policy is responsible for extracting the authenticated user’s roles - and this is data, that is required for the Authorization policy to do its work.
The configuration of this policy consists of a number of rules that are applied to any inbound request to the API. Each rule consists of a regular expression pattern, an HTTP verb and the role that an authenticated user must possess in order for access to be granted.
Go to page Authorization for a detailed overview on all settings of this policy.
Working with Keycloak Tokens
With PAS 23.1.1, the Scheer PAS installation comes with the default Keycloak client api-management-oauth . Keycloak clients are entities that can request Keycloak to authenticate a user. In most cases, Keycloak clients are applications and services that want to use Keycloak to secure themselves and provide a single sign-on solution. However, clients can also be entities that just want to request identity information or an access token so that they can securely invoke other services on the network.
If you use the Keycloak OAuth policy, we recommend to check against the default client api-management-oauth.
Expert Advice
If you need to create your own client in Keycloak, visit the official Keycloak documentation for further information.
How to Get the Secret
To retrieve a Keycloak token, you need to know the secret of the used client.
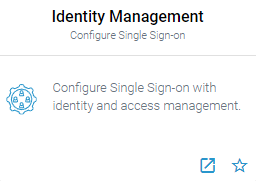
Open the Identity Managament (Keycloak). If your user has no permission for the identity management, contact an administrator and ask him to provide the secret. | |
You will find the secret of the client in the PAS realm: Clients > Credentials > Secret |
How to Retrieve the Keycloak Token
The token exchange in Keycloak is a very loose implementation of the IETF's OAuth Token Exchange specification. It is a simple grant call on the OpenID Connect token endpoint of a realm. It accepts form parameters (application/x-www-form-urlencoded) as input. The output depends on the type of token for which you requested an exchange. The token exchange is a client endpoint, so requests must include authentication information for the calling client.
The client_secret parameter is required for clients that use form parameters for authentication and use a client secret as credentials. A list of all form parameters can be found in the official Keycloak documentation > Form parameters.
The token URL is composed as follows:
https://<system name>/<client name>/keycloak/realms/<realm name>/protocol/openid-connect/token
Example:
- https://scheer-acme.com/acme-test/keycloak/realms/PAS/protocol/openid-connect/token
Send your request to the token URL.
Example:
curl --location 'https://scheer-acme.com/acme-test/keycloak/realms/PAS/protocol/openid-connect/token' \
--header 'Content-Type: application/x-www-form-urlencoded' \
--data-urlencode 'username=<username>' \
--data-urlencode 'password=<password>' \
--data-urlencode 'client_id=api-management-oauth' \
--data-urlencode 'client_secret=<client-secret>' \
--data-urlencode 'grant_type=password'
A successful response from an exchange call returns the HTTP 200 response code with a content type that depends on the requested-token-type and requested_issuer. Clients requesting a refresh token receive both an access token and refresh token back in the response. Clients requesting only an access token receive only an access token in the response.
Example:
{
    "access_token": "eyJhbGciOiJIUzI1NiIsInR5cCI6IkpXVCJ9.eyJzdWIiOiIxMjM0NTY3ODkwIiwibmFtZSI6IkpvaG4gRG9lIiwiaWF0IjoxNTE2MjM5MDIyfQ.SflKxwRJSMeKKF2QT4fwpMeJf36POk6yJV_adQssw5c",
    "expires_in": 300,
    "refresh_expires_in": 7200,
    "refresh_token": "eyJhbGciOiJIUzI1NiIsInR5cCI6IkpXVCJ9.eyJzdWIiOiIxMjM0NTY3ODkwIiwibmFtZSI6IkpvaG4gRG9lIiwiaWF0IjoxNTE2MjM5MDIyfQ.SflKxwRJSMeKKF2QT4fwpMeJf36POk6yJV_adQssw5c",
    "token_type": "Bearer",
    "not-before-policy": 0,
    "session_state": "f5dd0490-aaf8-42f7-87b5-df0c7b1cb4a7",
    "scope": "email profile pas_user"
}
Expert Advice
For detailed information about the token exchange, refer to the official Keycloak documentation > Using token exchange.
How to Use the Token for a Request
You have to send the received token with each request as authorization header. If you use the PAS internal request UI (Swagger UI), the token is set automatically.
Example:
curl --location 'https://scheer-acme.com/acme-test/gateway/test/hello-oauth/1.0' \
--header 'Authorization: Bearer eyJhbGciOiJIUzI1NiIsInR5cCI6IkpXVCJ9.eyJzdWIiOiIxMjM0NTY3ODkwIiwibmFtZSI6IkpvaG4gRG9lIiwiaWF0IjoxNTE2MjM5MDIyfQ.SflKxwRJSMeKKF2QT4fwpMeJf36POk6yJV_adQssw5c'


