
To implement the currency calculations, you need the exchange rate from USD to CHF. As mentioned before, you now will get this exchange rate from an external Web service, the E2E Education Exchange Rate Provider.
Web services are self-contained applications that can be published and invoked across the Web using XML-based protocols. The E2E Bridge has a "Simple Object Access Protocol" (SOAP) adapter ready, which enables you to use any other Web service as backend for the Bridge. Instead of reading data from a database, the SOAP adapter sends a request to the other Web service and gets back a SOAP response message. This message then is mapped to data items.
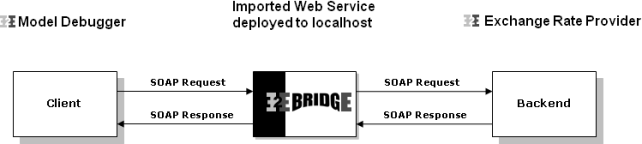
The steps involved in calling a Web service through the Bridge are as follows:
- A client requests the Bridge Web service.
- The E2E Runtime makes a HTTP/SOAP call to the linked Web service.
- The result is mapped to the defined data structure.
- The output is returned.
Each Web service has its own distinct interface, defined by the names of the operations and their parameters. Before an external Web service can be used, its interface definition must be imported to the UML model or from a "Web Services Description Language" (WSDL) document. This functionality is implemented in E2E Builder (also see the Builder User's Guide).
During the importing process of the WSDL, you can decide whether to create a test model to test the external service or whether to import it into an existing UML model. The WSDL file provides all necessary information to create an UML model, so the test model contains all necessary building blocks for you to test the imported service.
Importing the WSDL and Creating a Test Service
You can create a test model while importing a WSDL or XML Schema file (XSD) directly from a file or via a URL. You can import the WSDL from the attached file ExchangeRateProvider.wsdl or from the E2E Cloud Server.
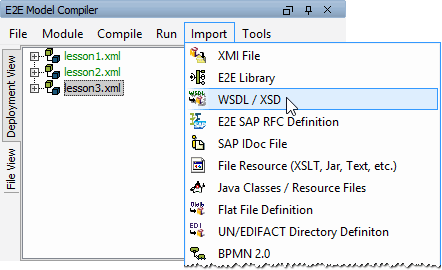
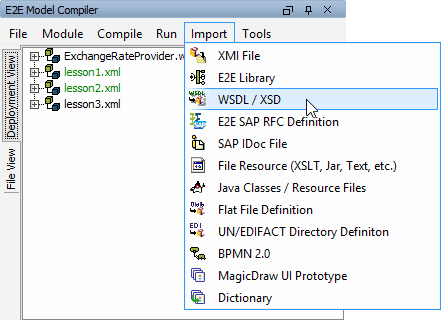
| Select Import > WSDL / XSD from the E2E Compiler window. |
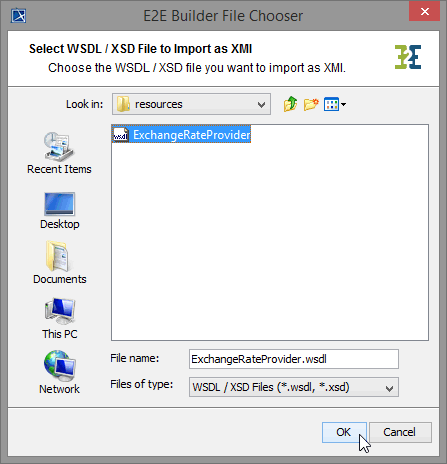
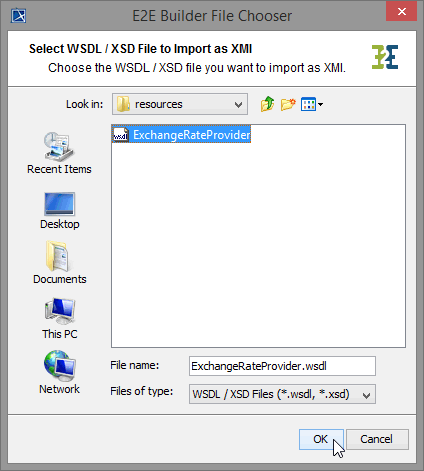
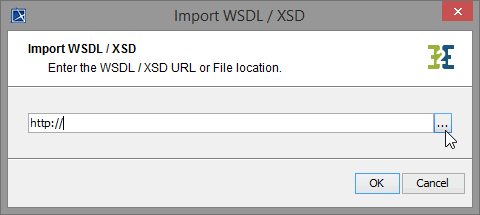 | The dialog Import WSDL / XSD opens. You can fill in the path to the location, you saved the WSDL file to. Or click ... to open the E2E Builder File Chooser. |
| Navigate to the location you saved the WSDL file to. Select it and click OK. |
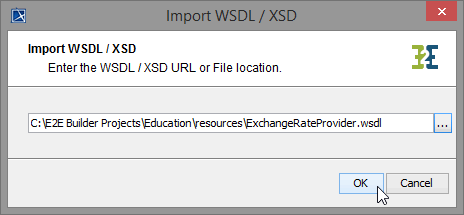 | The correct path is now displayed in the window Import WSDL / XSD. Click OK. |
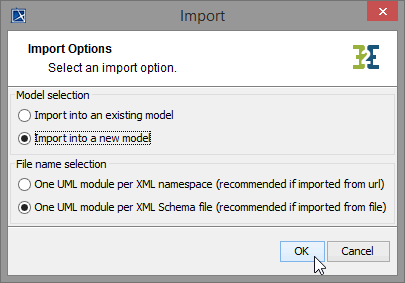
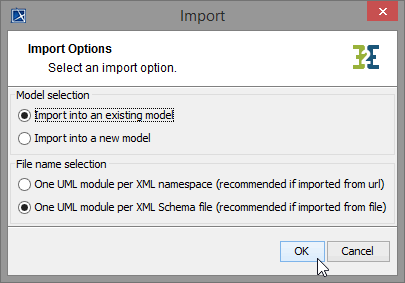
| The Builder offers the two options to import into an existing model or create a new (e.g. test) model for the imported service WSDL. By importing into a test model, you get an overview over the operations provided by the imported service and you can test them. Select the second option Import into a new model. Select the second File name selection option (One UML module per XML Schema file), because you are importing the WSDL from file. Click OK. |
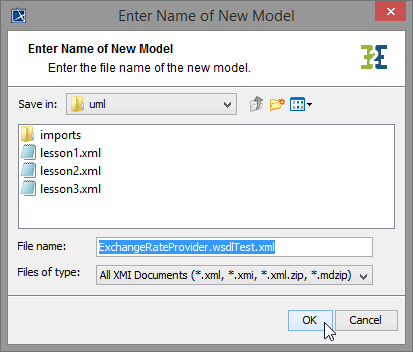
| A dialog opens to enter the name of the test model. Leave the default name ExchangeRateProvider.wsdlTest.xml and click OK. |
Within Builder project Education, a new xml file ExchangeRateProviderService.wsdlTest.xml was created. You can switch between the test model and lesson3.xml using Switch Projects in the toolbar.
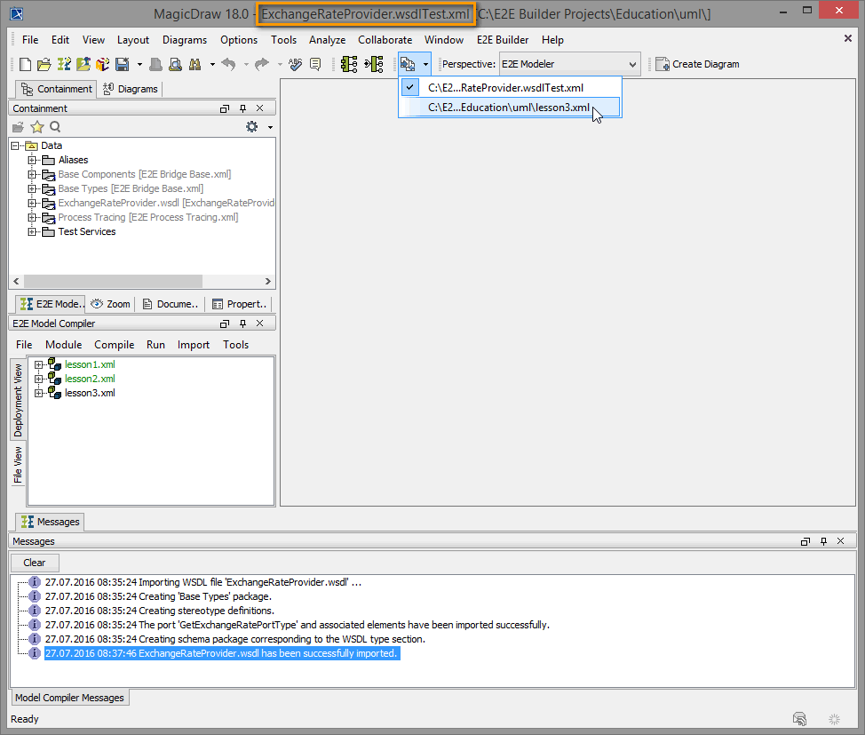
But the new xUML service is not ready to be compiled yet, because the component diagram is missing. During the import, the Model Compiler read all necessary components and instances from the WSDL file and created the package Component View where all elements of a component diagram will be saved.
As ExchangeRateProviderService.wsdlTest.xml has no component diagram yet, it is only visible in the File View of the E2E Compiler window. To create the component diagram, use the E2E Components Wizard.
Creating the Logical View of the Test Model with the E2E Components Wizard
Now, start to create the logical view of the imported Web service with the help of the E2E Component Wizard.
Select the menu icon ![]() E2E Component Wizard to start the wizard:
E2E Component Wizard to start the wizard:

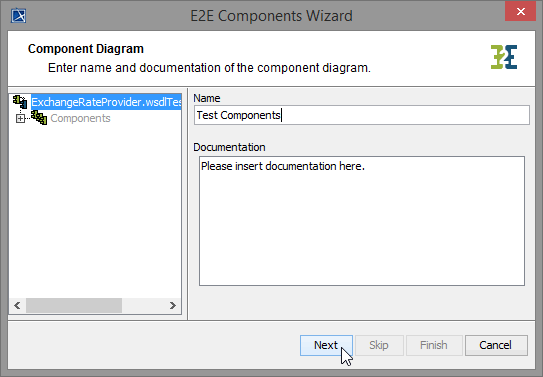
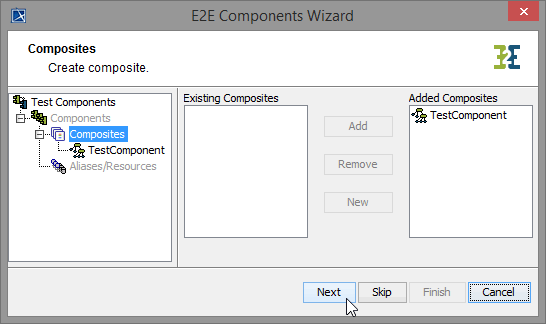
| Assign the name Test Components to the component diagram and click Next. |
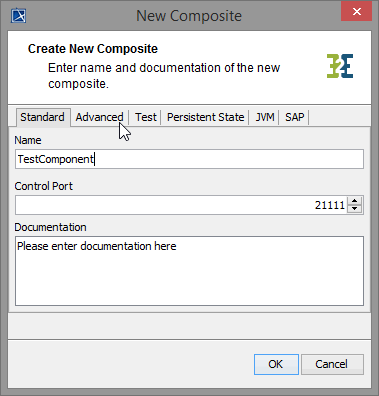
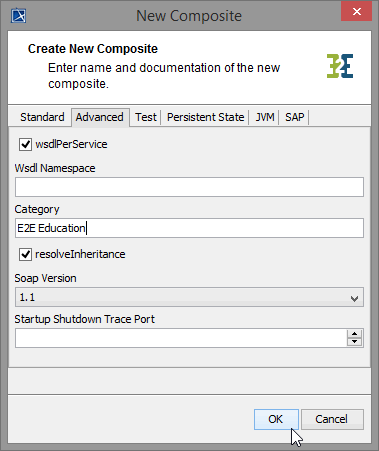
| Assign the name TestComponent to the composite component. The Control Port is used by the E2E Bridge to control the deployed xUML service. Leave the value 21111 and switch to the Advanced tab. |
| Enter the category E2E Education and click OK. |
| The TestComponent is defined. Click Next to proceed. |
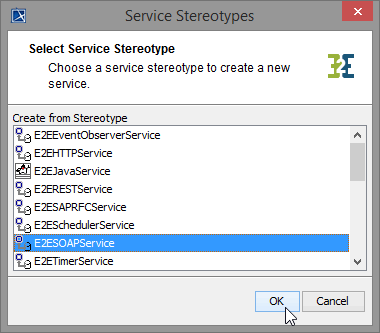
| Now, define the frontend service of the xUML service. As you model a Web service, select E2ESOAPService from the list of stereotypes. Click OK. |
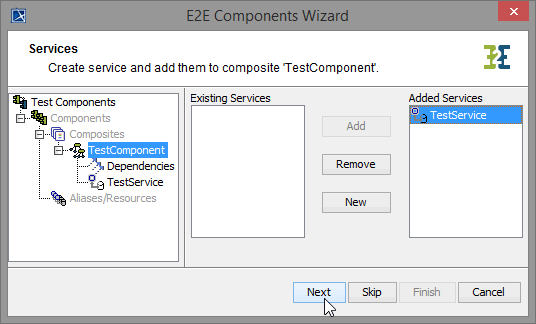
| Enter the name TestService and leave the default setting of the port to 11111. Click OK. |
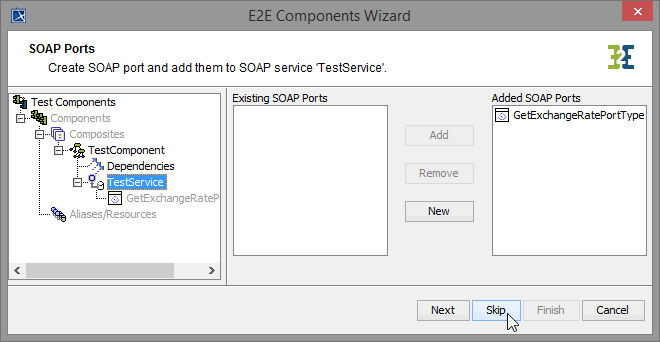
| In the customization panel on the right, you will find the new service TestService. Click Next. |
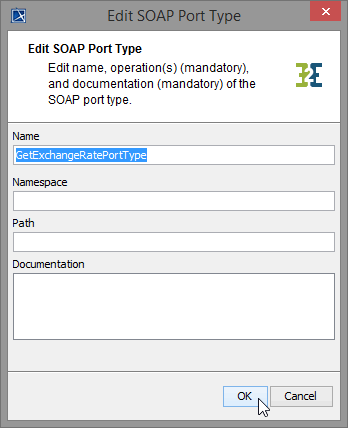
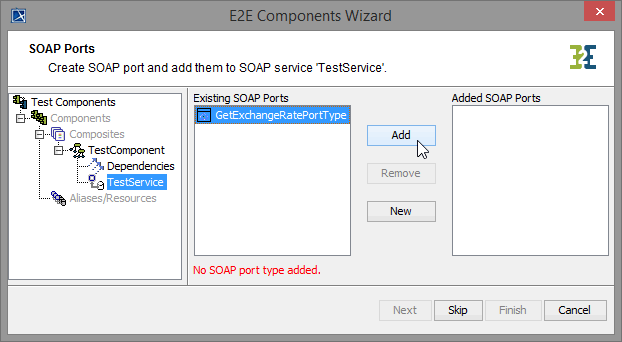 | Now, define the interface of the SOAP service. Select the port type GetExchangeRatePortType and click Add . |
| Leave the name of the port type and click OK. |
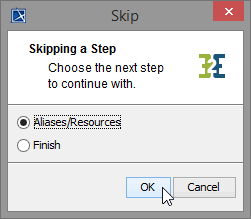
| As you do not need to define further frontend services, click Skip. |
| The external SOAP Service will be accessed via a backend definition. Select Aliases/Resources and click OK. |
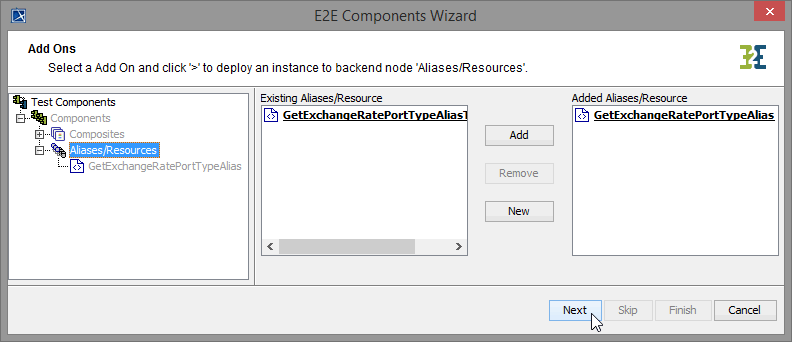
| The backend service's components were created during the import process. Select the service artifact GetExchangeRatePortTypeAlias. Click Add to use it. |
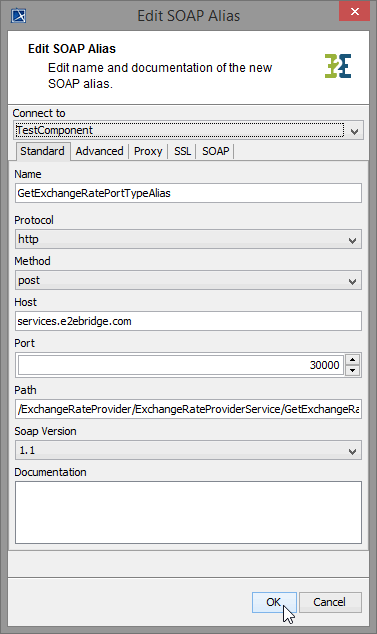 | The details of the alias are displayed. Click OK. |
| Backend definition is complete. Click Next to proceed. |
| Confirm the drawing of the component diagram by clicking Finish. |


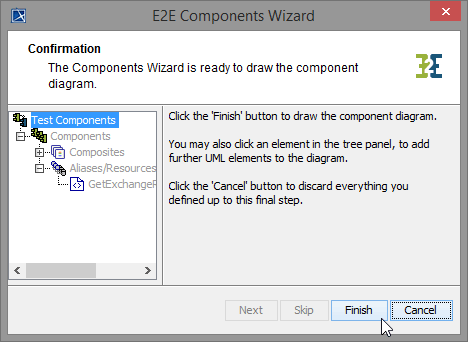
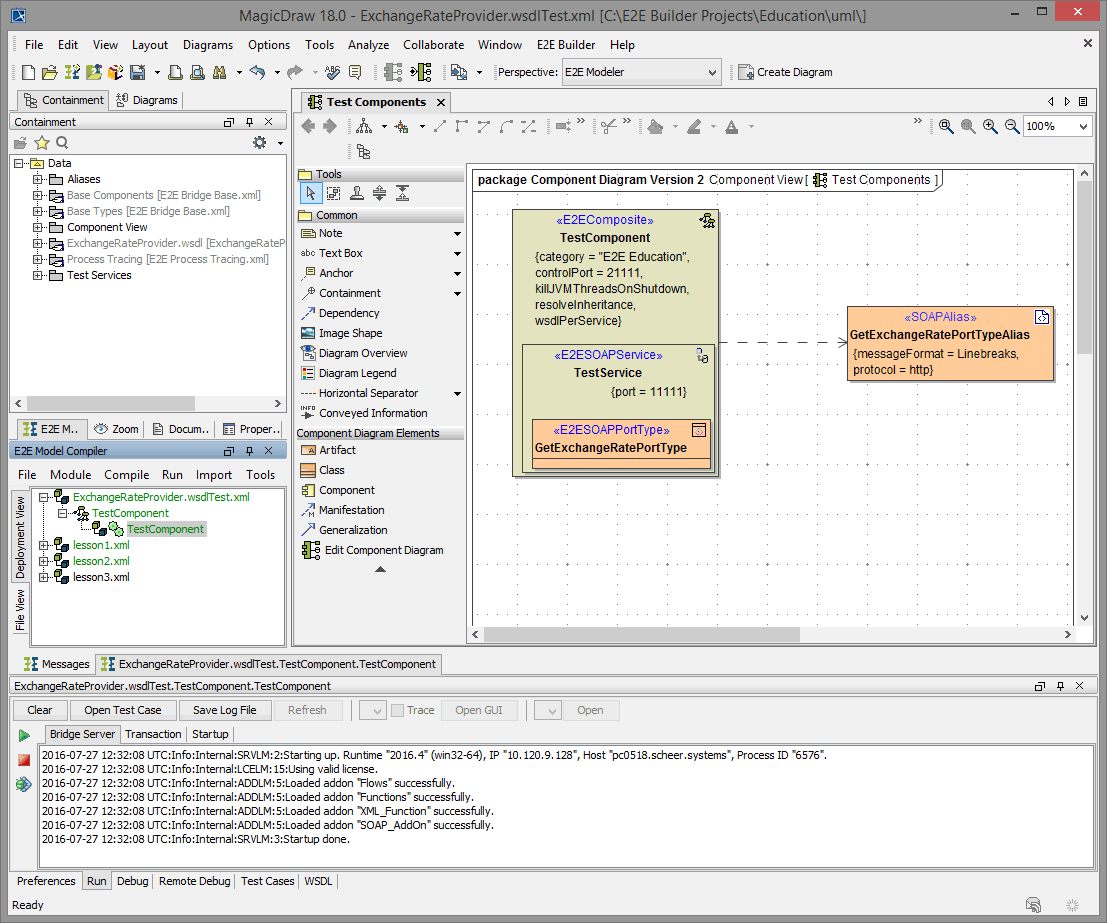
The component diagram is drawn in MagicDraw and the generated diagram Test Components is displayed.

Save ![]() the UML test model.
the UML test model.
Testing the Service
Now, the test service is ready to be compiled and run.
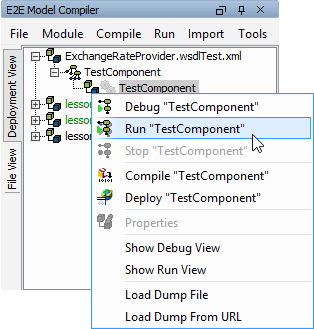
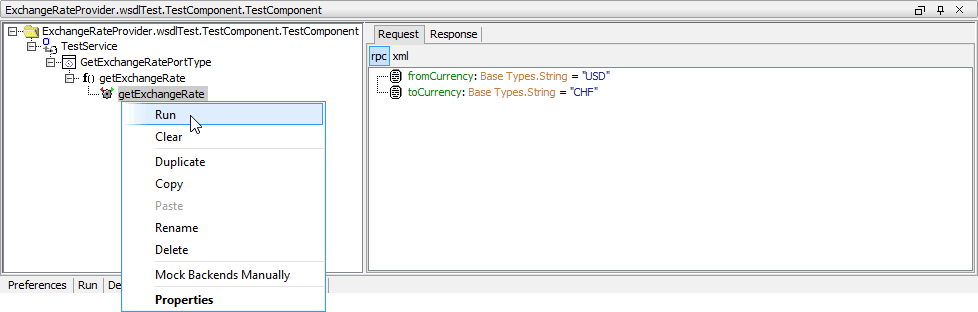
| Navigate to the deployment TestComponent of the service in the Model Compiler window and select Run "TestComponent" from the context menu. The service will be compiled, deployed to the server and started. |
If no errors occur, ...
... click Open Test Case.

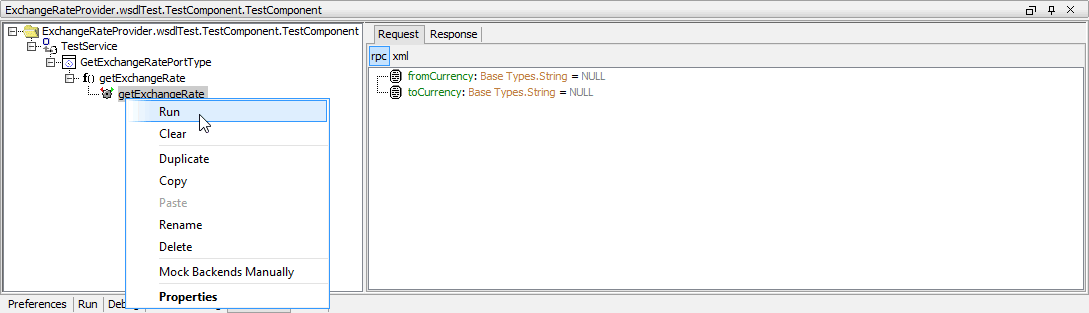
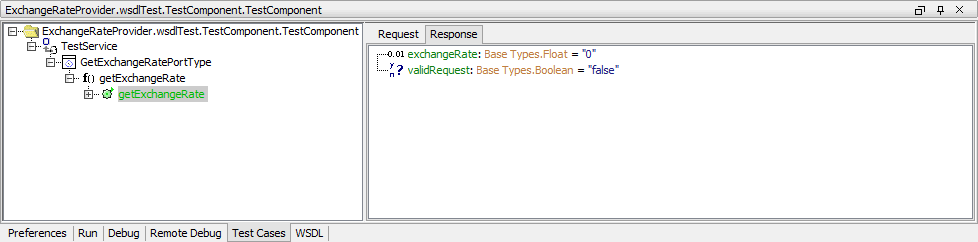
Run the test case getExchangeRate without entering any values in the Request tab.
The Response tab opens. If the test case runs without any error, the gearwheel in front of the test case turns green ![]() . Running the test case without an error means, that the service was reached, proceeded the request without errors and returned information to the client.
. Running the test case without an error means, that the service was reached, proceeded the request without errors and returned information to the client.
As you did not fill in any values in the Request tab, the Exchange Rate Provider service returned the flag validRequest as false and the exchangeRate as 0.
Switch back to the Request tab, enter the values USD and CHF as shown below and run the test case again.
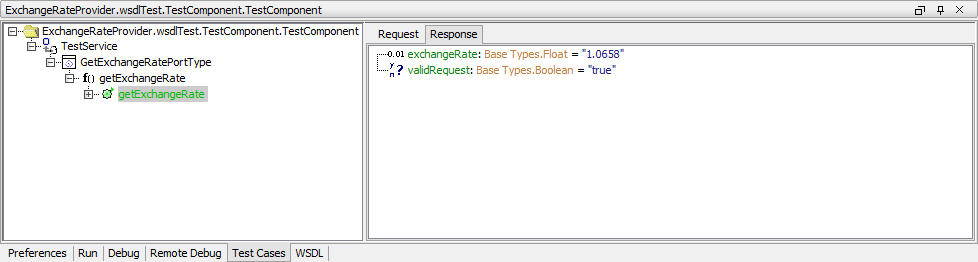
The Response tab shows the exchangeRate 1.0658 (or whatever exchange rate is actually provided) and the flag validRequest is true, as this was a valid request of the Exchange Rate Provider service.
As you now know how to handle the Exchange Rate Provider service, you can continue with lesson 3 and import the service into your lesson 3 model.
Save ![]() the UML model ExchangeRateProviderService.wsdlTest.xml.
the UML model ExchangeRateProviderService.wsdlTest.xml.
Importing the WSDL into the Lesson 3 Model
Switch back to lesson3.xml and start the importer again. This time, you will import the WSDL file directly into your lesson 3 model.
| Select Import > Import WSDL / XSD File from the E2E Compiler window again. |
| Navigate to the location of the WSDL file and select it. Click OK. |
| Select the first option Import into an existing model, leave the other option and click OK. |
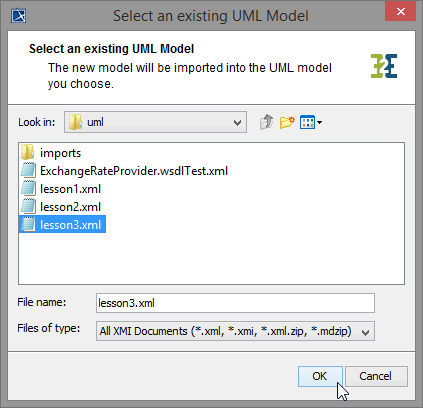
| Select the UML model of lesson 3 lesson3.xml and click OK. |
In the E2E Compiler Messages window, you can see whether the import was successful or not.
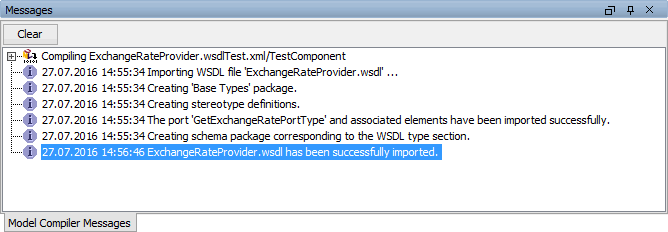
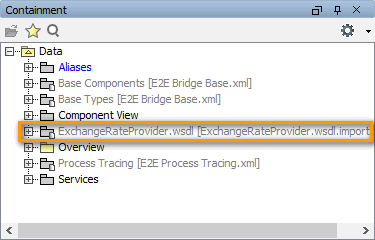
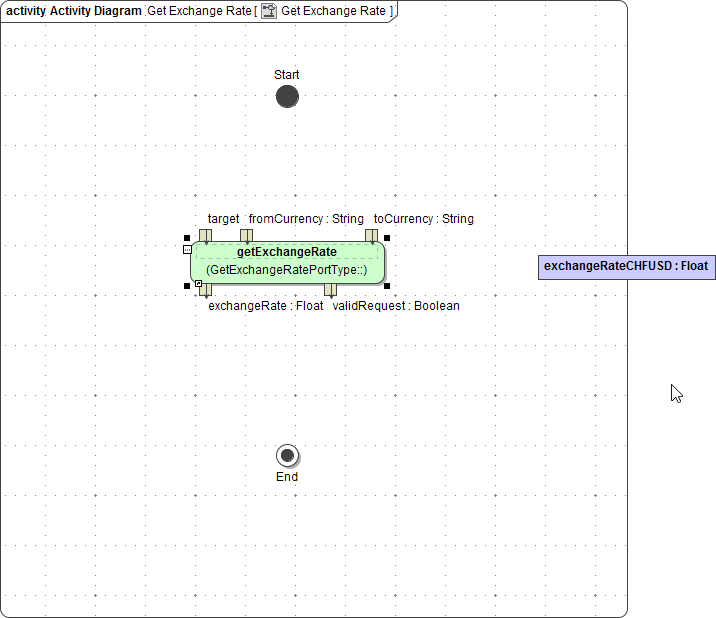
| After a successful import, the imported service should be part of the containment tree. |
Now, the hard coding of the exchange rate in class CurrencyCalculator can be substituted by a call of the Web service.
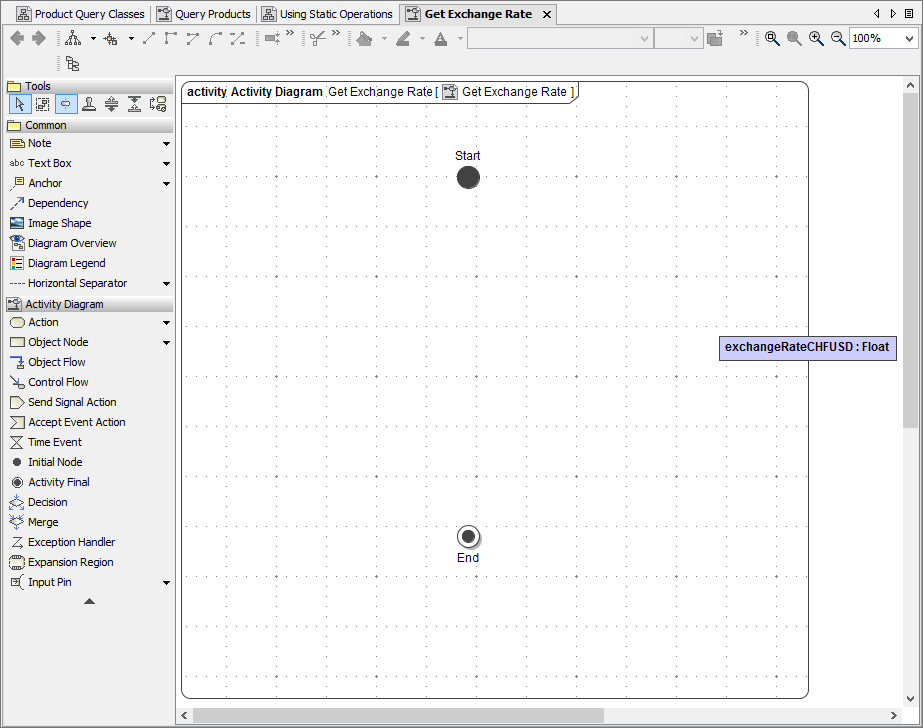
| Open the activity diagram Get Exchange Rate of operation getExchangeRate. |
| Delete the activity node Define Exchange Rate. |
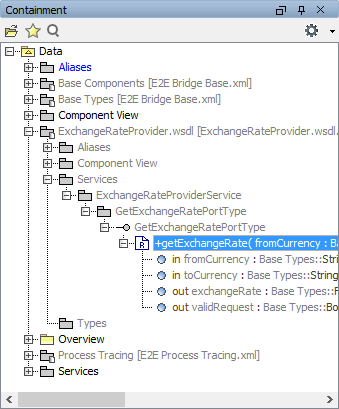
| Select the operation getExchangeRate from the imported Web service definition of the ExchangeRateProvider service. |
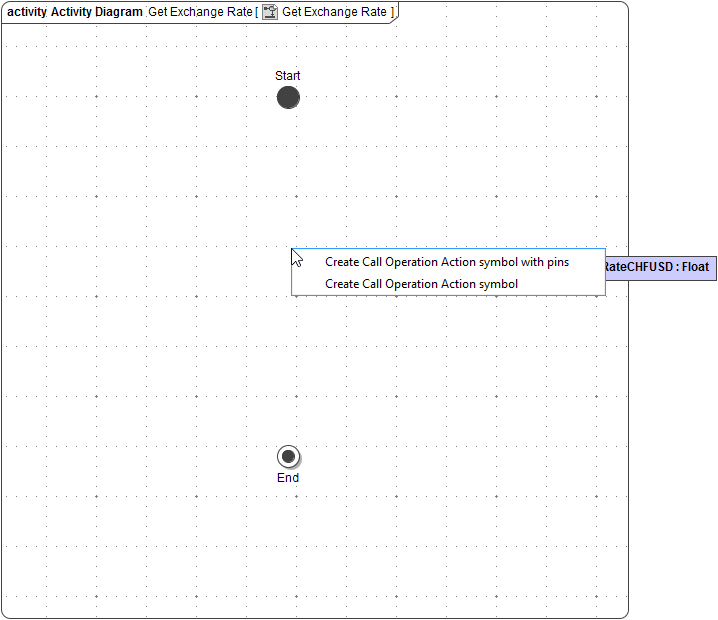 | Drag and drop it onto the diagram pane of Get Exchange Rate. While dropping the operation, select the option Create Call Operation Action symbol with pins. |
| All parameters of operation getExchangeRate are shown as input respectively output pins. By default, a target pin is created automatically, too. Delete the target pin. Remember to use Ctrl - D to delete the element and not only its symbol. |
| Rearrange the input pins to the left side of call operation action, the output pins to the right side of it. |
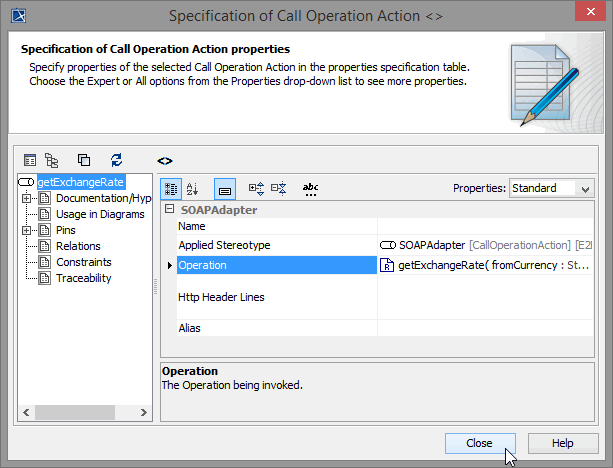
| Open the Specification dialog of getExchangeRate and assign the stereotype SOAP Adapter. |
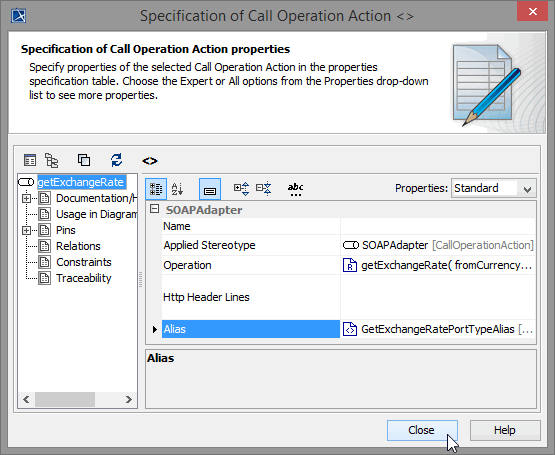 | The compiler needs to know where to find the SOAP operation. In field Alias , select GetExchangeRatePortTypeAlias from the list. Click Close. |
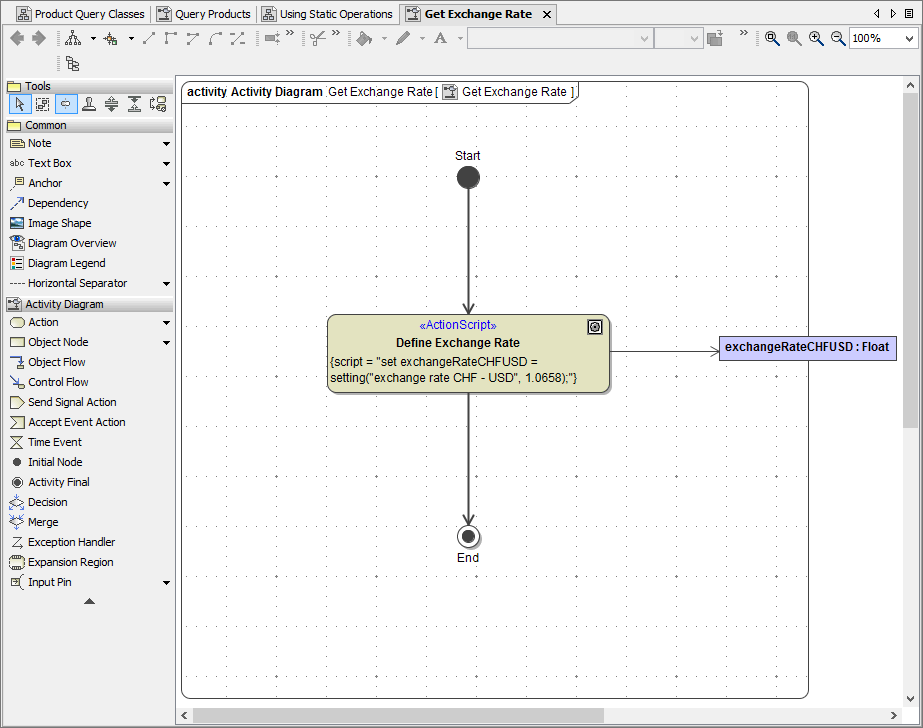
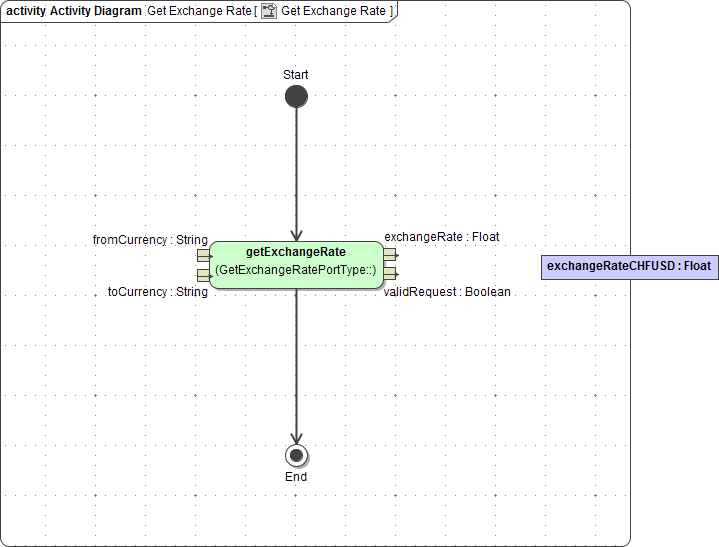
Now, your activity diagram should look like this:
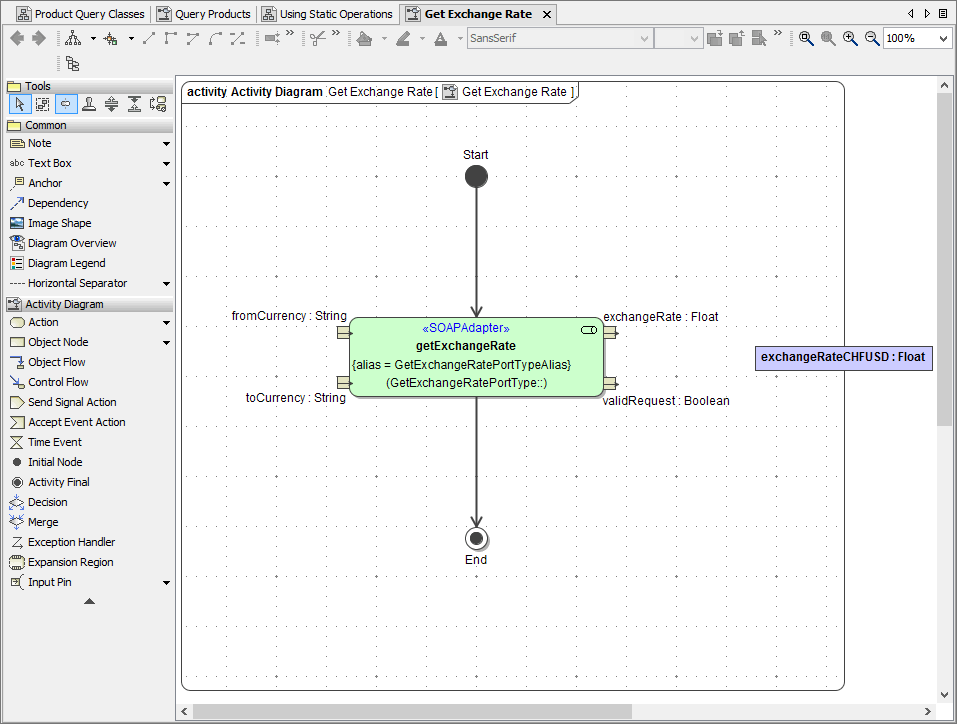
Three parameters of the operation getExchangeRate are still missing : fromCurrency, toCurrency and the flag validRequest.
| Name | Type | Direction |
|---|---|---|
| fromCurrency | String | in |
| toCurrency | String | in |
| validRequest | Boolean | out |
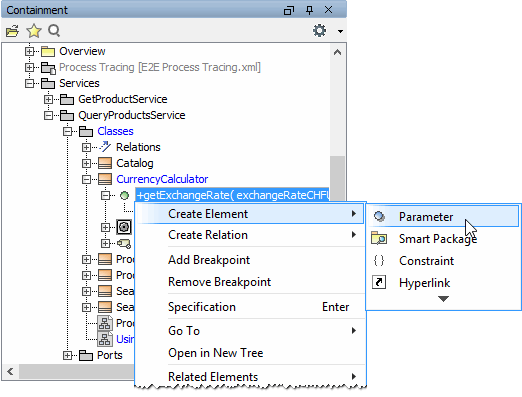
| Create the three parameters. |
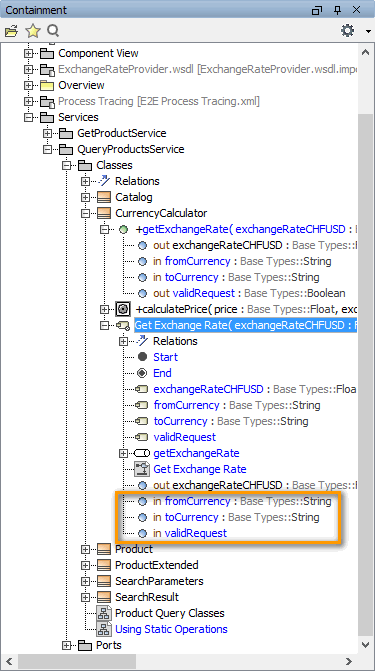 | Check the containment tree: The parameters have also been added to the activity Get Exchange Rate. But the specifications for the output parameter have to be corrected. Open the specification dialog of the parameter validRequest, set the direction to out and assign the type Boolean. |
| Place the missing parameters on the diagram border as shown on the left and connect them to their corresponding pins. |
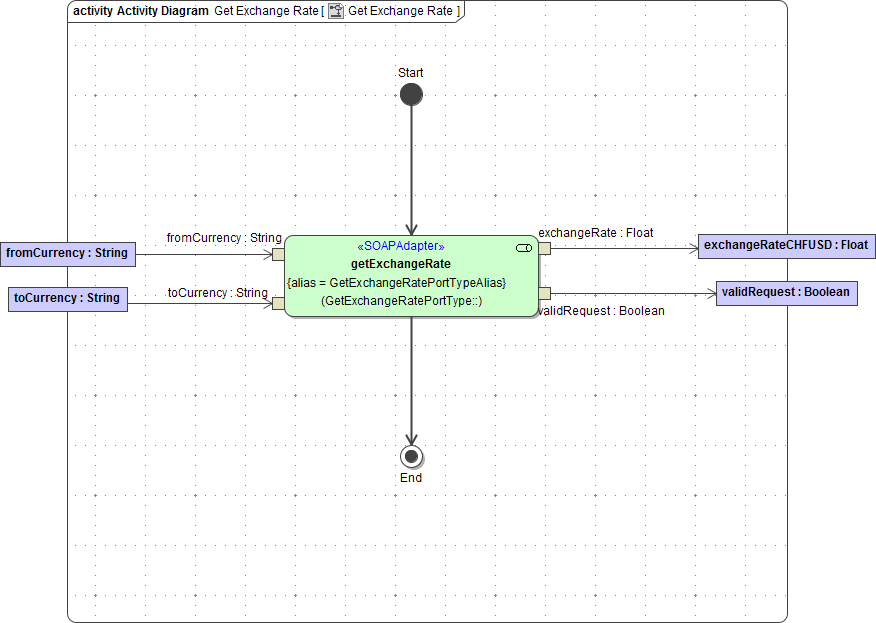
The SOAP operation call is implemented.
Alternatively, you could have copied the operation call out of your test model ExchangeRateProviderService.wsdlTest.xml from diagram Test Services/GetExchangeRatePortType/GetExchangeRatePortType/getExchangeRate. Simply select the diagram element from the test model and use copy & paste to insert it to the lesson 3 model.
Save ![]() the UML model.
the UML model.

On this Page:
Overview
Content Tools