
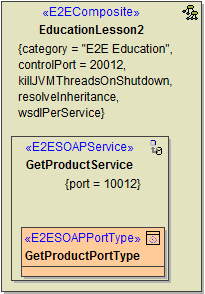
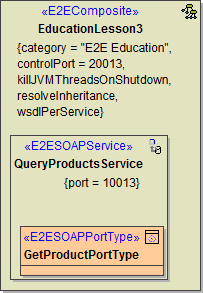
In the picture below, the component diagram, which results from the work in lesson 2, is displayed. The component diagram will be extended now by using the E2E Components Wizard.
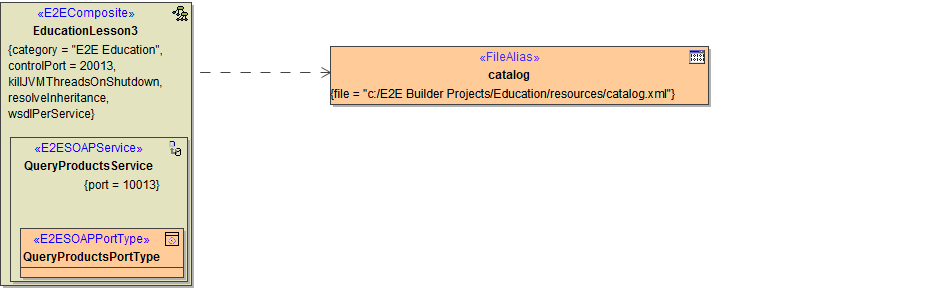
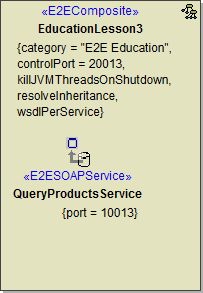
Bridge 7 You will specify a <<FileAlias>> in the xUML service Education.After running the E2E Components Wizard, the component diagram will look like shown in the following picture.
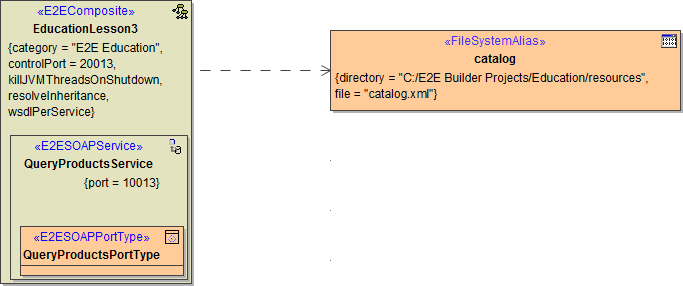
You will specify a <<FileSystemAlias>> in the xUML service Education.After running the E2E Components Wizard, the component diagram will look like shown in the following picture.
Reworking the Component Diagram
For extending the existing configuration you created in lesson 2, you will use the Components Wizard to define a file backend. But first, you will do some renaming.
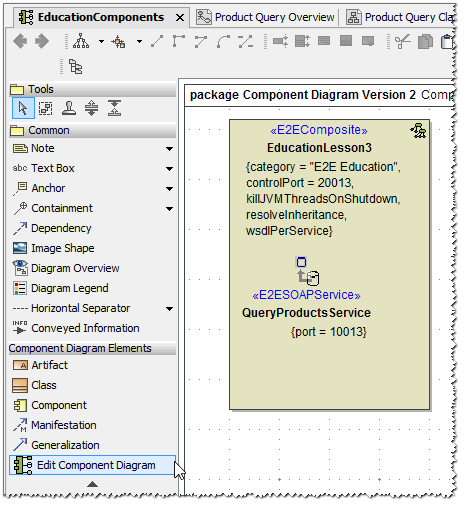
Open the component diagram EducationComponents in node Component View of the containment tree.
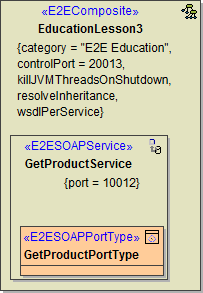
| Rename the xUML service EducationLesson2 and assign the new name EducationLesson3. Change the control port of the service to 20013. |
| Rename the service component GetProductService and assign the new name QueryProductsService. Change port number of the service component artifact to 10013. |
| Delete the port type definition GetProductPortType. |
Click the icon ![]() Edit Component Diagram from the diagram toolbar to start the Components Wizard.
Edit Component Diagram from the diagram toolbar to start the Components Wizard.
|
Extending the Component Diagram
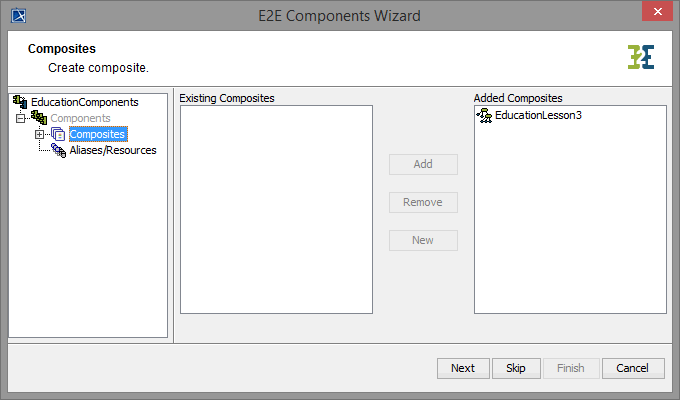
The E2E Components Wizard dialog window opens.
| The wizard displays the service composite EducationLesson3. |
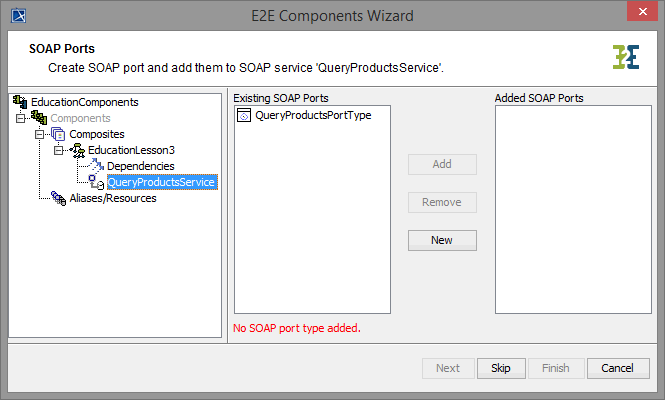
| Expand the tree on the left and navigate to the component QueryProductsService. |
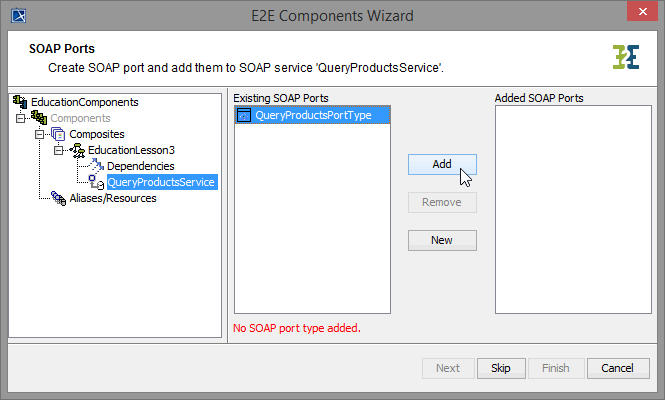
| Select QueryProductsPortType and click Add to create the composite. |
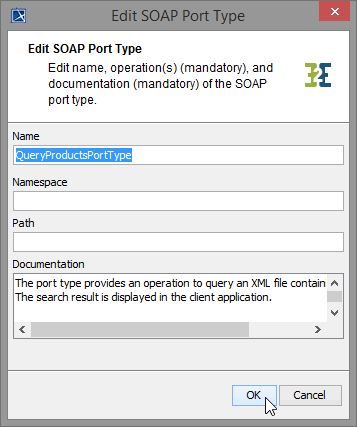
| Leave the name QueryProductsPortType and click OK. |
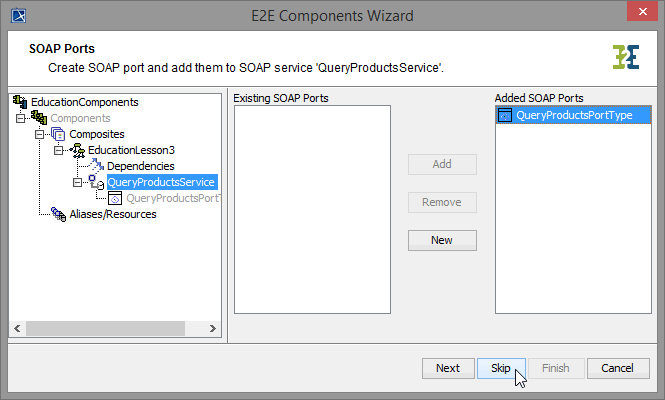
| In the customization panel on the right, you will find the new port type composite QueryProductsPortType. You now have completed the frontend of your Web service for lesson 3. Click Skip. |
As the Web service will read data from an XML file, you need to define a backend. As you read a file using the file system adapter, you need to define a file system alias in the component diagram in order to access the XML file. You will add the alias defined in step Reading the XML File to the component diagram. By that, you can link the physical definition of the backend with the logical definition in the activity diagram, where the backend adapter is used.
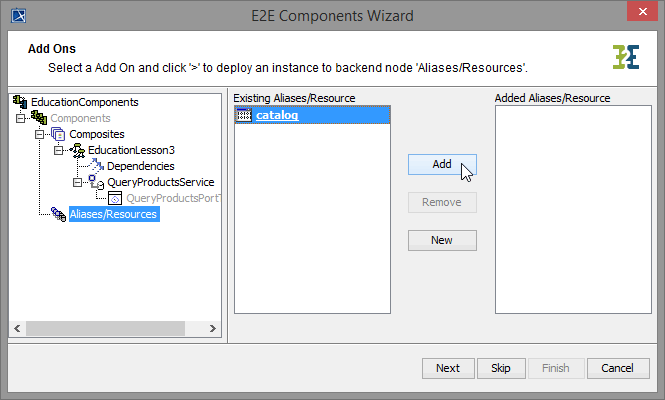
| Choose the option Aliases/Resources in the Skip dialog. |
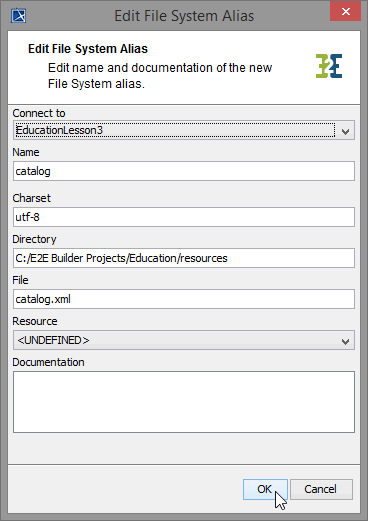
| In the list of Existing Aliases/Resources, the Components Wizard displays your previously defined alias catalog. Select it and click Add to add it to the component diagram. |
| The details of the alias are displayed. Click OK. |
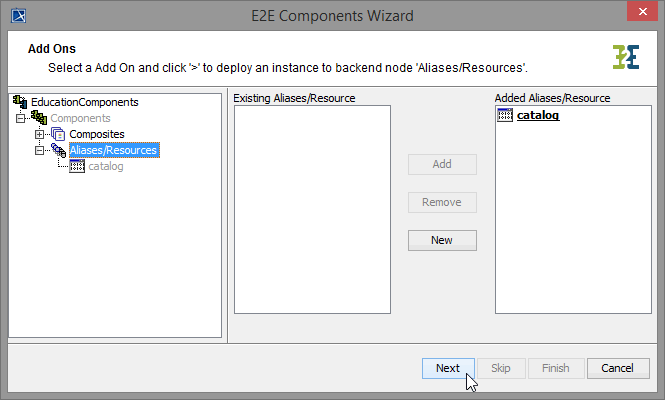
| The file system alias catalog has been added to the component diagram. Click Next. |
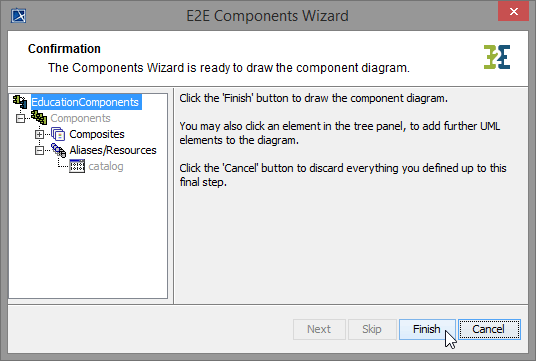
| All necessary components and artifacts have been defined. Therefore, the wizard skips to the final step. You need to confirm drawing the component diagram. Click Finish. |

Bridge 7 The component diagram will be re-drawn in MagicDraw. The defined components are saved in the package Data / Component View and the generated component diagram will open.
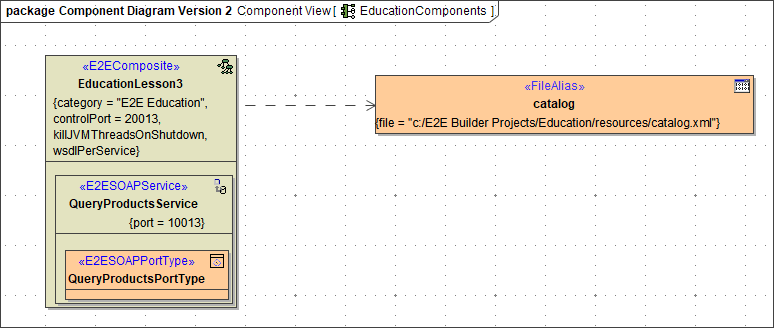
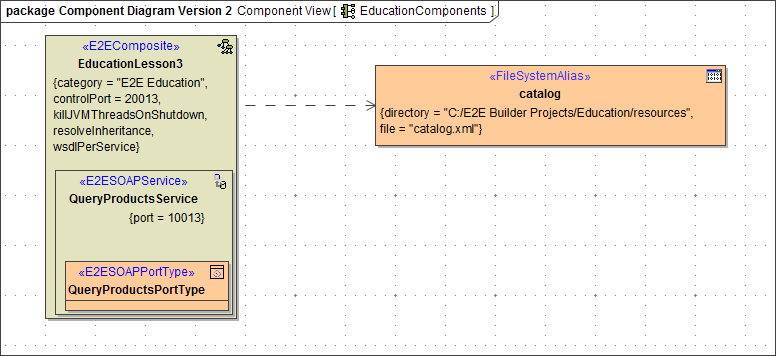
The xUML service artifact EducationLesson3 contains the SOAP service QueryProductsService and its port type QueryProductsPortType.
At the backend side, the file system alias catalog connects the file catalog.xml to the service composite.
Save ![]() the UML model.
the UML model.
Now, the xUML service EducationLesson3 can be compiled.

On this Page:
Overview
Content Tools