Page History
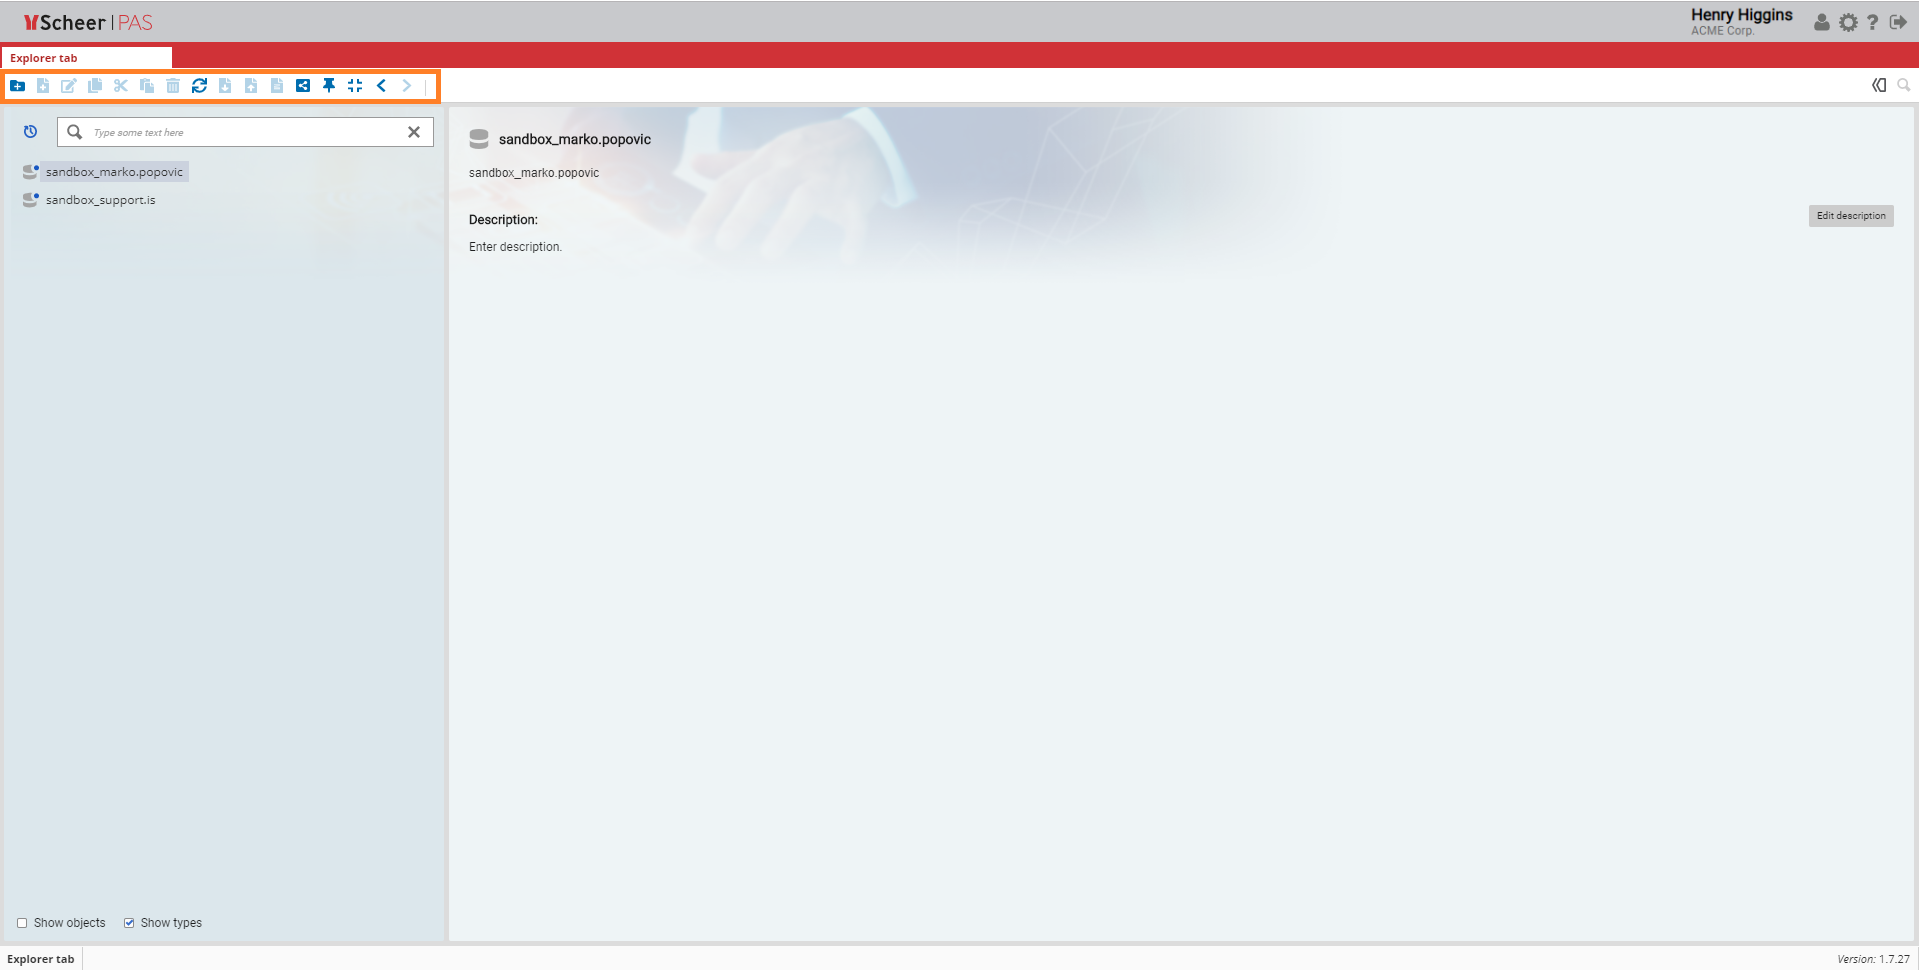
Explorer Tab
Toolbar Overview
| The Toolbar is part of the Explorer Tab which contains many options related to folders, models or object definitions. Relevant options will be enabled when a database, folder, model or an object definition is selected. If you select a model, the following options are available:
|
Toolbar Functionalities
| Icon | Pop-up Window | Description | ||||||||
|---|---|---|---|---|---|---|---|---|---|---|
|
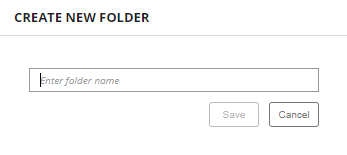
| Use the New Folder icon to create a new folder in the profile database or in an already created folder. By clicking on this icon, the pop-up window Create New Folder allows you to name your folder. Click Save to create the folder or Cancel to abort. | ||||||||
|
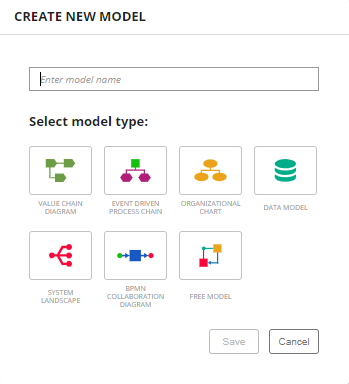
| Use the New Model icon to create a new model in the selected folder.
By clicking on this button, a pop-up window will open: Enter a name for your model and choose a model type. Click Save to create the model in the selected folder. | ||||||||
|
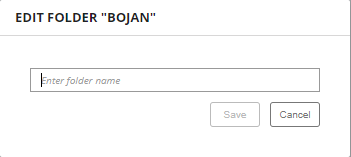
| The Edit icon allows you to edit the model or folder name.
A pop-up window will open: Enter the new name of the model or folder and confirm with Save. | ||||||||
| Use the Copy icon to copy your model or object to another location.
| |||||||||
| Use the Cut item icon to move your folder, model or folder object to another location. | |||||||||
|
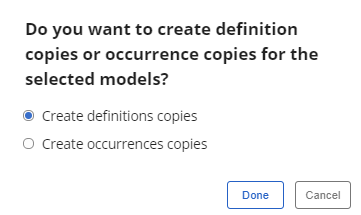
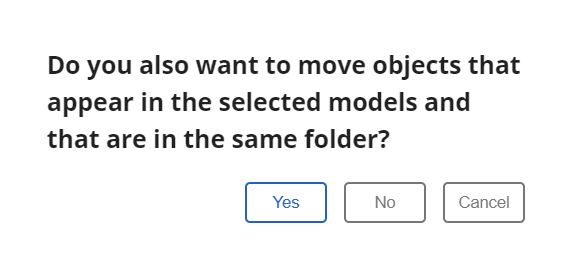
| Use this icon to paste a copied or cut item to another location.
Copy: You will be asked what type of copies you want to create. Choose one of the options and click Done to proceed or click Cancel to abort. Cut: You will be asked if you want to move objects appearing in the selected models and that are in the same folder. You can choose between Yes, No or Cancel.
| ||||||||
|
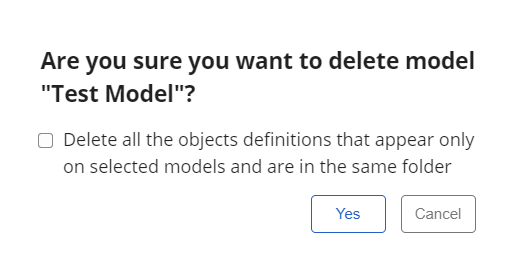
| Click on the Delete icon to erase a selected folder. This option is disabled when a model is selected. , model or object. If you use this icon, a confirmation dialog will open.
If you want to delete the folder including its content, click Yes. If you use this icon on models, you can choose to delete all the objects definitions that appear only on selected models and are in the same folder by checking this option within the confirmation dialog. | ||||||||
|
| Use the Refresh explorer icon to refresh your explorer. When you click the icon, a message appears on the top left corner of the screen showing the message Explorer is refreshed. | ||||||||
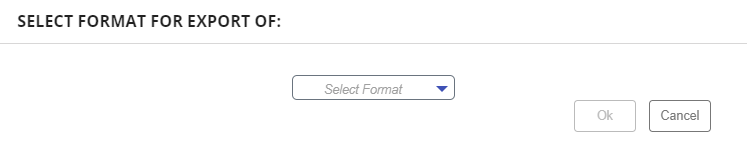
| If you want to export data from a profile database, folder or foldermodel, use the Export option. Available export formats are JSON and XML.
| |||||||||
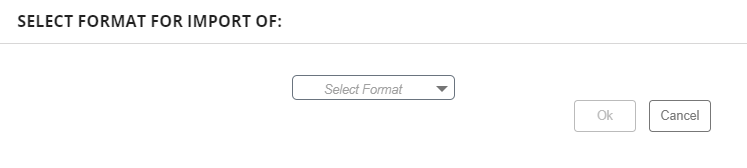
| Use the Import option if you want to import data from a file to a database folder or foldermodel. Available import formats are JSON, XML and ARIS.
| |||||||||
|
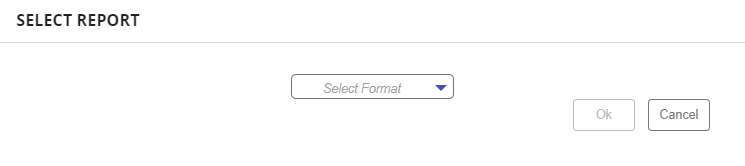
| You can generate reports from the Reports page in the Administration tab. Four types of reports are Five Standard Reports are available:
| ||||||||
|
| The Share option allows you to copy a link of the chosen profiledatabase, folder or model to a clipboard. When you click the icon, a message appears on the top left corner of the screen showing the message message URL copied to clipboard.
| ||||||||
|
| The Publish to cockpit option is available for databases, folders or models. Use it to pin the selected item to a cockpit. When you click on the button, a message appears on the top left corner of the screen showing the message External link published to cockpit. | ||||||||
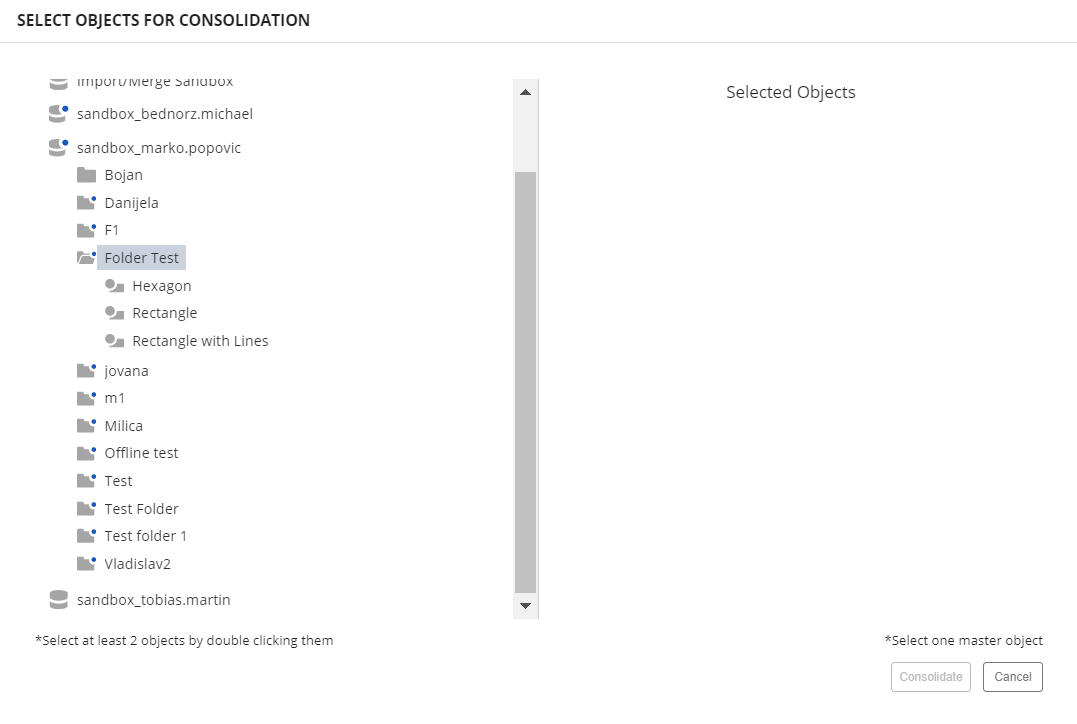 |
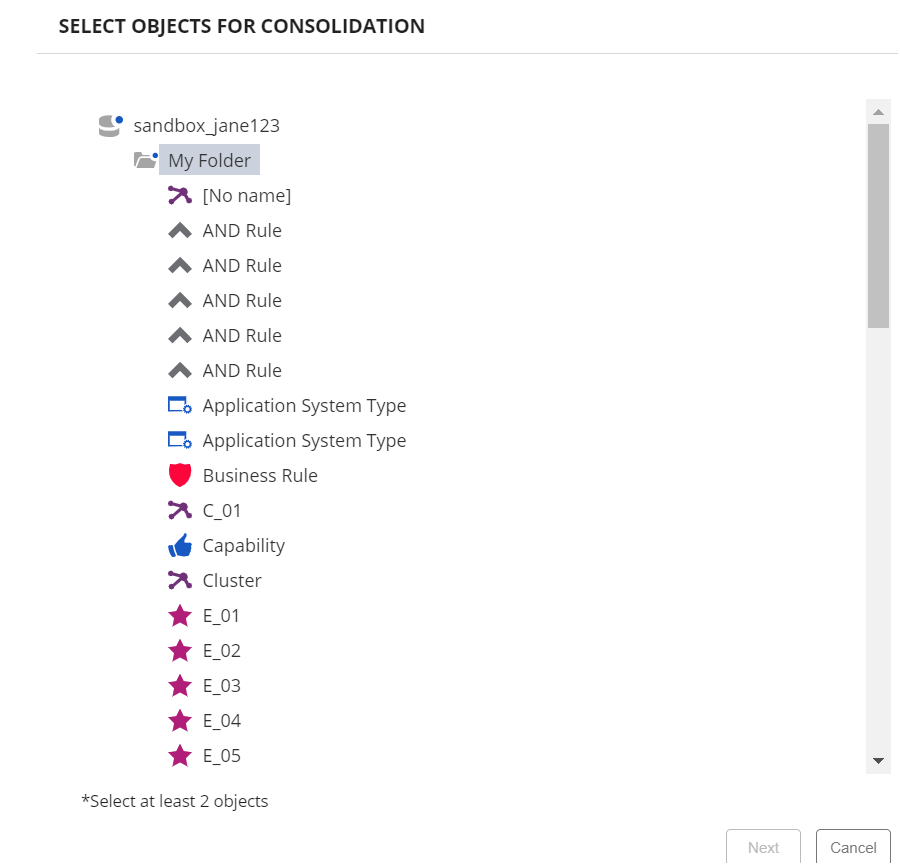
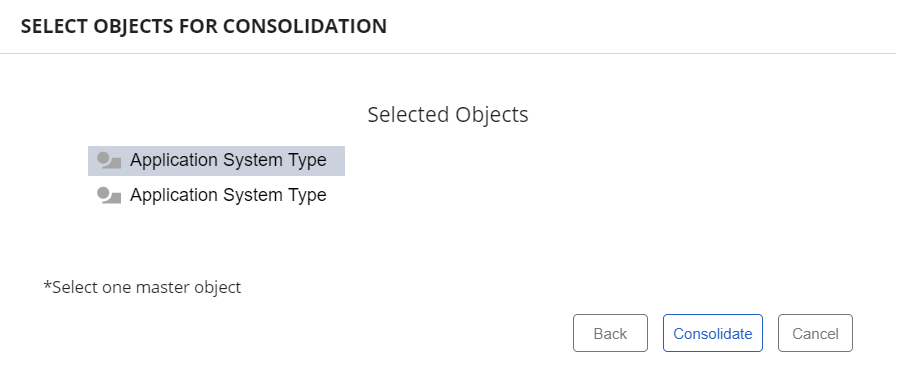
| The Consolidate icon gives you the option to merge two or more objects with one main object. Select a folder and click on the consolidate button in the toolbar. The pop-up window Select Objects for Consolidation will open. Double click on at least two objects and on the right section of the click Next. A new pop-up window , will appear where you need to select one main master object. When you are ready to merge, click Consolidate to merge all selected objects. If you want to discard your choice, click Cancel. To return to the previous pop-up window, click Back. | ||||||||
|
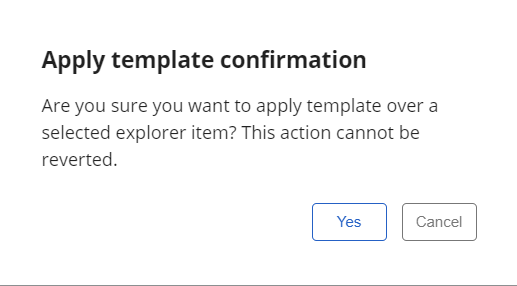
| The Apply templates icon gives you the option to apply templates on all of the models in specific folder at once. First, select the folder you want to apply the templates to, and then choose Apply templates option from the Toolbar.
| ||||||||
| The Back/Forward icons are used for navigating through paths you have recently visited. | |||||||||
| The Toggle role level visibility icon gives you the option to show only the models that are visible to your role inside the Structure bar.
|


| Otp | ||||
|---|---|---|---|---|
|
| Rp |
|---|
Overview
Content Tools