Page History
Go to the Backup and Restore menu to create and manage backups of your namespaces.
| Menu Backup and Restore contains two buttons:
|

| Tip | ||
|---|---|---|
| ||
Backups in the administration menu are always created for an entire namespace. If you want to create a backup copy of a single project or model, use the export function in the explorer. |
Creating a Backup
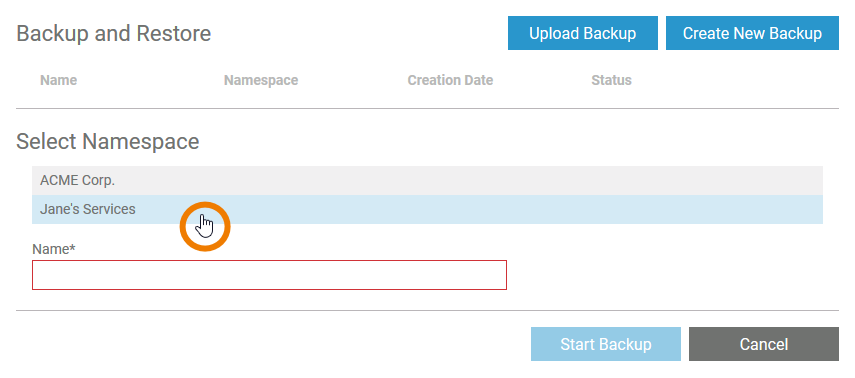
| Backups are always created for an entire namespace. Click the Create new backupNew Backup button to open section Select Namespace and click select the namespace for which you want to create the backupback up. |
| Enter a name for your backup. As soon as field Name contains content and a namespace has been chosen, the button Start backup button Backup is enabled. Click the button to create your backup. |
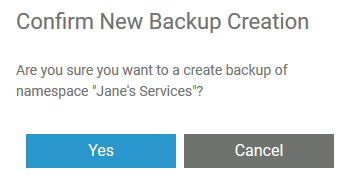
| Confirm the confirmation prompt to start the process. |
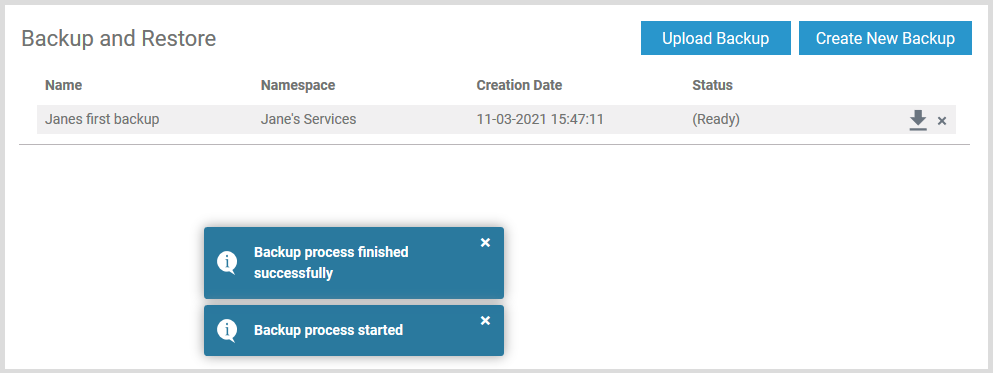
| Various notifications show the progress of the process:
|
| The backup is attached to the list of backups. |
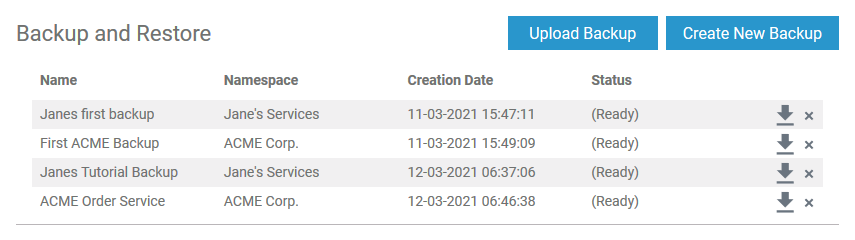
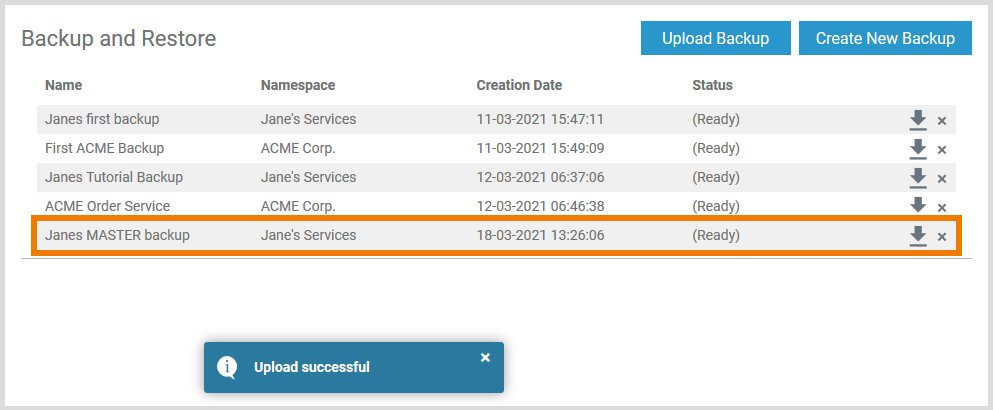
| The list is sorted by creation date and contains the following information:
|


Managing Backups
Use the backup list to manage your backups.
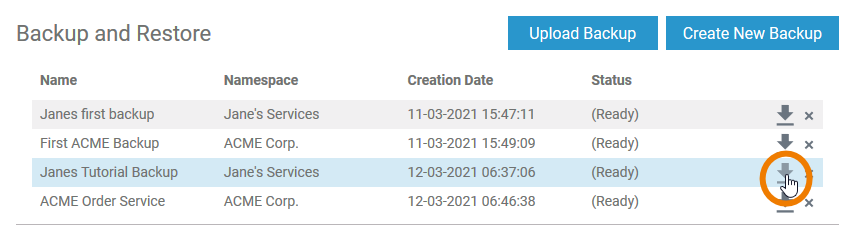
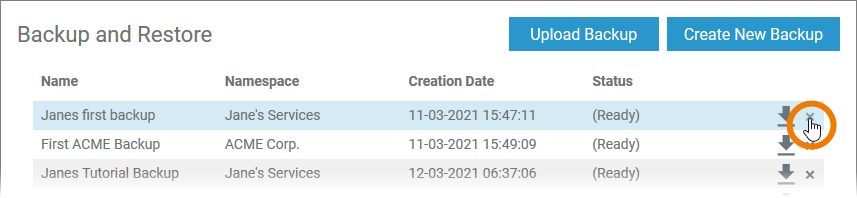
| Click the icon |
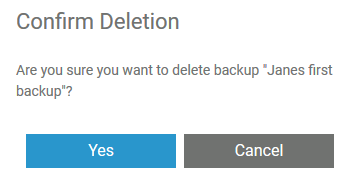
| To delete a backup from the list, click icon |
| You need to confirm the deletion in the pop-up window to proceed. |
Restoring a Backup
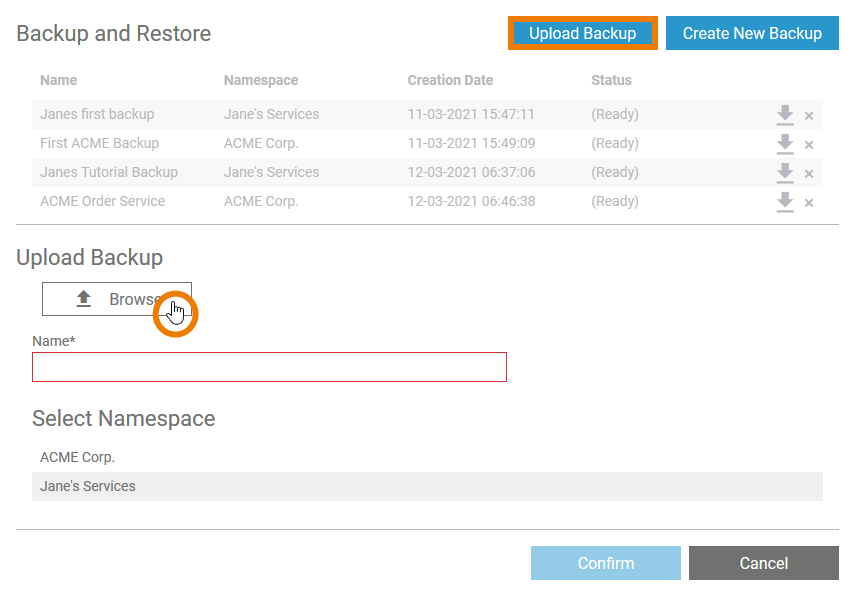
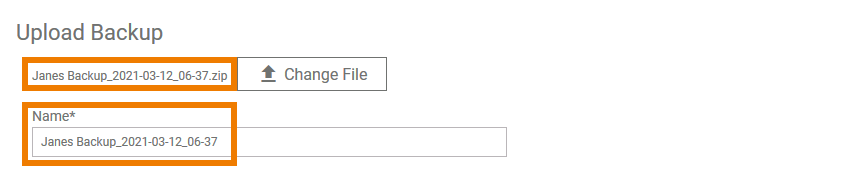
| You can restore data from downloaded backup files. Use the Upload backupBackup button to open the section of the same name. To select the file you want to upload, click the Choose fileFile button. |
| The name of the selected file is displayed. If you want to select a different file, use the Change fileFile button. The file's name is also displayed in field Name. |
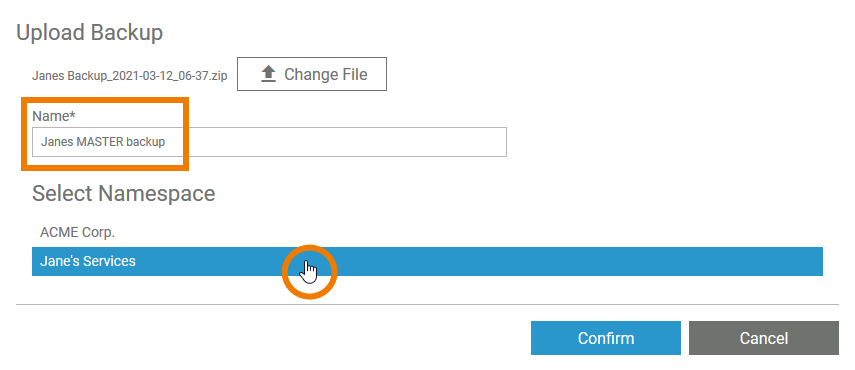
| Change the contents of the Name field to rename the backup before restoring it. The Confirm button is only enabled after the user has selected the namespace to which the file is to be uploaded. |
| A notification indicates the successful upload. The uploaded file is added to the list of backups under the chosen name. |
Overview
Content Tools