Page History
Versions Compared
Key
- This line was added.
- This line was removed.
- Formatting was changed.
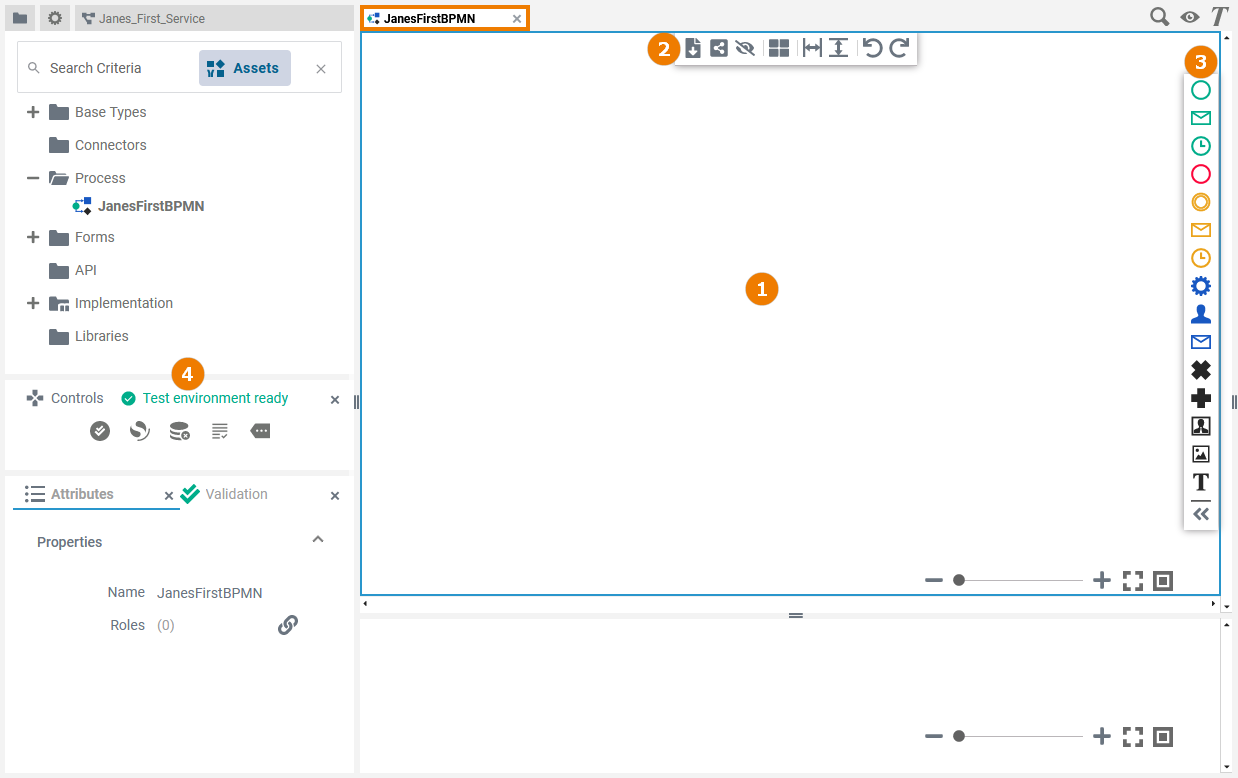
When you open a model from the service panel, a second tab will open, displaying the model on the diagram pane. This is where you design your BPMN model.
| The diagram pane consists of different areas: |
Customizing the Diagram Pane
|
Modeling on the Diagram Pane
While modeling, some general functionalities help you to browse through your model, and to adjust your working location within the model. Refer to Customizing Editors and Panels for more details.
| Excerpt Include | ||||||
|---|---|---|---|---|---|---|
|
The Toolbars
Two toolbars are available for work on the diagram pane:
The Model Toolbar
The model toolbar assists you during modeling on the diagram pane:
The following table explains the available tools:
| Tool Icon | Tool Name | Description | ||||||||||||
|---|---|---|---|---|---|---|---|---|---|---|---|---|---|---|
| Export | Use this icon to export your BPMN model in JSON format. | |||||||||||||
| Report | Click the Report icon to print your model. You have two options: You can send your model directly to a printer or save it as a Word document. See page Creating Diagram Reports for details. | ||||||||||||
| Share | If you click the Share icon, the URL of your BPMN model is copied to the clipboard and you can paste it elsewhere, for example in an email. | ||||||||||||
| Publish to Cockpit | If you want direct access to your BPMN model in your cockpit, click on the icon Publish to cockpit. If you open your cockpit the next time, an external link tile grants you direct access to the model. | ||||||||||||
| Hide Execution Pane | Use this icon to hide the execution pane. This allows to gain more space during modeling. | |||||||||||||
| Toggle gridUse this icon to enable or disable the grid on the diagram pane. The grid supports you during modeling: If the grid is enabled, elements snap to the grid points. |
| ||||||||||||
| Show invalid |
| |||||||||||||
| Insert/Remove horizontal spaceUse this icon if you need more or less space on the diagram pane. Click on the pane to display the start line, the second click marks the end line and defines the size of the area to be added. To add space, click from left to right to define the area. If you want to delete a horizontal space, click from right to left to define the area. |
| |||||||||||||
| Insert/Remove vertical spaceUse this icon if you need more or less space on the diagram pane. Click on the pane to display the start line, the second click marks the end line and defines the size of the area to be added. To add space, click from top to bottom to define the area. If you want to delete a vertical space, click from bottom to top to define the area. |
| |||||||||||||
| Undo | If you want to cancel your last action on the diagram pane, use this icon. | |||||||||||||
| Redo | Use this icon to restore the action that you had previously undone. |
The Elements Toolbar
The elements toolbar contains all BPMN elements that you can create on the diagram pane.
By default, the elements toolbar only displays the icons of the available BPMN elements. But you can also expand the toolbar by using the | |||||||||||
In its expanded version, the names of all elements are also displayed.
| |||||||||||
|
The Diagram Context Menus
Various context menus support the user during modeling on the diagram pane:
- The Elements Context Menu
- The Tools Context Menu
- The Extended Tools Context Menu
- The Relation Context Menu
- The Diagram Context Menu
Elements Context Menu
| |||||||||||||||||||||||||
|---|---|---|---|---|---|---|---|---|---|---|---|---|---|---|---|---|---|---|---|---|---|---|---|---|---|
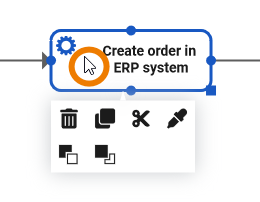
If you click on an element, the element context menu opens. You can use it to create new elements instead of using the elements toolbar. Choose one of the icons to create the corresponding element:
If you create a new element using the context menu, the relation to the current element is drawn automatically. | |||||||||||||||||||||||||
Tools Context Menu
| |||||||||||||||||||||||||
| If you right click on an element, the tools context menu opens. Use it to edit the current element. The following options are available:
| ||||||||||||||||||||||||
Extended Tools Context Menu
| |||||||||||||||||||||||||
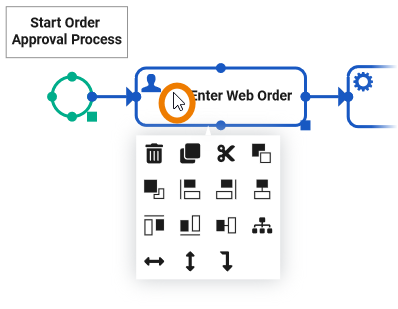
| If you have selected more than one element on the pane, the tools context menu is enhanced with additional options:
| ||||||||||||||||||||||||
Relation Context Menu
| |||||||||||||||||||||||||
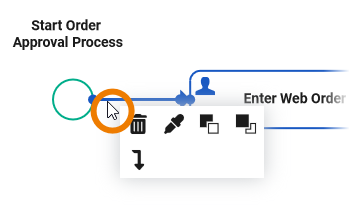
| Right-click a relation to open the relation context menu. Only the following options are applicable to relations:
| ||||||||||||||||||||||||
Diagram Context Menu
| |||||||||||||||||||||||||
| With a right-click on the diagram pane itself, you open the diagram context menu:
| ||||||||||||||||||||||||
Shortcuts
You can also use shortcuts on the diagram pane. The following list of shortcuts can be searched. Enter your search term in the Global Filter field.
| Table Filter | ||||||||||||||||||||||||||||||||||||||||||||||||||||
|---|---|---|---|---|---|---|---|---|---|---|---|---|---|---|---|---|---|---|---|---|---|---|---|---|---|---|---|---|---|---|---|---|---|---|---|---|---|---|---|---|---|---|---|---|---|---|---|---|---|---|---|---|
| ||||||||||||||||||||||||||||||||||||||||||||||||||||
|
