| Problem | Possible Reason | Solution |
|---|
Cannot run docker-compose on gateway container:
Docker-compose throws NoSuchFileException for e.g. jks files during build. | You are using Docker for Windows and you have changed your Windows password recently. | There is an mounting issue using Docker for Windows. You can try this workaround: - Open Docker settings.
- Click on the Shared Drives tab.
- Deselect your shared drives.
Click Apply. - Select the drives you want to share.
Click Apply.
Docker should prompt you to re-enter your credentials. - Rerun docker-compose.
|
| Cannot generate a keystore. | You are using Docker on Linux and docker-compose does not have sufficient rights to write into folder configs. | Change the folder permissions as follows: | Code Block |
|---|
| chmod -R 777 api-mgmt/configs |
|
| Your command shell has problems to read the path to the script. | Escape the slashes with backslash like \/opt\/api-mgmt\/create-self-signed-certificates.sh. |
| You are trying to update the certificates and didn't remove the old ones before. | The keystore script does not override any existing (old) certificates. Remove them manually and run the script again. |
- API Management will not start.
- Docker daemon does not respond anymore.
| The assigned resources for Docker for Windows or for the Docker Toolbox are not enough for API Management. | - Open your Docker Settings from windows context menu.
- Navigate to tab "Advanced".
Increase the memory to at least 8192 MB: 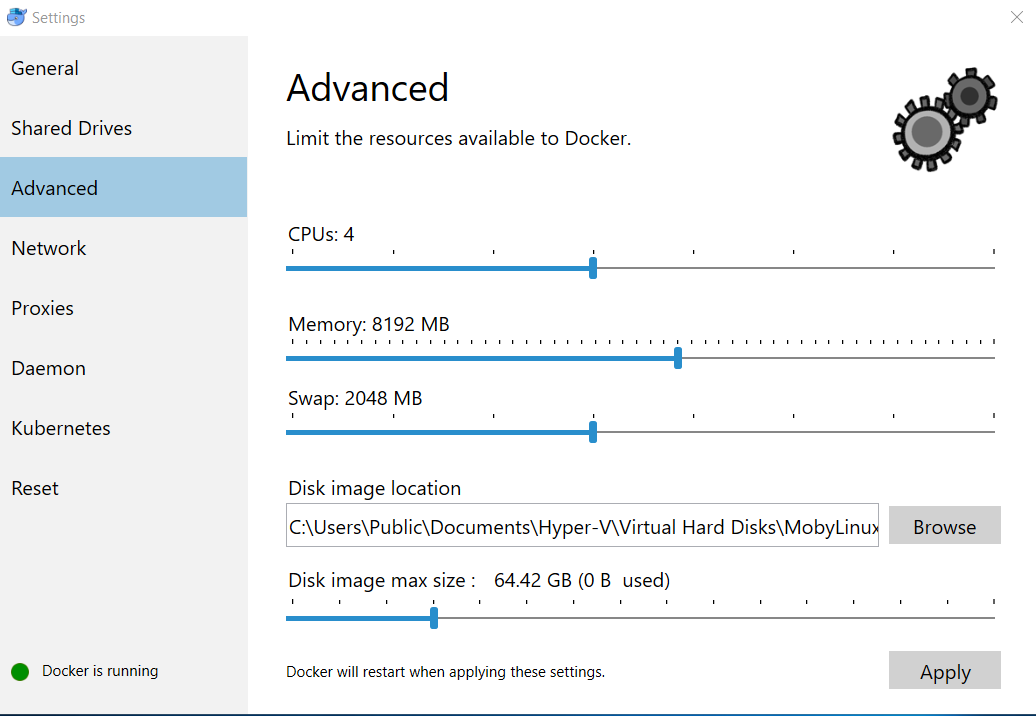
|
You cannot login to API Management. | You have configured localhost for variable ENDPOINT in your .env file. One or more docker container can't resolve you hostname | - You cannot use localhost as endpoint. Please configure your full hostname e.g. api.acme-corp.com.
|
One or more docker container can't resolve you hostname. | |
| If the steps from above do not work for you | https://docs.docker.com/compose/compose-file/#extra_hosts |
After accessing the Login page, you see the error Invalid parameter: redirect_url. | The redirect URL is configured wrongly in Keycloak. | Change the Keycloak settings as described on Installing API Management > Configure the Authentication Service (Keycloak). |
After having logged in, you are not redirected to the API Management UI.
The error message reads: "HTTP Status 403 - Forbidden. The server understood the request but refuses to authorize it." | If you are using CentOS on your API Management server, you might have run into a know firewall issue. | Change the firewall rules as to trust the Docker interface. |
Your browser shows an ERR_SSL_VERSION_OR_CIPHER_MISMATCH error. | This may be a problem with your file permissions:
If the file permissions are not set correctly, the container can not read the certificate. | Linux: Change the file permissions in your config folder to provide at least read-access: | Code Block |
|---|
chmod -R 644 api-mgmt/configs |
|
| An API Management update has failed and you need to restore a previously backuped installation. |
| Perform a database restore as described on API Management Backup and Restore > Restoring a Database Backup. |
| Cannot access Kibana. | API Management 7.4.0 comes with Kibana and all needed configurations.
If you are updating an older installation of API Management to 7.4.0, the configurations of Kibana are missing. | If you want users to be able to use Kibana, do the following: Step 1: Add a new role for Kibana to Keycloack For users to be able to use Kibana, you need to create a dedicated role in Keycloack (including clients and client scopes). - Open your Keycloak URL, e.g. https://api.acme-corp.com:8445/auth/admin, and login to the administration console. The admin credentials have been defined during installation of API Management.
- Select realm Apiman and go to section Clients.
Create a new client called kibana with the following settings: | Setting | Value |
|---|
| Name | kibana | | Access Type | confidential | | Valid Redirect URIs | https://<your API Management URL>:<your Kibana port>/oauth/callback |
Go to Client Scopes and create a new scope kibana-scope and, within this scope, a new mapper kibana-audience-mapper with the following settings: | Tab | Setting | Value |
|---|
| Settings | Name | kibana-scope | | Mappers | Name | kibana-audience-mapper | | Mapper Type | Audience | | Included Client Audience | kibana |
- Switch back to client kibana and go to tab Client Scopes.
- Add the previously created scope kibana-scope to the list of Default Client Scopes.
- Switch to Roles and create a new role kibanauser.
Step 2: Add the new role to some users Go to section Users and assign the new role kibanauser to all users you want to be able to use Kibana as described on Managing Users and Permissions. |