Page History
A service is a deployment unit that may contain multiple processes. On the service details page, you can see a summary of service related information such as service details, service status and service components.
Multiexcerpt include SpaceWithExcerpt INTERNAL MultiExcerptName recommendation_container_deployment PageWithExcerpt INTERNAL:_general_excerpts
| If you want to open the service details, click on the service panel tab. You can also use the menu option Service Properties in the additional menu The service details will then be displayed on the right side of the service panel. |
| On top of the service details page, a breadcrumb navigation is displayed, showing the path to your service within the namespace. It helps you to orientate in which namespace, service and folder you are currently working. |
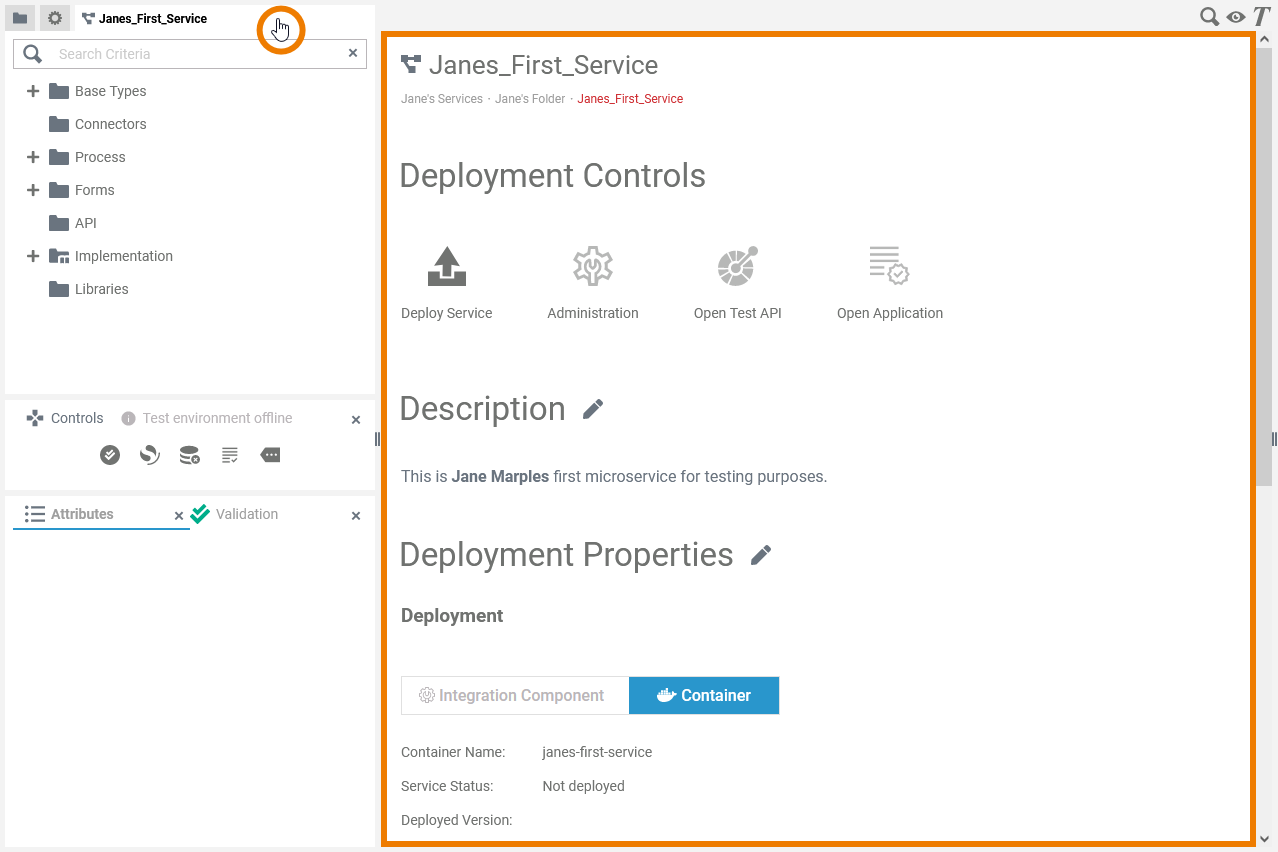

Service Details
Editing the Service Description
Click the
| |||
Enter your text in the editor. Various formatting tools are provided. | |||
Click icon |
Editing the Service Properties
The necessary settings for your micro service such as the service properties, the BPMN model, the data model, used libraries and forms are managed within the service.
If you want to change the service properties, click icon to enable edit mode.
The table below displays the properties you are able to change.
Insert a version number for your service. The version number is displayed in the integration component (Bridge).
| Info |
|---|
The version of the service must follow Semantic Versioning 2.0.0: Major.Minor.Patch. A pre-release tag is optional. Version numbering that differs from this will lead to deployment errors. |
Enter a proxy port (optional). If the service ports are not exposed and a proxy server is configured, enter the proxy port you want to use for your service here.
For Designer applications containing forms, you need to configure 5444 as a proxy port.
| Info |
|---|
Please note: The proxy protocol is always https and the proxy path is always the name of the service. The final URL is composed as follows: https://{bridge host name}:{proxy port}/{service name}. Example: https://acme-corp.com:1234/myService/ |
Activate this option (Yes) to enable the possibility to export your service as an Angular project for further pro-code development. You can find the export option in the additional menu of the controls panel.
If the option is enabled, Angular projects will be created for forms and for the instance table. Deactivate (No) the checkbox to disable the export.
Default is Yes.
| Tip | ||
|---|---|---|
| ||
If you don't need the instance table, disable the option. The deployment will be much faster and the repository file much smaller. |
Description
Select one of your API Management organizations (optional). The REST API of the deployed service will be exposed by API Management and will be visible in the API Developer Portal.
| Tip |
|---|
Go to the API Management Guide for further information about Scheer PAS API Management and API Developer Portal. |
Activate this option (Yes) to create an OAuth policy on each published API endpoint or deactivate (No) to remove any existing OAuth policy. If the option is enabled, you need a PAS login to call the API. If the option is disabled, no authetication is needed.
Default is Yes.
| Tip |
|---|
Go to the API Management Guide > Keycloak OAuth for further information. |
Checking the Service Status
Section Deployed Service allows you to check on the status of the service showing the following information:
- Not deployed (default)
- Running
- Stopped
- Version number registered in section Service Properties
| Info |
|---|
The content of this section is read-only. |
| Tip | ||
|---|---|---|
| ||
The designer of the service himself sets set the service number in section Service Properties. Before you redeploy a service, you should change the service number when you have made relevant changes to the service. In case of deployment problems, comparing version number and the number of the deployed version will help you to find out if the latest version of the service is running in the integration component (Bridge). |
Adding Aliases
In this section you can add Aliases to the service, which can then be used on adapters. Currently, REST aliases are supported.
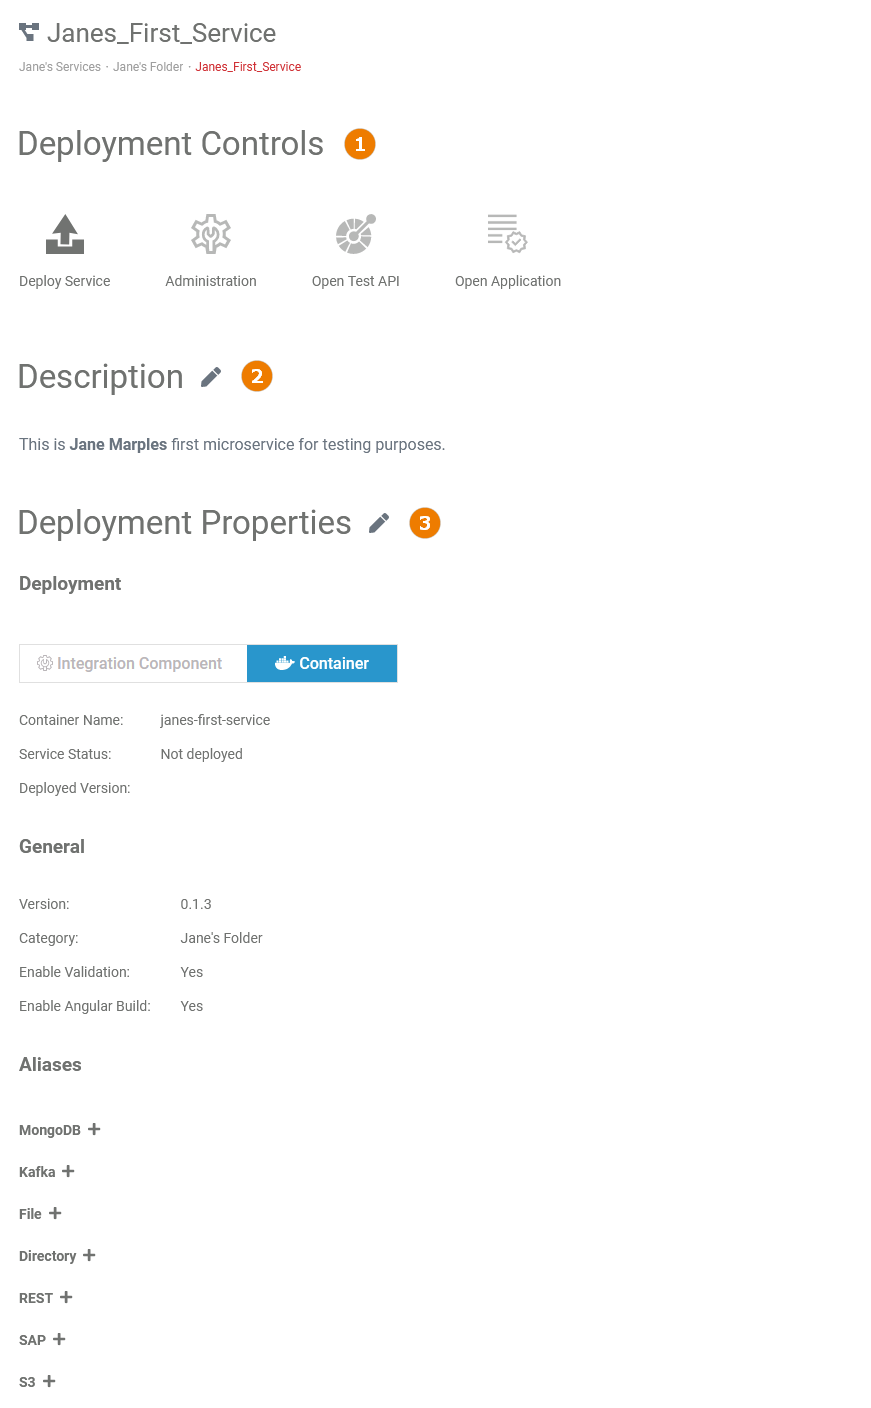
The service details page consists of the following sections:
| Name | Description | ||
|---|---|---|---|
| 1 | Deployment Controls | The deployment controls allow you to deploy a service, administer it, open a test API or the deployed application itself. Go to page Using the Deployment Controls for detailed information about this tool. | |
| 2 | Description | The description section allows you enter a description of your service or edit it. Go to page Editing the Service Description for further information. | |
| 3 | Deployment Properties | The deployment properties section allows you to select a deployment target, editing the general deployment properties settings and to mange the aliases of the service. Go to page Editing the Deployment Properties for further information. Refer to page Deploying a Service for a step-by-step guide on how to deploy a service. | |
| Deployment | In the deployment section, you can select the desired deployment target: | ||
| General | Which of the deployment properties are displayed in the general section depends on the selected deployment target (see above). | ||
| API Management | This section is available only if you have selected the integration component (Bridge) as the deployment target. | ||
| Aliases | In this section you can manage the aliases of the service. Aliases are configuration units for adapters. | ||
| Panel | ||
|---|---|---|
| ||
|
| Otp | ||||
|---|---|---|---|---|
|
| Rp |
|---|
Overview
Content Tools