Page History
6.0.42.0 To You can renew an expired proxy certificate , go directly via the Bridge user interface.
- Go to the Certificate tab of the corresponding proxy node
- ,
Click Create New Self-Signed Certificate.
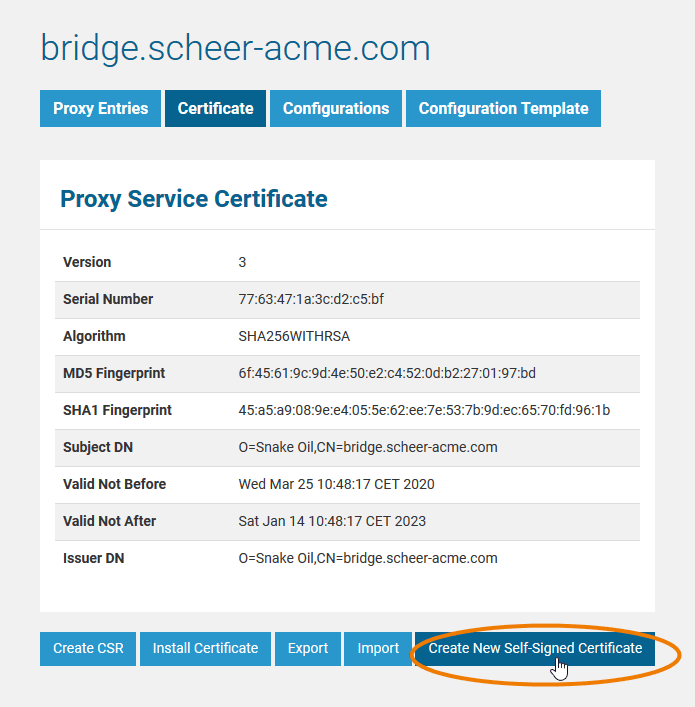
A message 'Created new certificate. ... ' informs you, that the certificate has been created.
Note icon false The new self-signed certificate will be created without further request for confirmation - existing certificates (also ones signed by a certification company) are overwritten.
- Restart the proxy to enable the new certificate.
Renewing a Certificate on older Bridge Installations
Deprecated since Bridge 6.0.42.0
| title | Click here to expand the documentation of how to renew a certificate with Bridge versions below 6.0.42 |
|---|
To renew an expired proxy certificate, repeat the following steps. As each proxy node has a unique name and a certificate, the procedure described below has to be repeated for each individual proxy node.
Create an SSL configuration file.
Backup your existing certificate.
Stop the Bridge proxy.
Create a new certificate.
Verify the expiration date of the certificate.
Start the Bridge proxy.
Step 1: Create an SSL Configuration File
Paste the following configuration into an editor and replace <your proxy node> by your proxy node name.
| Code Block | ||
|---|---|---|
| ||
[req]
x509_extensions = req_ca
distinguished_name = req_dn
prompt = no
[req_ca]
subjectKeyIdentifier = hash
authorityKeyIdentifier = keyid:always,issuer:always
basicConstraints = CA:true
[req_dn]
O = Snake Oil
CN = <your proxy node> |
Save the file as openssl.conf to a directory of your choice.
Step 2: Backup Your Existing Certificate
Backup your old proxy certificate as described in Exporting a Certificate.
Step 3: Stop the Bridge Proxy
Stop the proxy as described in Starting and Stopping the Proxy Service.
Step 4: Create a New Certificate
Run the command mentioned below from the directory you saved the configuration file openssl.conf to. Adjust the directory paths to your installation. Replace <your proxy node> by your proxy node name.
| Code Block | ||
|---|---|---|
| ||
c:\e2e_bridge_prog\bin\openssl-win32-x86.exe req -new -x509 -days 1025 -config openssl.conf -key c:\e2e_bridge_data\proxies\conf\<your proxy node>_key.pem -out c:\e2e_bridge_data\proxies\conf\<your proxy node>_cert.pem |
If you are not using Windows, replace openssl-win32-x86.exe by one of the executables listed below.
Linux
openssl-linux-x86
Windows
openssl-win32-x86.exe
If the command returns without any output, everything is correct. The new certificate has been generated and already installed.
Step 5: Verify the Expiration Date of the New Certificate
Inspect the certificate information as described in Managing Bridge Proxy Server Certificates and verify the expiration date "Valid Not After" of the certificate .
Step 6: Start the Bridge Proxy
Start the proxy as described in Starting and Stopping the Proxy Service.
| Rp | ||||
|---|---|---|---|---|
|
Overview
Content Tools