Step 3: Handling the Decision
Follow Our Example User Story
Since David's process is an approval process, it includes a decision: The order value can be within the order limit or outside the order limit. He now needs to handle both possible process steps.
The value of the order limit is 1.000. The limit is defined in the ERP system (you are going to define the limit automatically by using the elements from the provided library ERPOrderInterface).
Check the Order Value
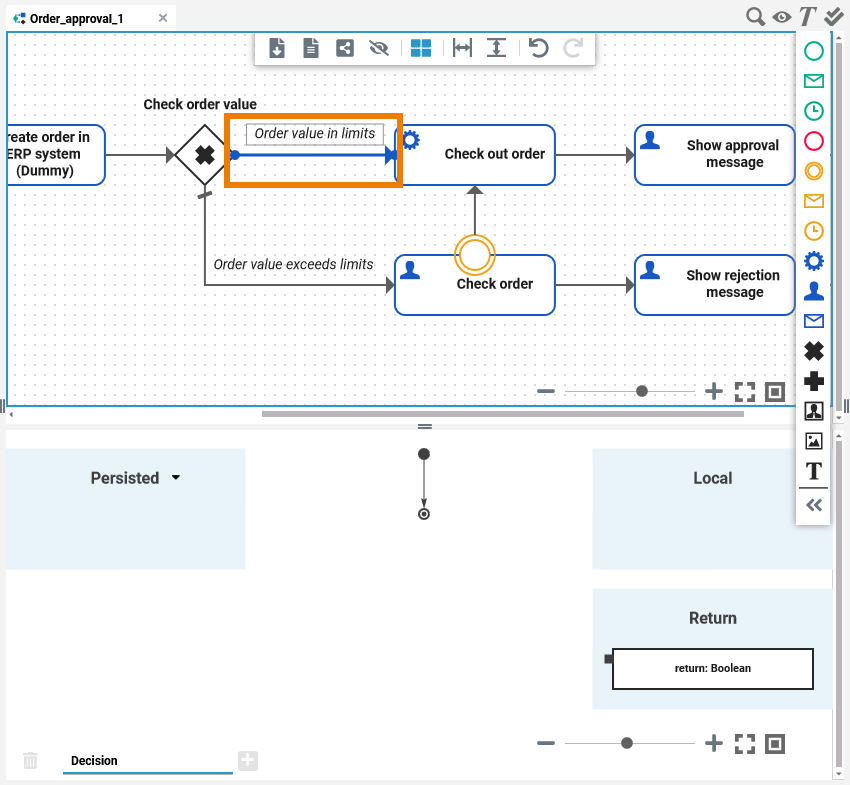
Following the process flow, it is now split by a guard expression: Check Order Value. Guard expressions (conditions) of exclusive gateways are implemented to the outgoing relations of the gateway. Click on the relation between the Check order value gateway and service task Check out order. This branch of the process should only be followed if the order value is within a given limit:

The corresponding execution diagram is displayed below the BPMN diagram:
Select operation checkOrderValue from class ERPOrder in library ERPOrderInterface. Drag and drop the operation to the action flow on the execution diagram:
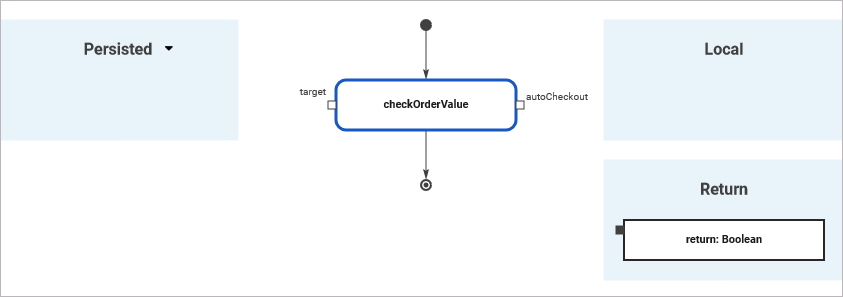
Operations that should be able to be used on a guard need to have a Boolean return value. This value should transport the following meaning:
true if the process flow should be continued on this branch
false if this branch should be omitted
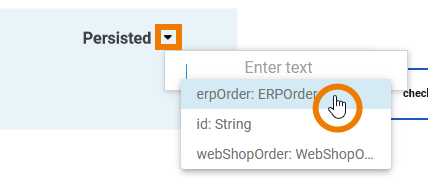
Add persisted variable erpOrder:
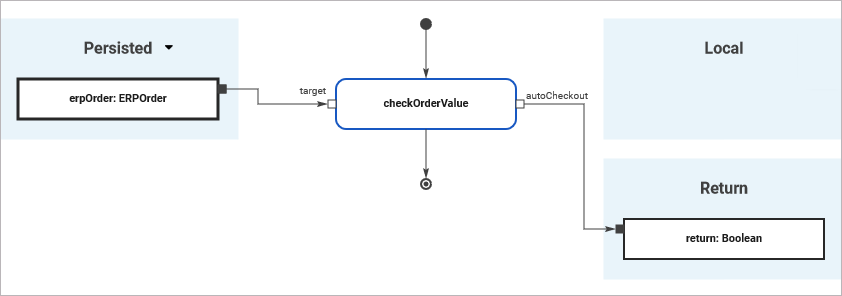
Draw the following object flows:
From | To |
|---|---|
persisted variable erpOrder | input pin target |
output pin autoCheckout | return value return |
Refer to Exclusive Gateway and Parallel Gateway in the Designer Guide to learn more about gateways in general.
Approve a Valid Order and Check it out
Follow Our Example User Story
David defined in the process model that the order can be approved automatically and checked out if the order value is within the limits.

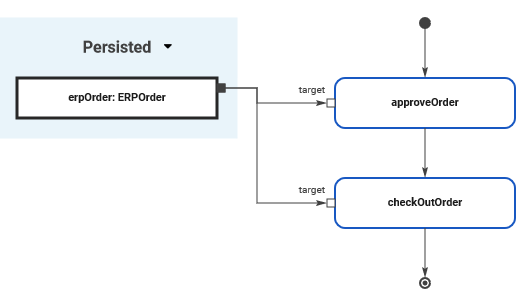
Add execution to service task Check out order. Draw the UML execution diagram as depicted on the image below:
Add both operations, approveOrder and checkOutOrder from library ERPOrderInterface > ERP > ERPOrder.
Add persisted variable erpOrder and connect it to the corresponding target pins.
Check an Order That Exceeds the Order Limit
Follow Our Example User Story
David defined in the process model that the order should be forwarded to the supervisor, if the permitted order value is exceeded. The supervisor has two options: He can approve the order and arrange that the order is checked out. But he can also reject the order.

Create Another Mapping
Follow Our Example User Story
In order to decide whether to approve or reject the order, the supervisor needs information about the sent order. So David needs to retrieve the data from the order to show it to the supervisor. To be able to do so, David needs to map the data from the order form to the Form_CheckOrder that has been created for the supervisor.
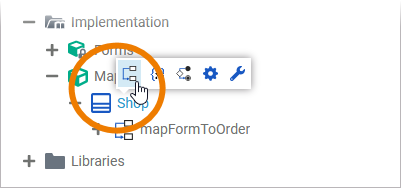
Add a new mapping operation mapOrdertoForm in class Shop of package Mapping in folder Implementation:
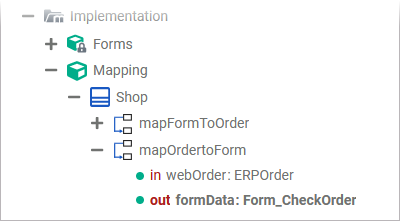
Add the following parameters:
input parameter webOrder of type ERPOrder
output parameter formData of type Form_CheckOrder
In the related mapping diagram, expand the Input and Output sections:

Add an array element to the items array on the input side (item [0] in the picture):
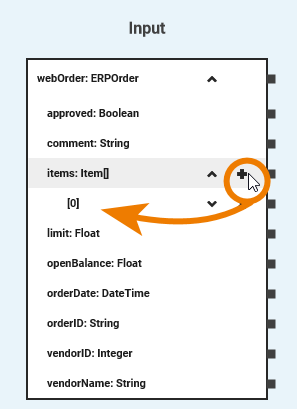
Expand the array.
In property openBalance the order value is saved as value of type Float. It contains the result of the input in form field quantity multiplied by the input in form field price from Form_EnterWebOrder. You want to display the order value in Form_CheckOrder, therefore you have to map property openBalance to orderValue in the Output section:
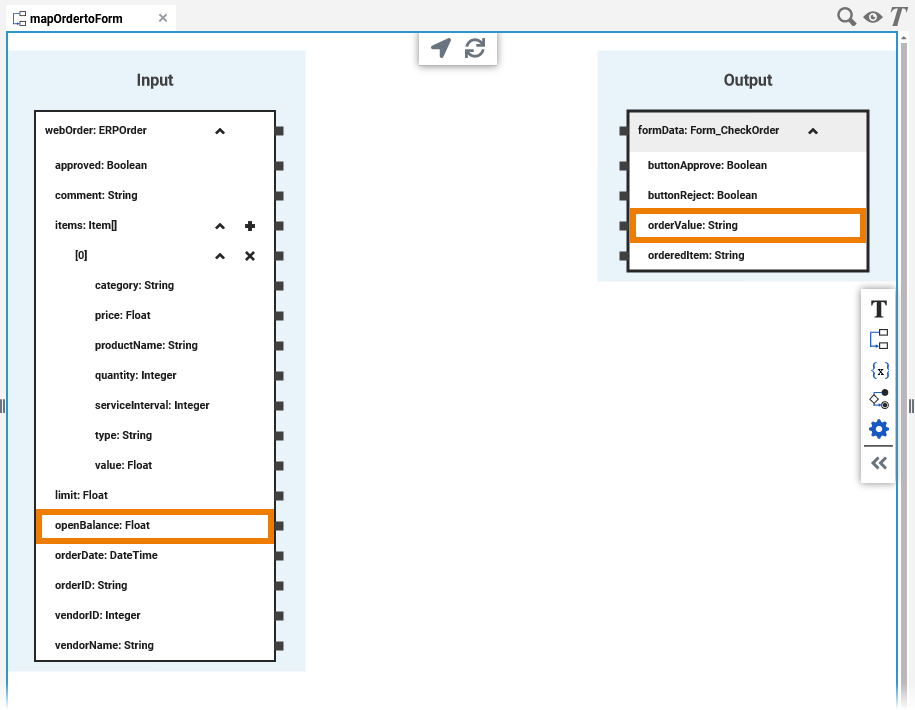
Since openBalance and orderValue are not of the same type, you need to convert the value first. In the service panel, open Bridge Base > Base Types > Float. Drag the operation convertToString to the mapping diagram:

Now connect openBalance with the target pin of the operation. Then drag a relation from the return pin to orderValue in the output section:
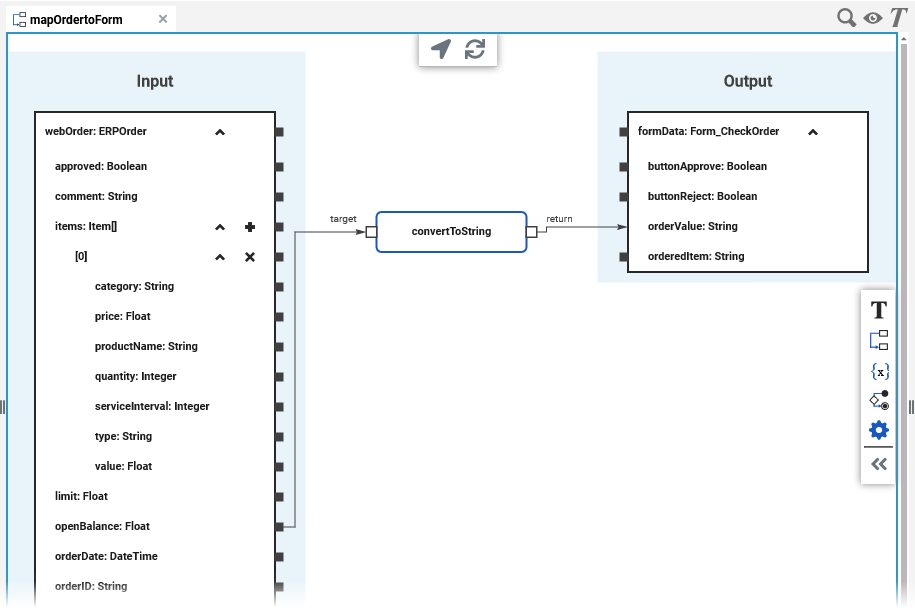
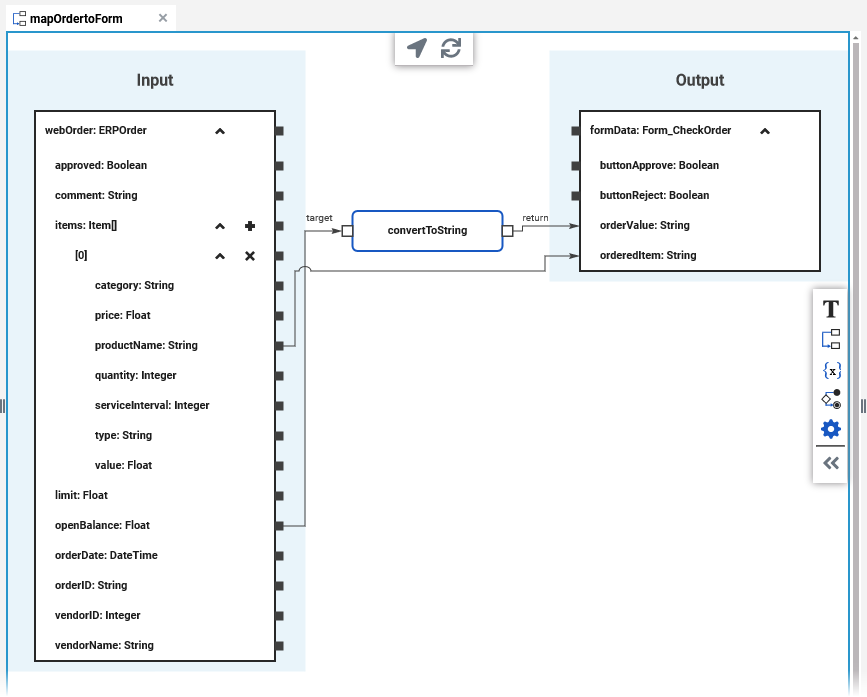
You also want to display the ordered item, therefore draw a second mapping relation:
productName: String with orderedItem: String
Add the Mapping Operation to the Process
Follow Our Example User Story
David finished the data mapping. Now he is ready to create the execution model for the step Check order.
Click user task Check order from your process to display the related UML diagram in the execution pane. Delete the execution model On Exit:
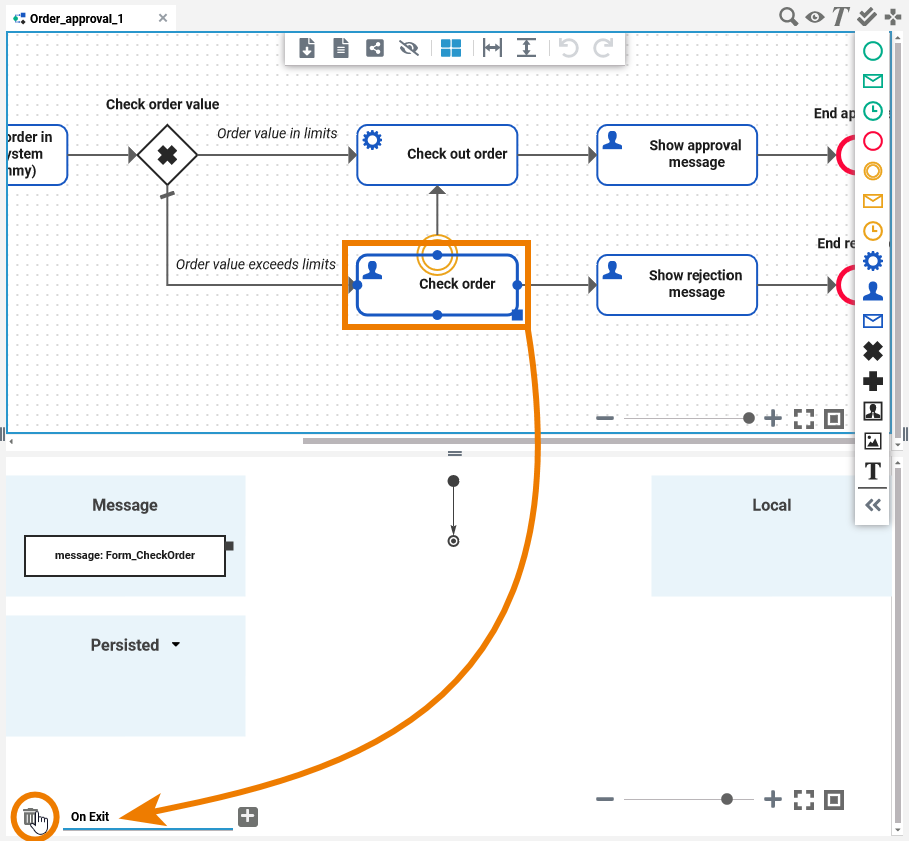
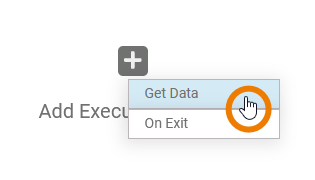
When the execution model has been deleted, the button Add Execution Model appears on the execution pane. Click it and select the model Get Data:
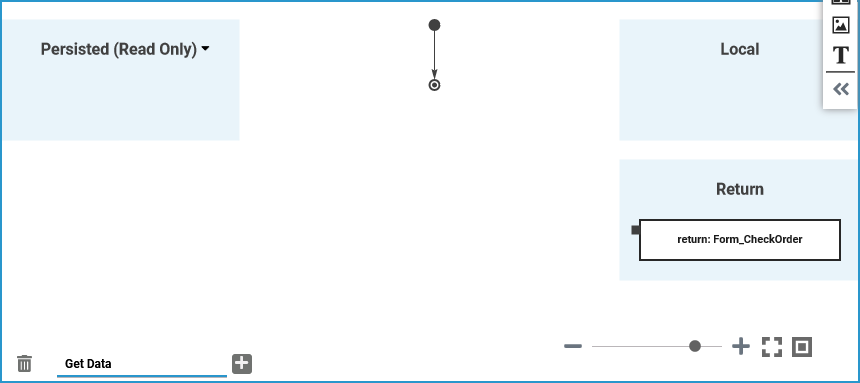
The execution model Get Data is now displayed on the canvas, showing three sections:
Persisted (Read Only)
Local
Return (containing the return variable return: Form_CheckOrder)
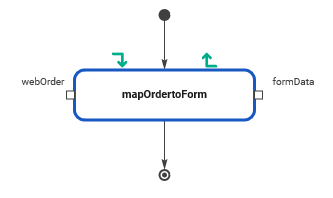
Select the operation mapOrderToForm you have created in the previous steps (Implementation > Mapping > Shop). Drag and drop the mapping operation to the activity flow in the execution diagram. Operation mapOrderToForm needs an incoming object and provides one outgoing object:
You need to provide the form data you want to map as input. Click the arrow icon in the Persisted (Read Only) section and select variable ERPOrder from the list of available persisted variables. Connect the selected variable with pin webOrder of operation mapOrderToForm. Then connect the output pin formData with the return parameter Form_CheckOrder:
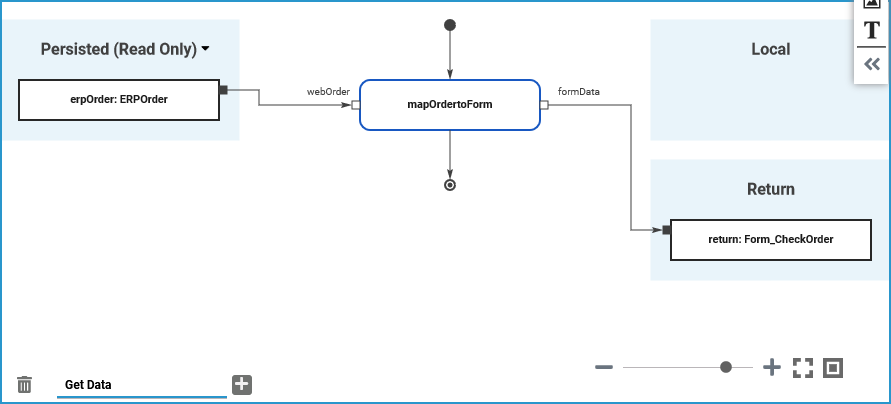
The mapping of order data is done and your service is finished.
Related Documentation:
